This lesson is an extension of Lesson 3(a).
Because nobody likes lengthy lessons. 🤷
Canned Responses
A few days into serving your customers, you will identify that you use the same greeting or goodbye every time or that there are specific common questions. Typing the same replies repeatedly without getting a tone of frustration in your message sounds like a superhuman job to us.
So, we introduced Canned Responses instead––to cut down the repetitive work. This lets you save frequently sent messages as templates and use them quickly in a chat with the help of short-codes.
What is a Canned Response on Chatwoot?
Canned Responses are like your ammo. These are your saved reply templates which can be used anytime to send out a reply to a conversation quickly.
How to create Canned Responses?
We have a detailed document for this.
Canned Responses library by Chatwoot
We have curated a bunch of editable, templated replies for you to create your Canned Responses with. Check it out.
Can Agents create Canned Responses?
Yes.
Can Agents access and use the Canned Responses created by other agents?
Yes.
How to use the Canned Responses feature?
You use Canned Responses during conversations. Follow the following steps.
Step 1. On the conversation where you need to use the canned response, type / in the reply box. This will display the list of all the canned responses on your account.
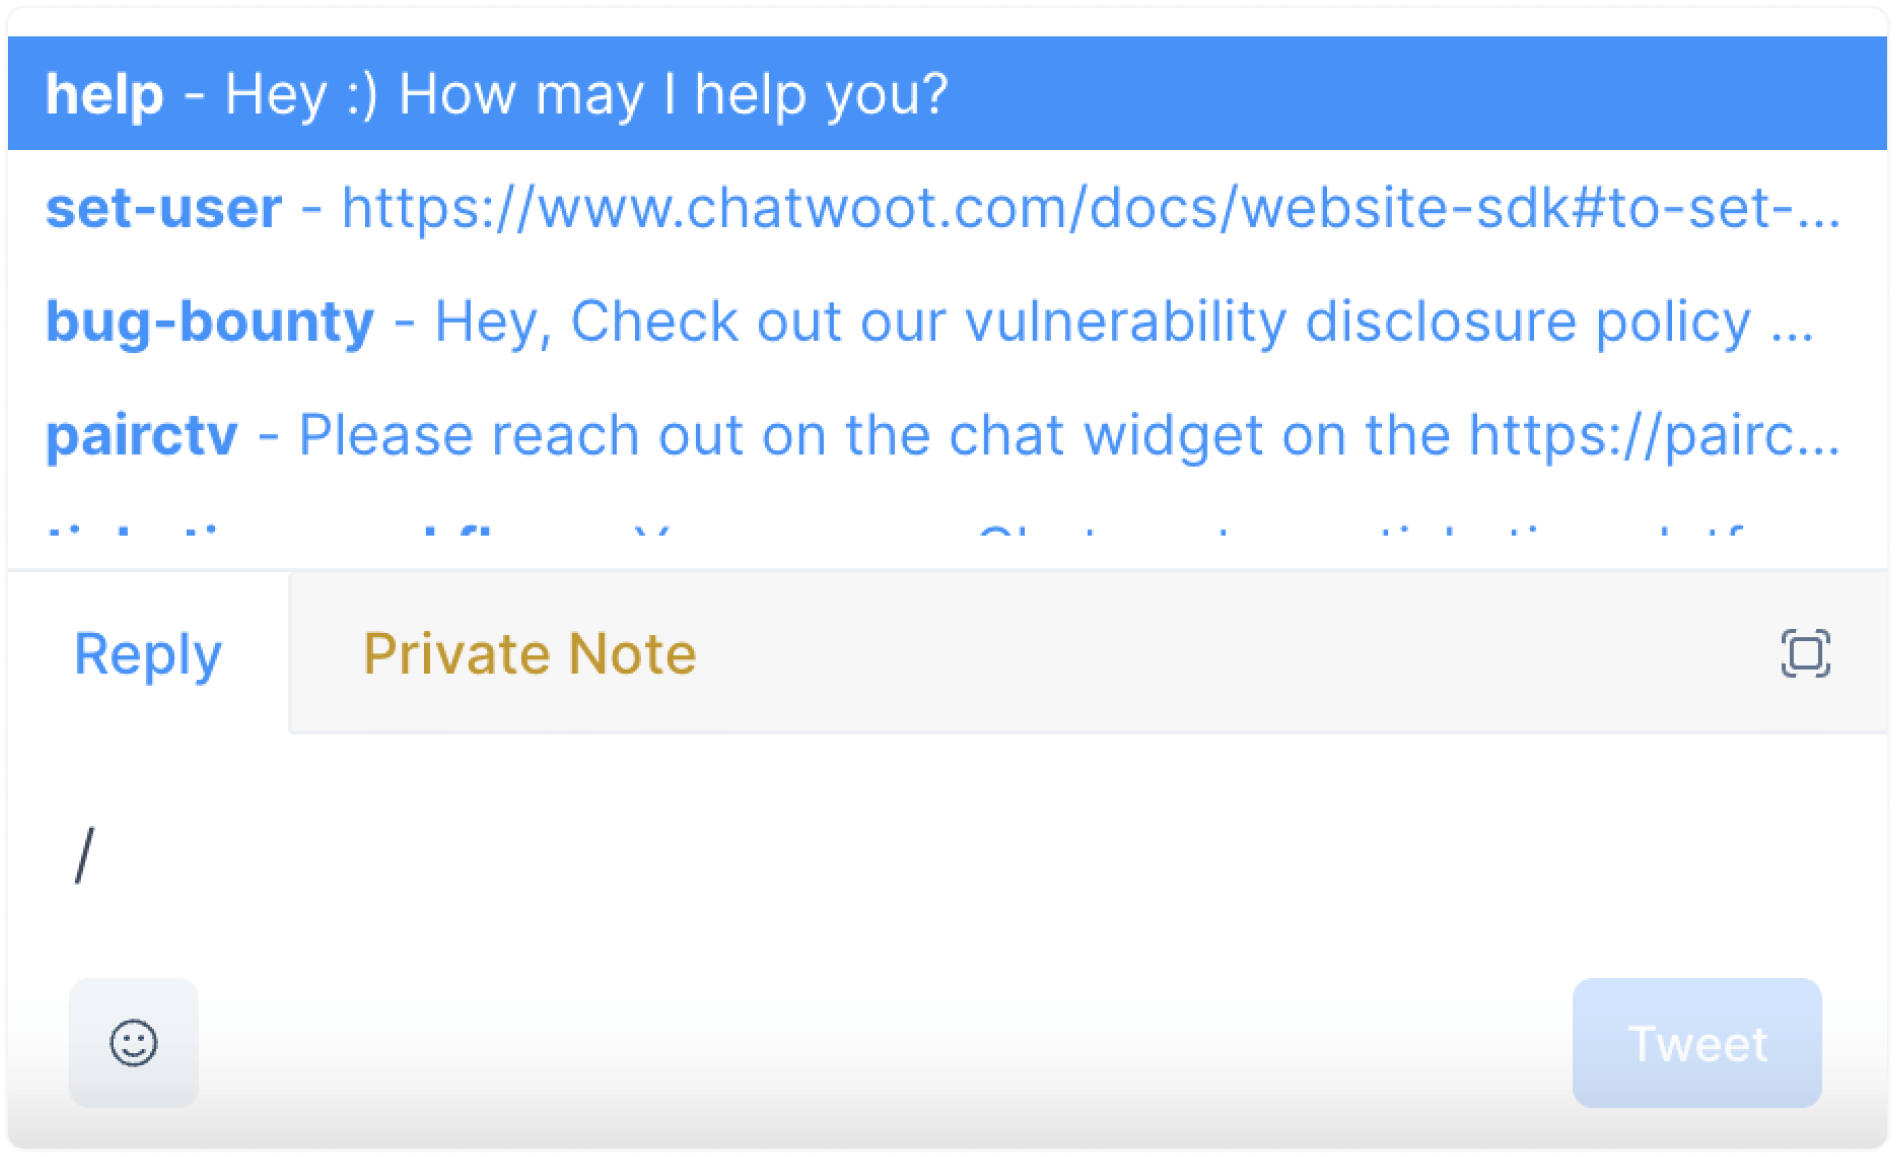
Step 2. If you remember the name of the shortcode, type it following the /. If you don’t, browse through your list and click on it. You reply box will be populated with the saved reply. It would look something like this:
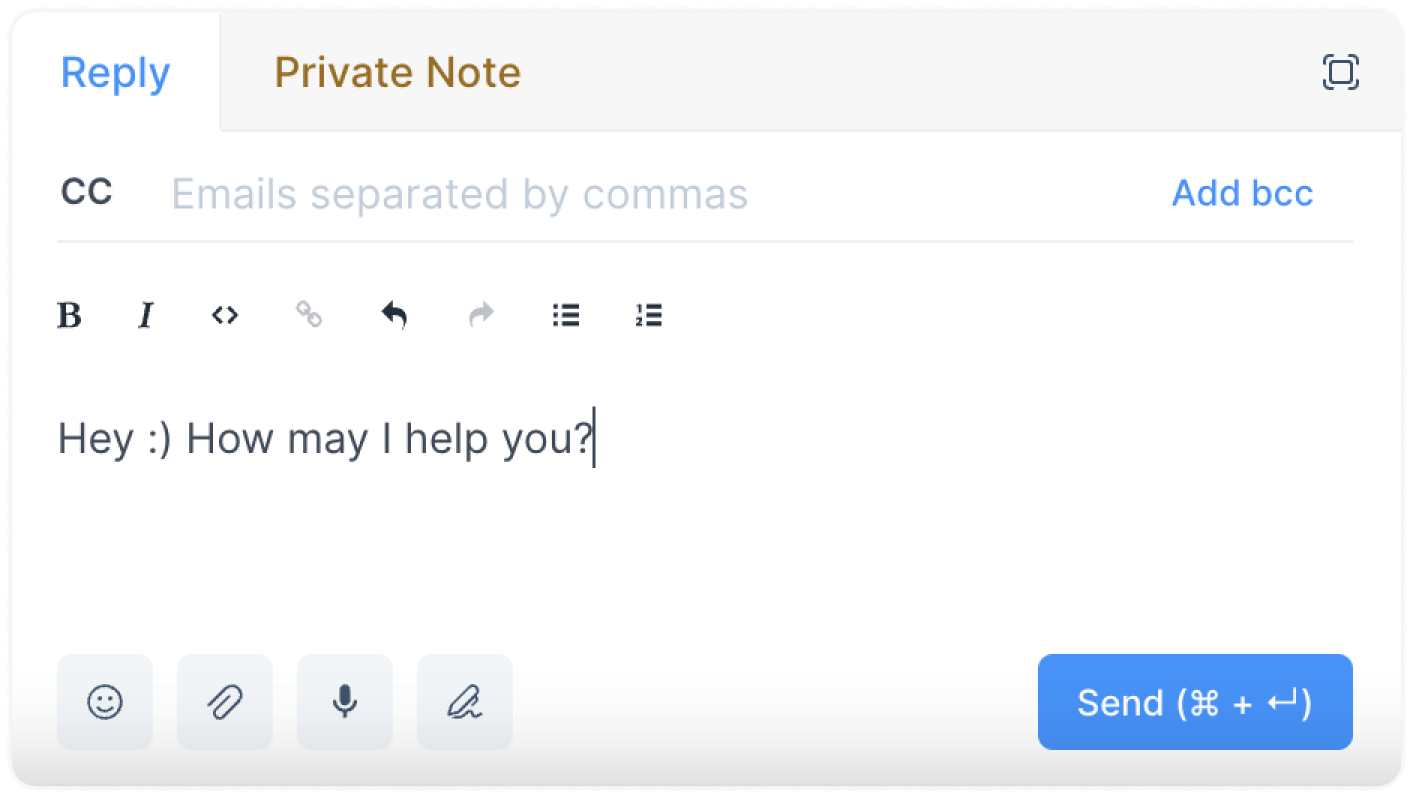
That was a complete sentence written in a click!
Step 3. Press Send. 🤷♀️
Custom Attributes
Each contact or conversation is unique, and there are some facts/attributes you might want to track about them. Custom Attributes are facts about your conversation or contacts. Facts like – subscription plan, subscription date, signup date, most ordered item, last ordered item, etc. Why custom? It is because you can create your own (custom) facts rather than sticking to the standard facts such as email, OS, location, etc.
What is a Custom Attribute on Chatwoot?
It is a particular type of fact you create for your conversations or contacts. These help you track essential info about them.
You can create account-wide attributes and apply them during a conversation.
How to add a Custom Attribute to Chatwoot?
We have a detailed document for this.
Can Agents create Custom Attributes?
Yes.
Can Agents access and use the Custom Attributes created by other agents?
Yes.
How to use the Custom Attributes feature?
You can use custom attributes in two parts, as explained below.
-
For applying to conversations/contacts
Step 1. On your dashboard, when you open a particular conversation, you’ll find a section that reads as “Conversation Information”. Click on the
+sign to expand it.Step 2. You’ll see an option that reads “Add Attributes” followed by a dropdown of all the Custom Attributes on your account. Use the search bar to narrow down on the name of the attribute you’re looking for. Or click on one to select it. If you need to create a new one instead, use the “Create new attribute” button from the same dropdown.
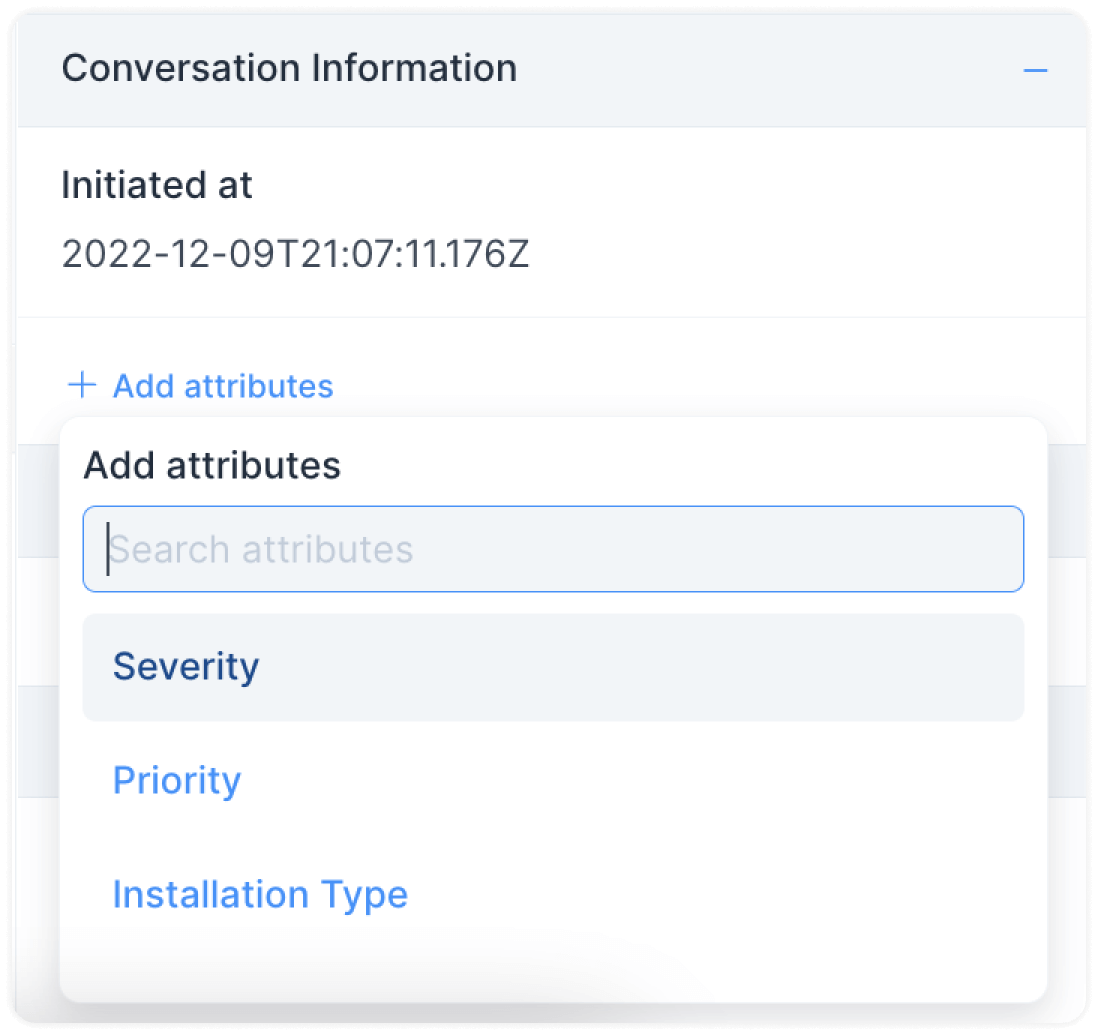
Step 3. Based on the type of attribute you added (list, checkbox, text, etc.), populate it at your will. Here is an example:
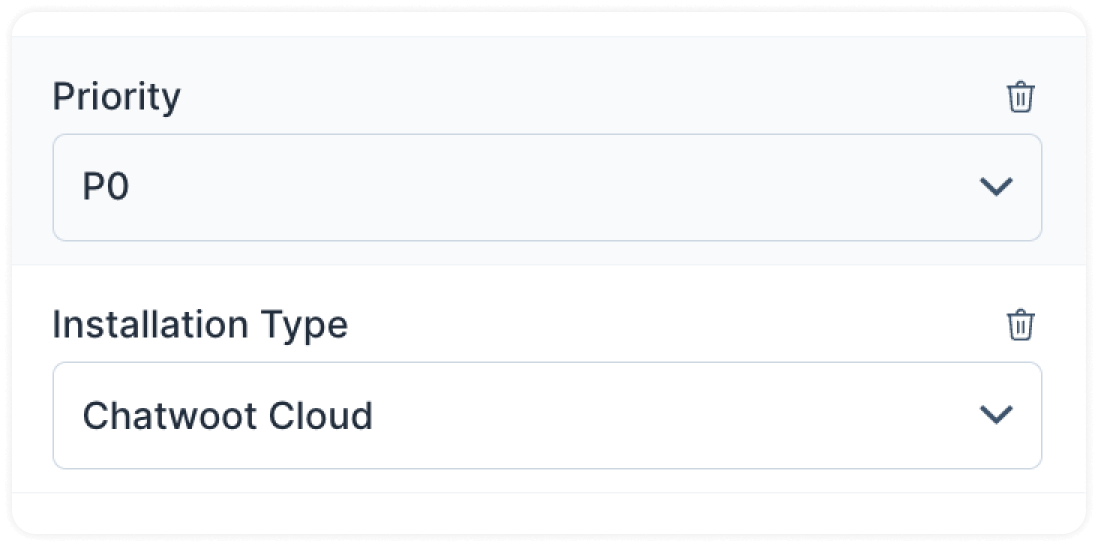
Imp: For adding Contact Attributes, follow the same procedure as described above, but use the Contact Attributes section of your chat sidebar instead.
2. For filtering conversations and contacts
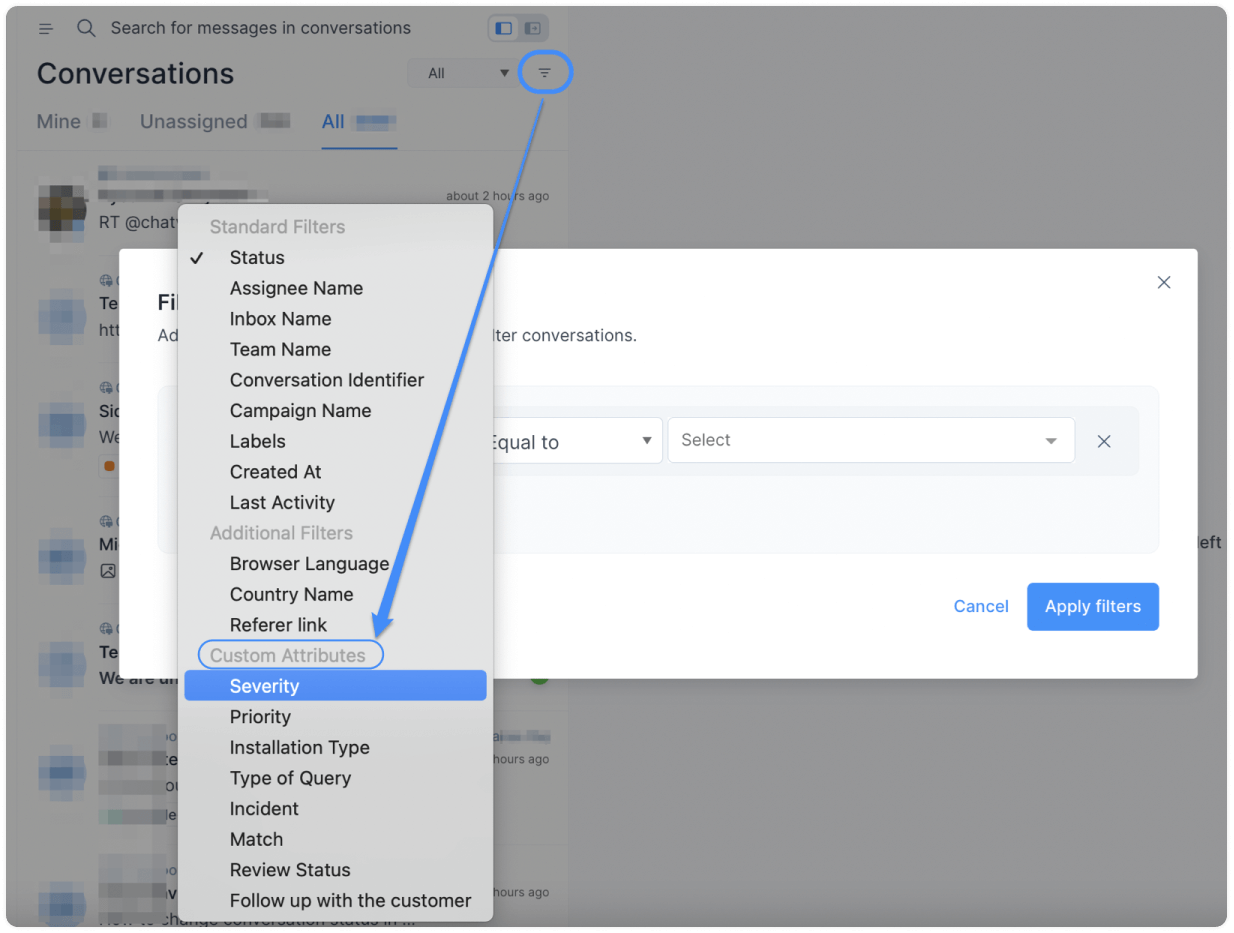
Filtering conversations
Step 1. Go to “conversations” and press the filter icon to view a list of available conversation filters.
Step 2. Scroll down to the “Custom Attributes” part. Select the one you want to. Refer to the screenshot:
Filtering contacts
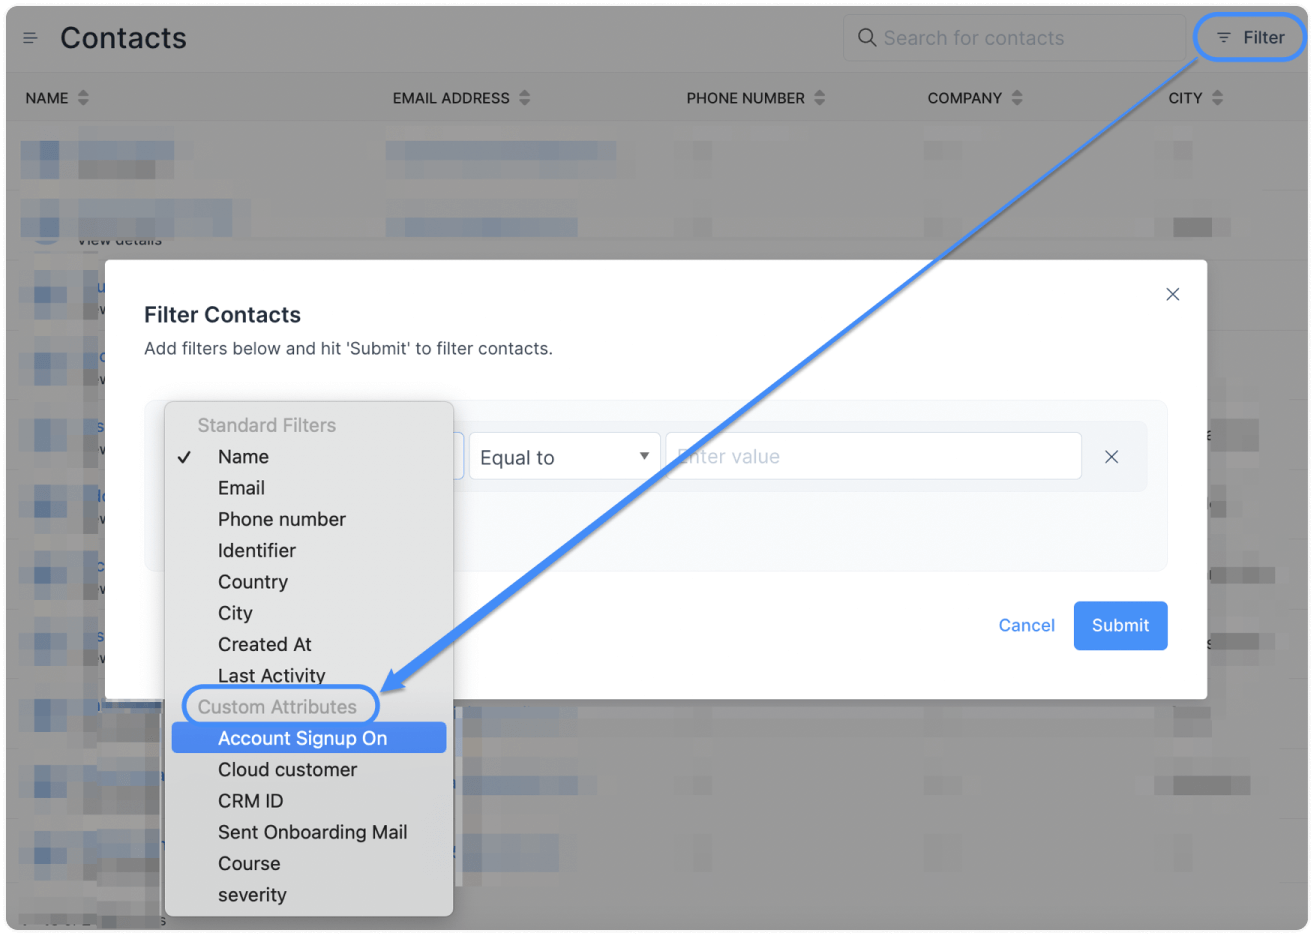
Step 1. Go to “Contacts” and press the filter icon to view a list of available contact filters.
Step 2. Scroll down to the “Custom Attributes” part. Select the one you want to. Refer to the screenshot:
Automation
Tasks like organizing conversations, assigning teams and agents, and assigning labels are important to avoid clutter. But having to do it for every conversation you receive is painful. When your volume of conversations increases, it becomes even more difficult to manage. So, it is best to leave some grunt work to the bots.
With Chatwoot Automation, you can define simple (or complex) rules in your account and get your workflows rolling––without spending a minute on them.
What is Automation in Chatwoot?
It is a set of rules an Admin defines for the account to automate certain tasks. A few examples of such tasks include assigning agents or teams, adding labels, snoozing conversations, etc. These actions are triggered based on events and conditions defined by you.
Can Agents create Automation rules?
No. Only admins can.
Can Agents access and use the Automation rules?
Yes.
How to create Automation rules?
We have a detailed document for this.
How to use the Automation feature?
Once you’ve set up the automation rules following the documentation provided in the section above, all you have to do is sit back and relax. You have just automated, after all!
Reports
A week, a month, a quarter, a year, or whatever period into working on Chatwoot––you’ll realize that you want to know specific metrics. Which agent responds the fastest? What is your CSAT score in the past quarter? Which agents are currently online? Which kind of conversations do you receive the most? –– these are only some questions you will look for answers to. Hence, we created Reports.
What are Reports on Chatwoot?
You will find seven types of reports on Chatwoot.
-
Overview: Realtime view of your support ops
-
Conversations overview: To view important metrics and KPIs about your conversations.
-
CSAT Reports: To track your CSAT scores.
-
Agents overview: To view important metrics and KPIs about your agents.
-
Labels overview: To view which labels get the most conversations, and associated metrics.
-
Inbox overview: To view important metrics and KPIs about your inboxes/channels.
-
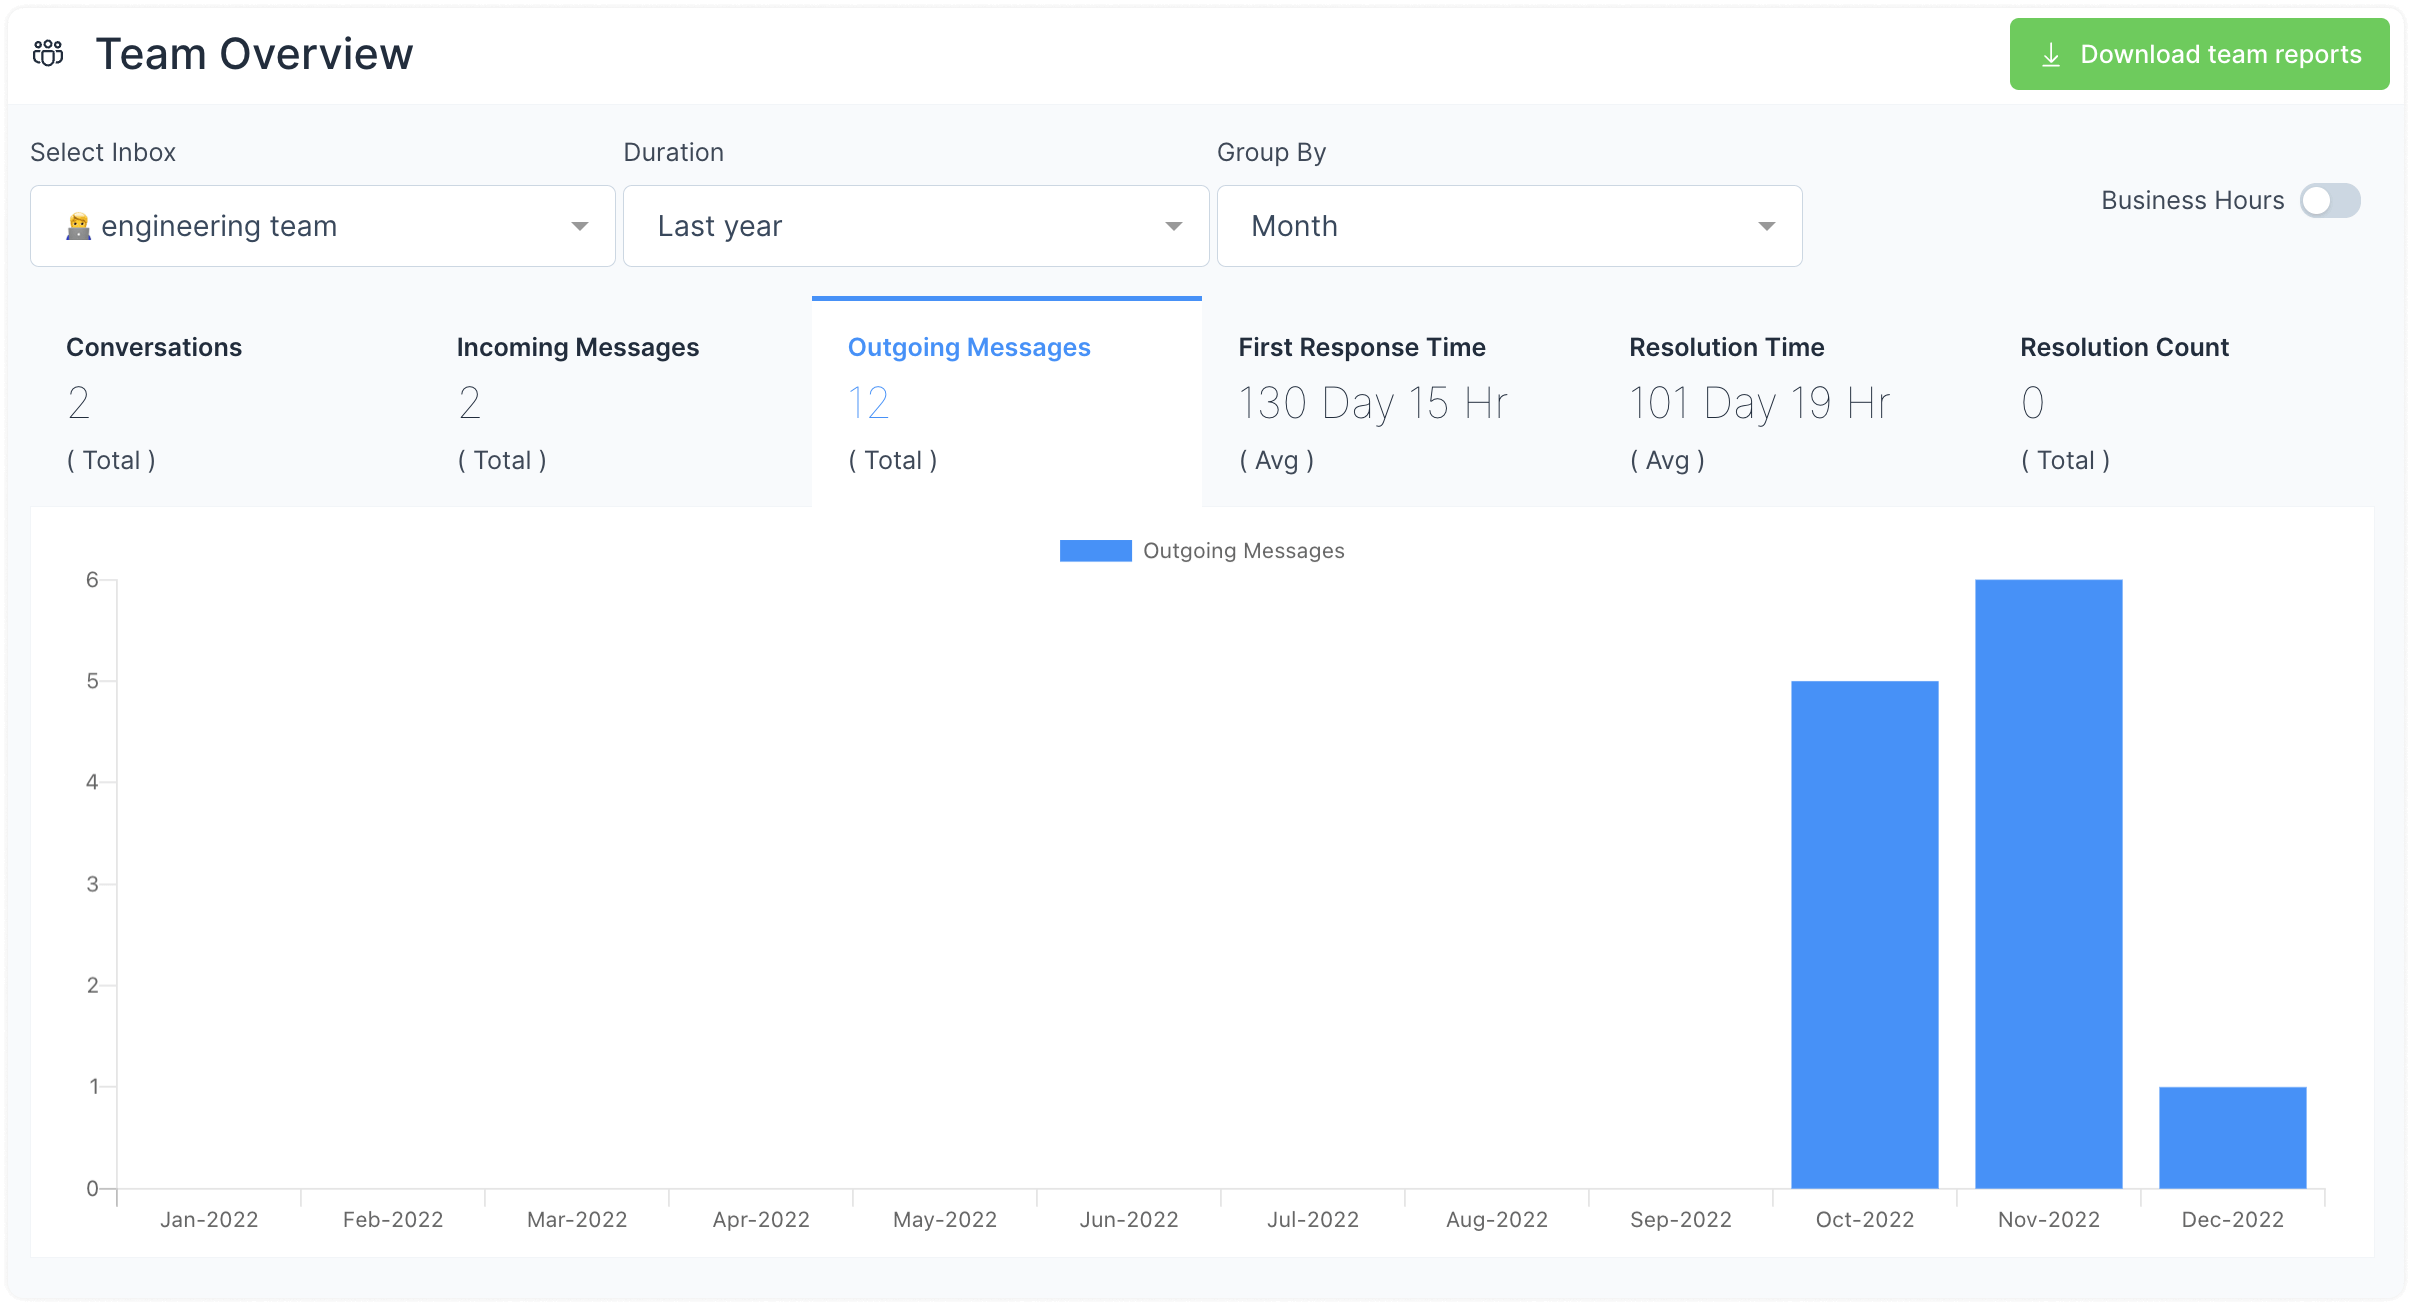
Team overview: To view important metrics and KPIs about your teams.
How to use the Reports feature?
Step 1. From your left sidebar, select the bar graph icon to see the list of the seven reports listed above.
Step 2. Click on any one report you want to see.
Step 3. Select the relevant particular––Agent’s name in the Agent's overview, Inbox’s name in the Inbox overview, and so on.
Step 4. Set the duration.
Step 5. Click on a particular metric to view the associated graph. Here is an example:
