Azure Chatwoot deployment guide
This guide will deploy chatwoot on a single VM in Azure. For a cloud native deployment, use our helm charts with Azure Kubernetes Service(AKS).
NOTE: This guide is a work in progress and your mileage may vary.
Create a Virtual Machine
- Login to the Azure portal and choose Virtual Machines.
- Select create a VM from scratch.
- In the Basics tab, create a subscription and a new resource group.
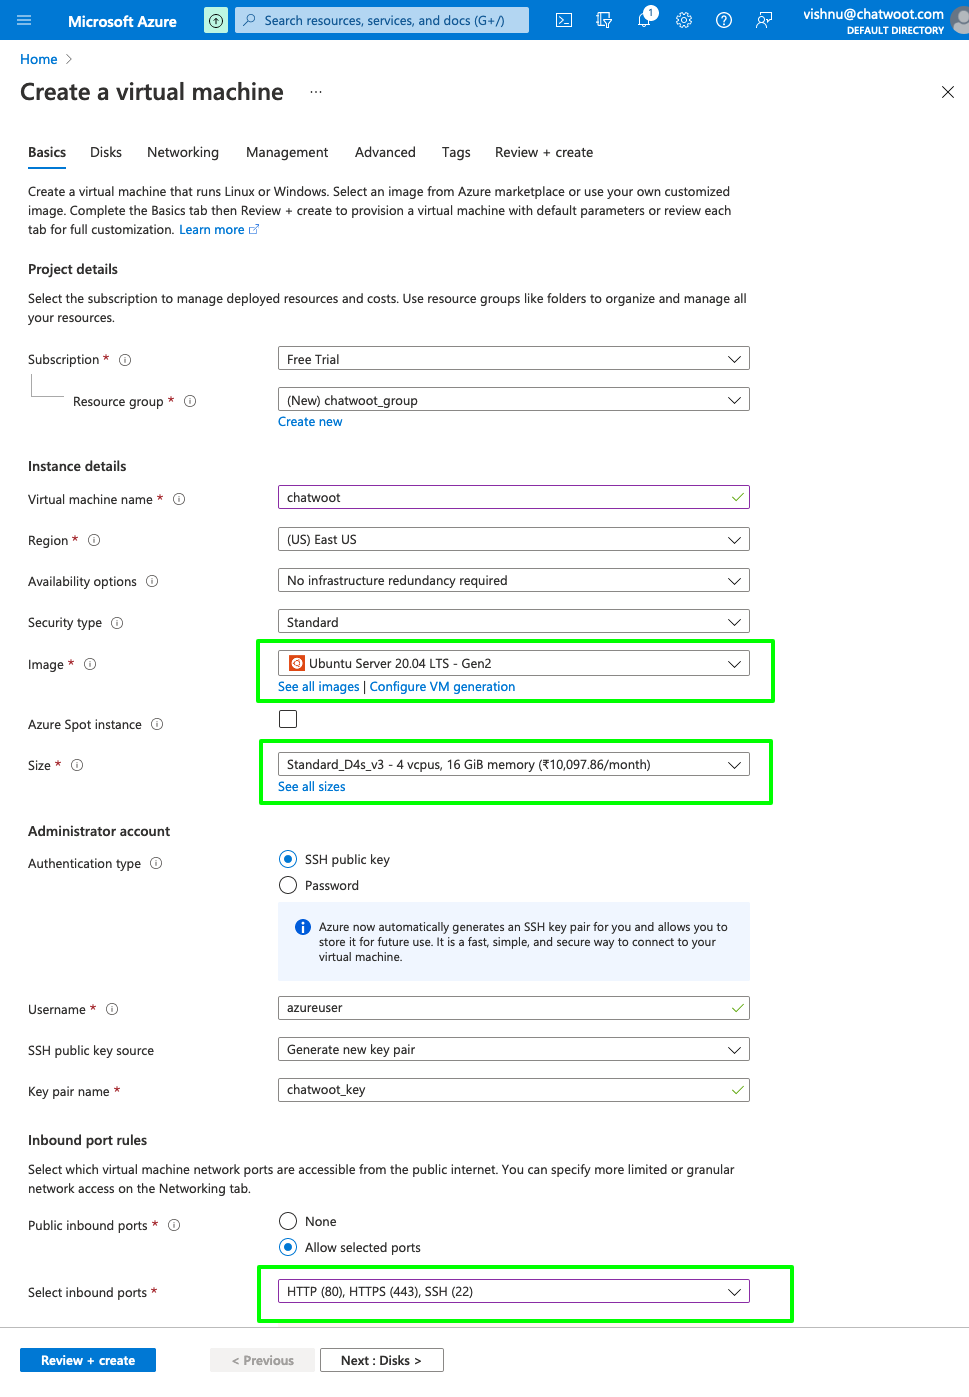
- Name the virtual machine as
chatwootand select your preferred region. - Select
Ubuntu 20.04 LTS - Gen2as the image. - For instance size, we recommend the type
Standard_D4s_v3(4vCPU, 16GB RAM). - Under authentication, leave the defaults and create a new key pair if needed.
- Allow HTTP, HTTPS and SSH under inbound port rules.
- Click next and leave the defaults for Disks, Networking, Management, Advanced and Tags section.
- Select
Review + createto spin up the VM.
Install Chatwoot
- SSH into the instance created from your local machine or create a bastion in azure to ssh via the browser.
- Follow the linux VM instructions at https://www.chatwoot.com/docs/self-hosted/deployment/linux-vm.
- Woot! Woot! Your Chatwoot Instance is ready and can be accessed at
http://<your-instance-ip>:3000. Or if you completed the domain setup during the installation, chatwoot should be available athttps://<your-domain>.
NOTE: Browser access via port 3000 will only work if enabled under inbound rules.
Configure Chatwoot
- Follow the Chatwoot docs to configure your domain, email and other parameters you need. https://www.chatwoot.com/docs/self-hosted/deployment/linux-vm#configure-the-required-environment-variables