Instagram via Facebook Login
Note: We recommend Instagram Business Login as the preferred authentication method, as it provides simpler configuration and a better developer experience. Please refer to this guide for more details. We will be stopping the support for Instagram via Facebook Login in the future from v4.1 onwards.
- A valid facebook account.
- A valid facebook page.
- A valid instagram professional account.
Register A Facebook App
To use Instagram Channel, you have to create a Facebook app in the developer portal. You can find more details about creating Facebook developer app here.
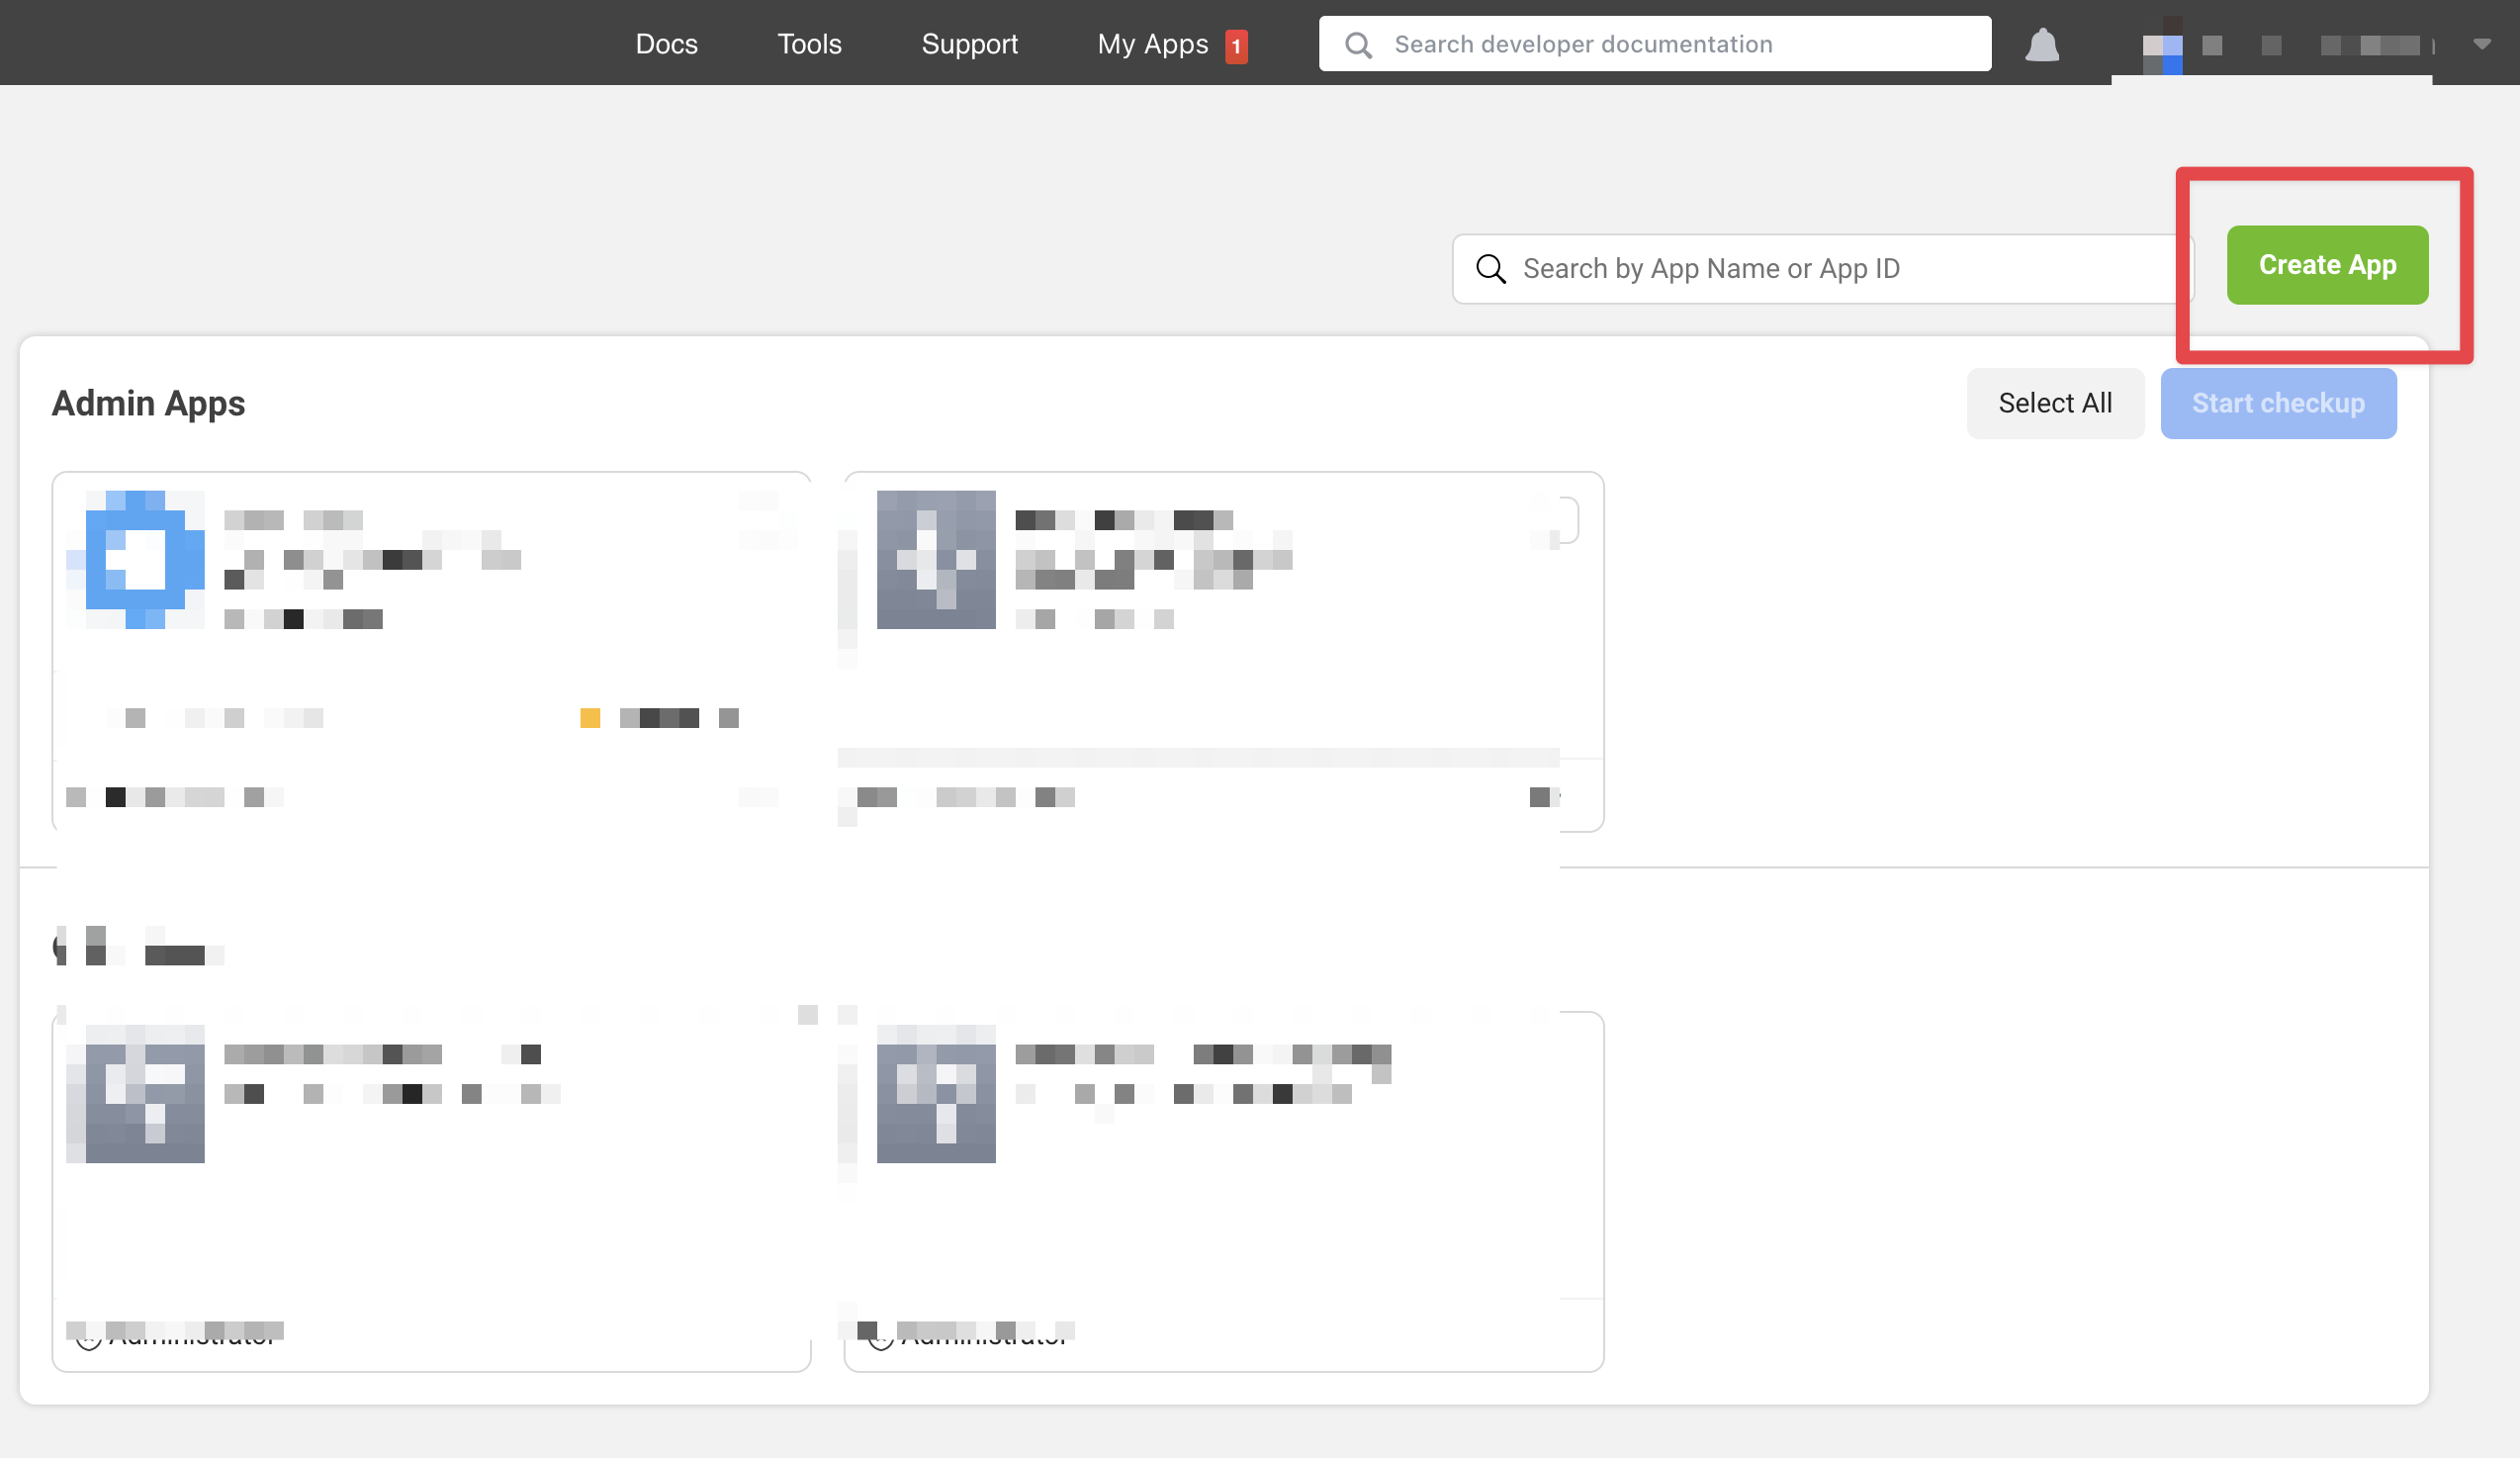
- Click on the "Create App" button
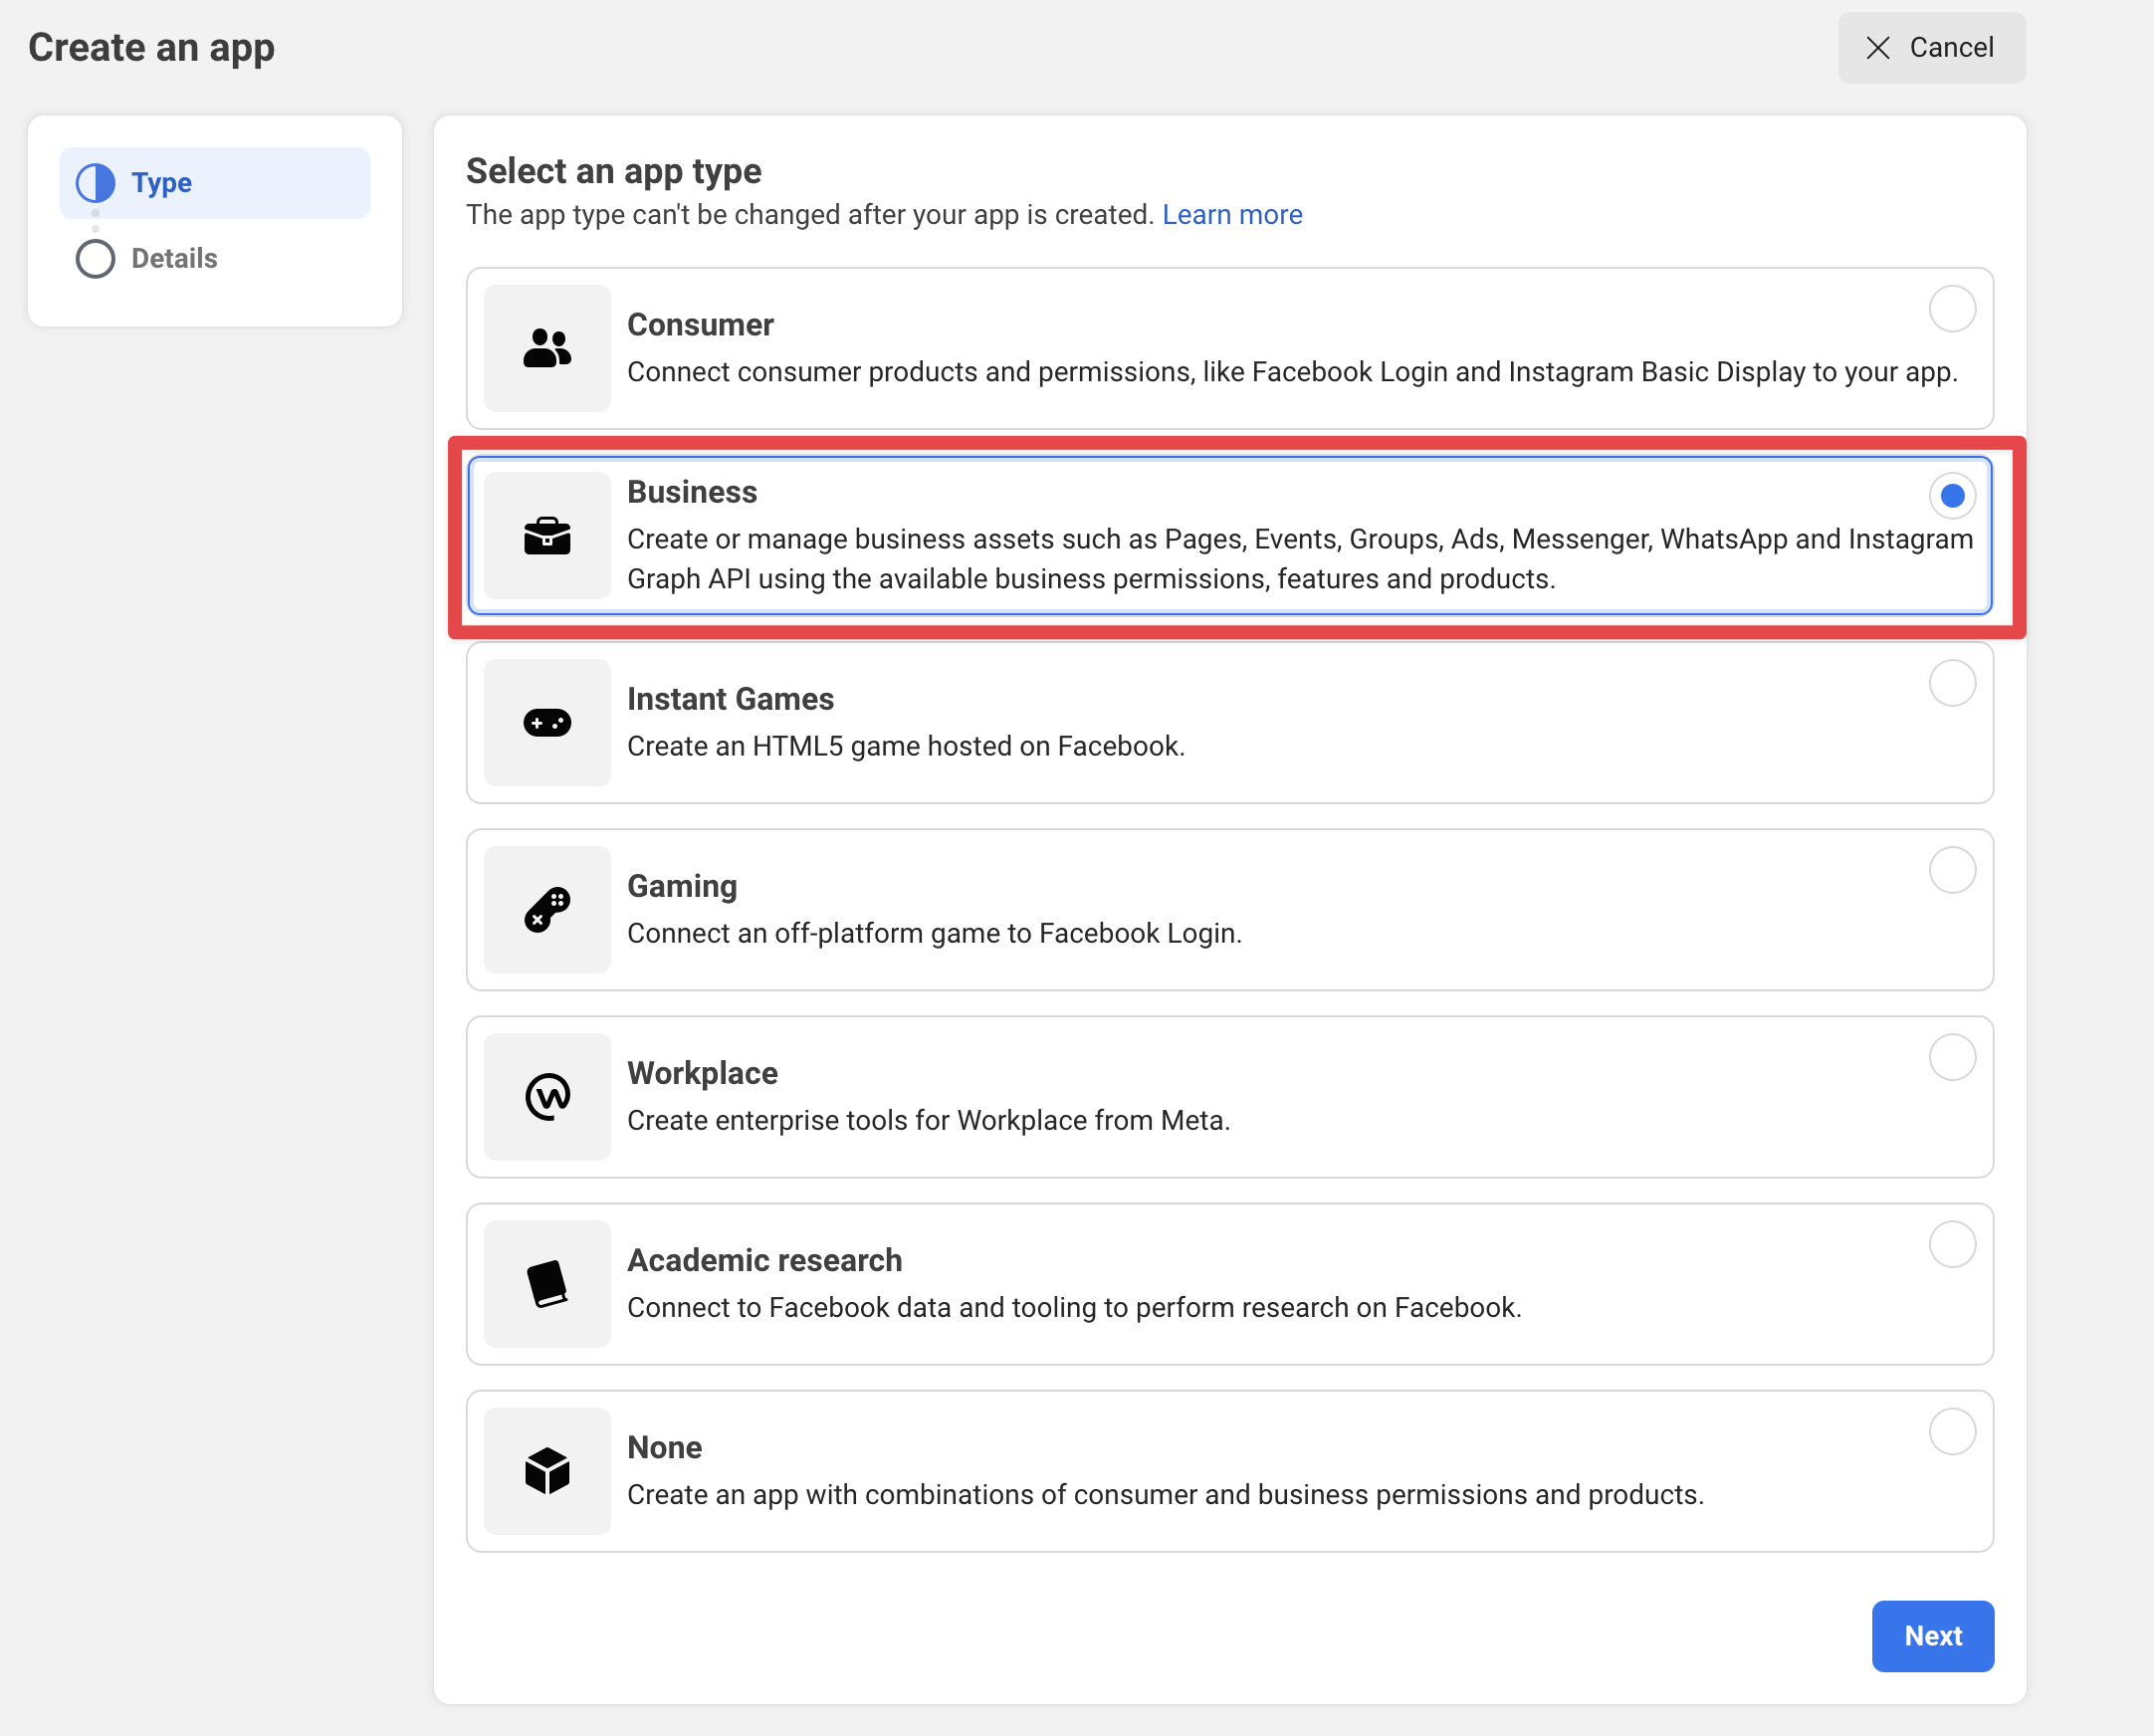
- Select the option "Other".

- For the app type, choose "Business"
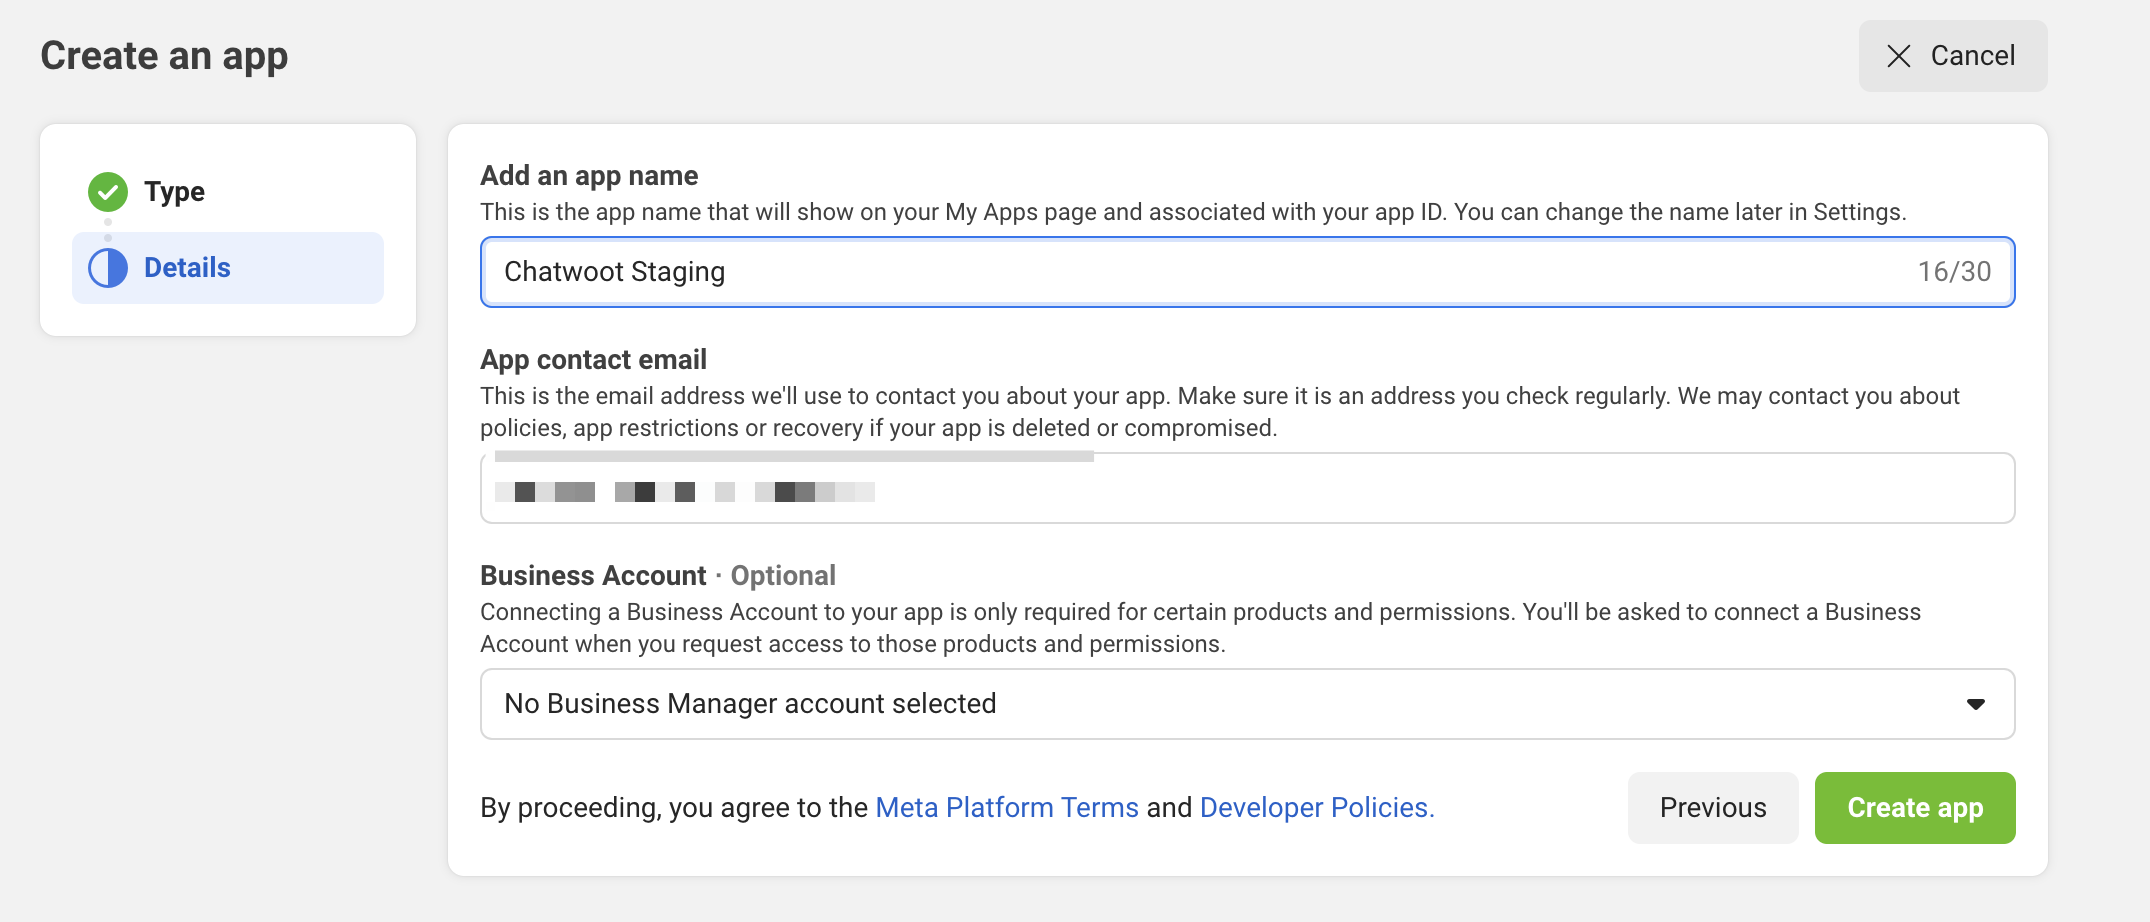
- Enter basic details like the app name and email.
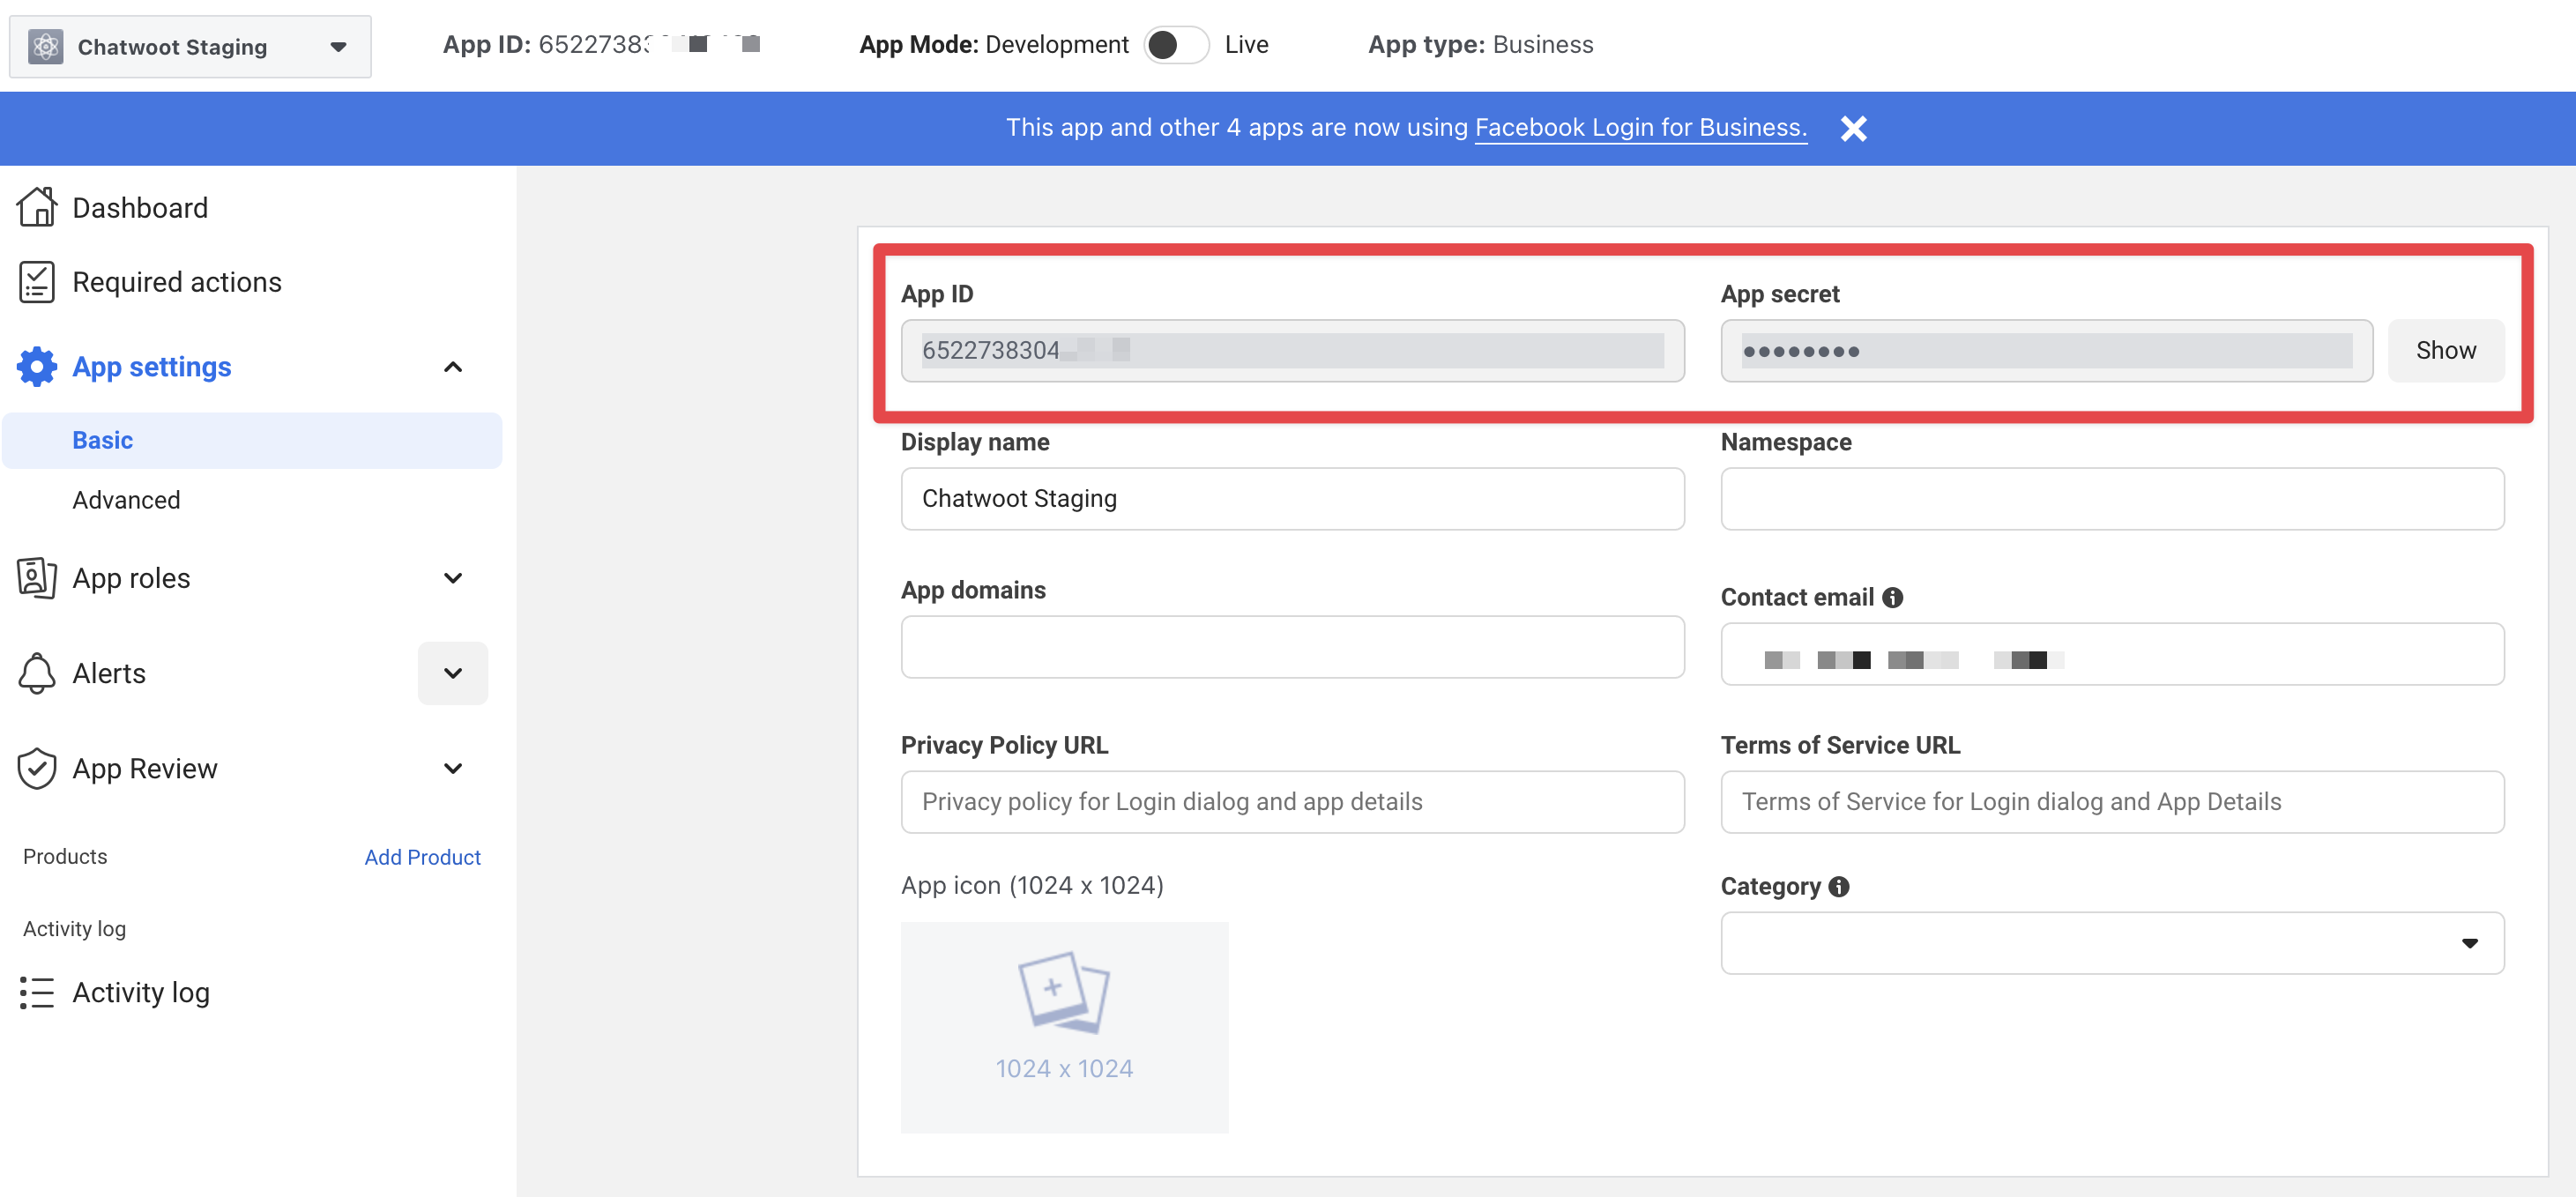
Once you register your Facebook App, you will have to obtain the App Id and App Secret. These values will be available in the app settings and will be required while setting up Chatwoot environment variables.
Configuring the Environment Variables in Chatwoot
Configure the following Chatwoot environment variables with the values you obtained during the Facebook app setup. The IG_VERIFY_TOKEN should be a unique and secure string that you provide when configuring the Instagram app.
Restart the Chatwoot server after updating the environment variables
IG_VERIFY_TOKEN=
FB_APP_SECRET=
FB_APP_ID=
Configure the Facebook App
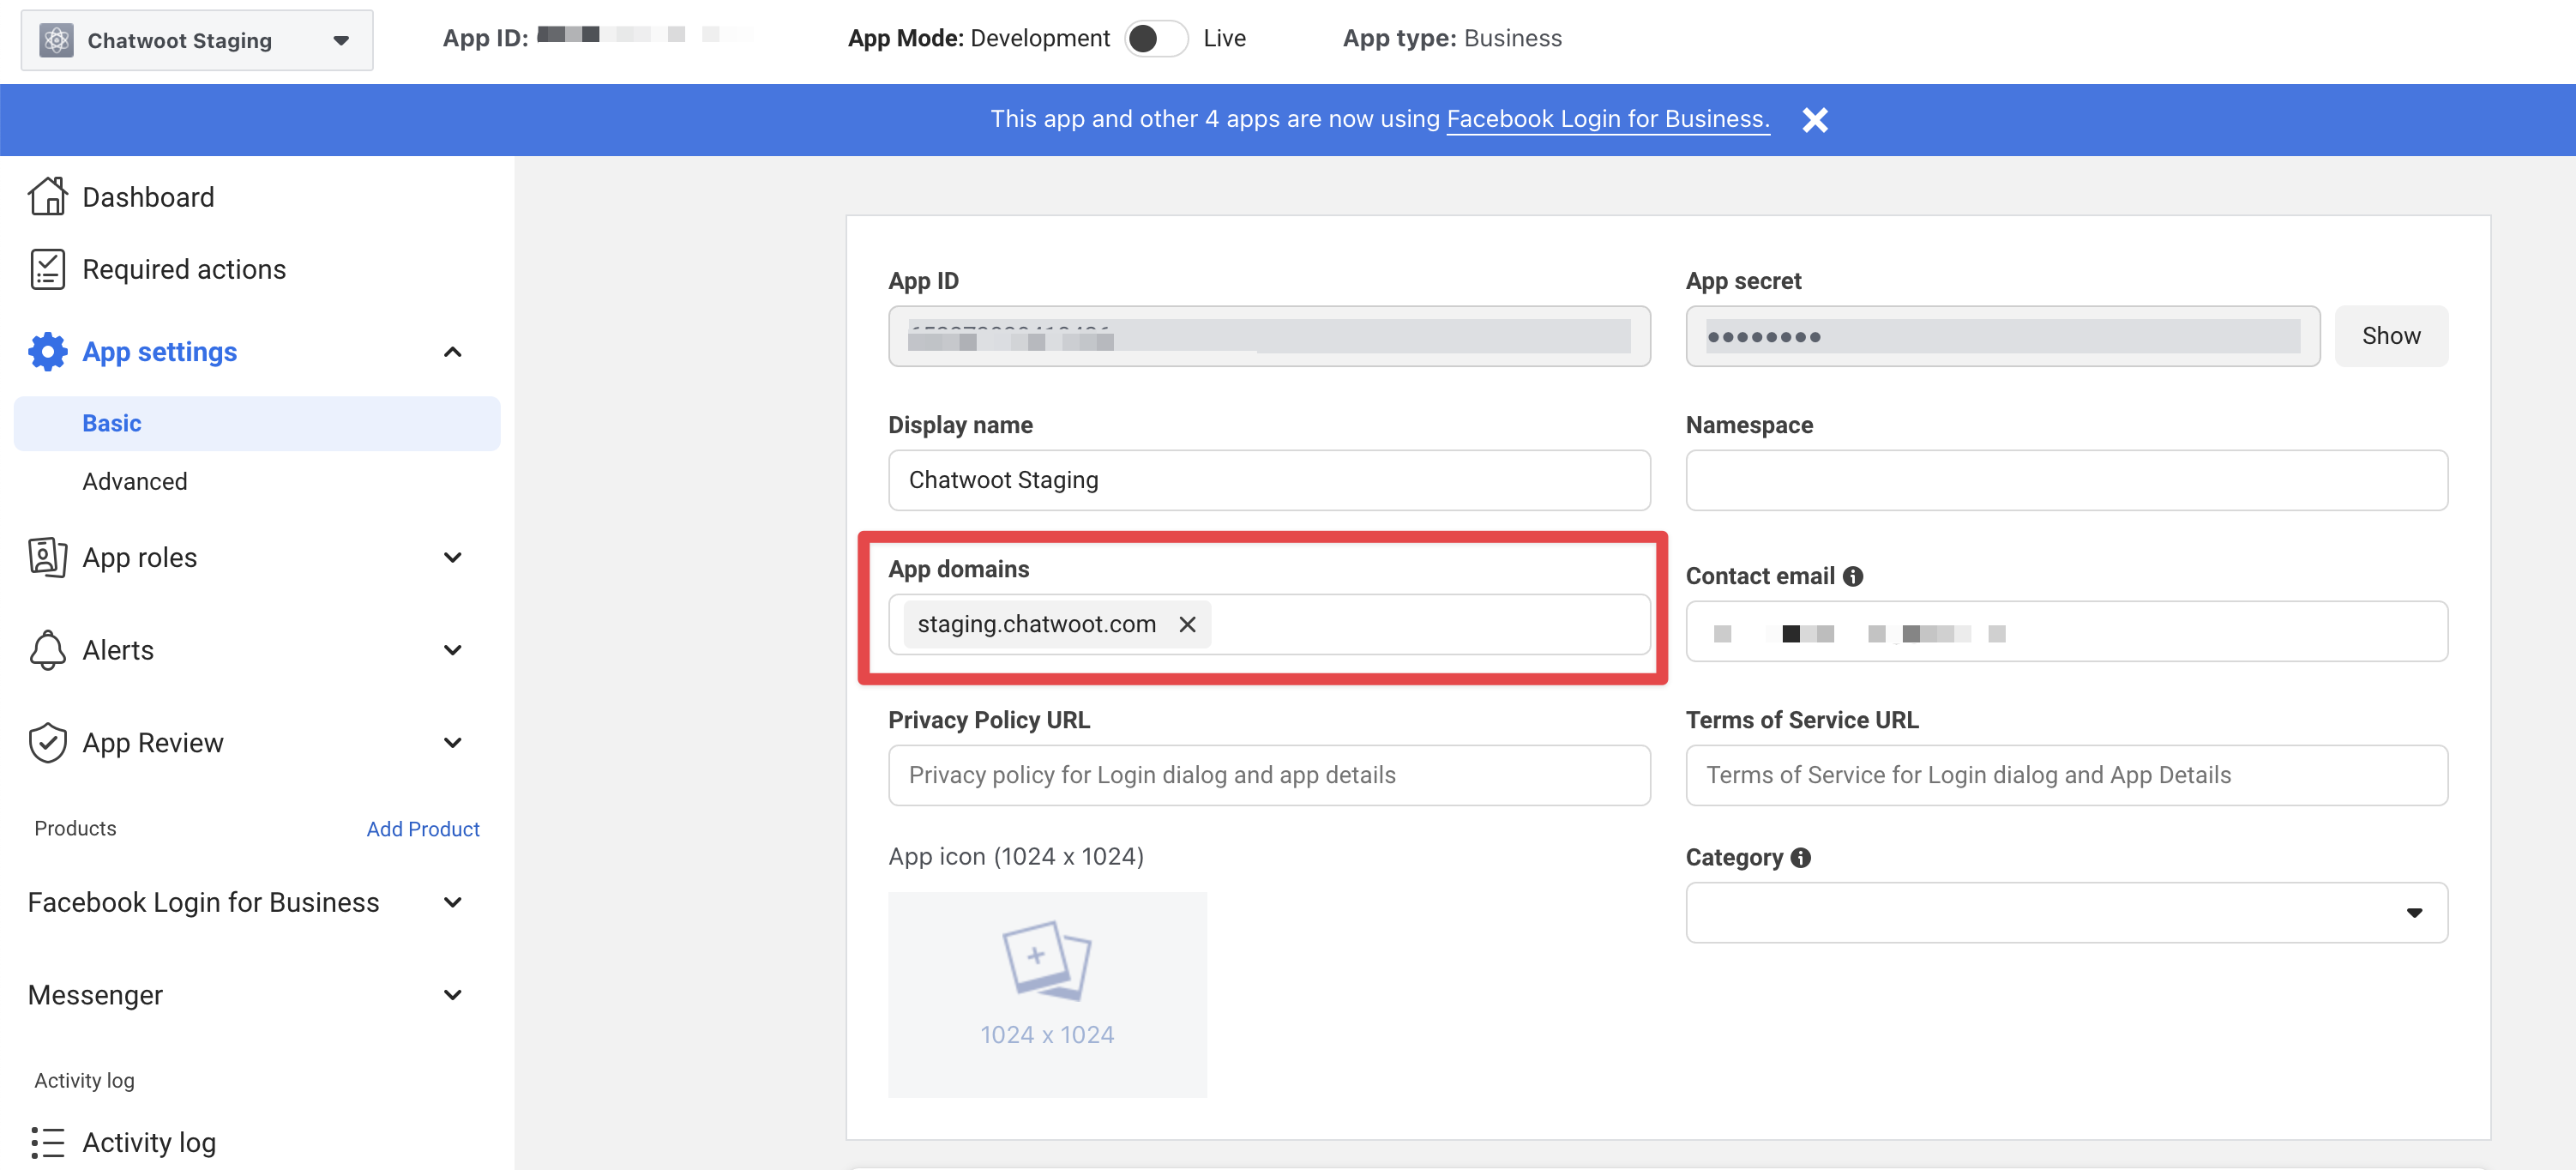
- In the app settings, add your "Chatwoot installation domain" as your app domain.
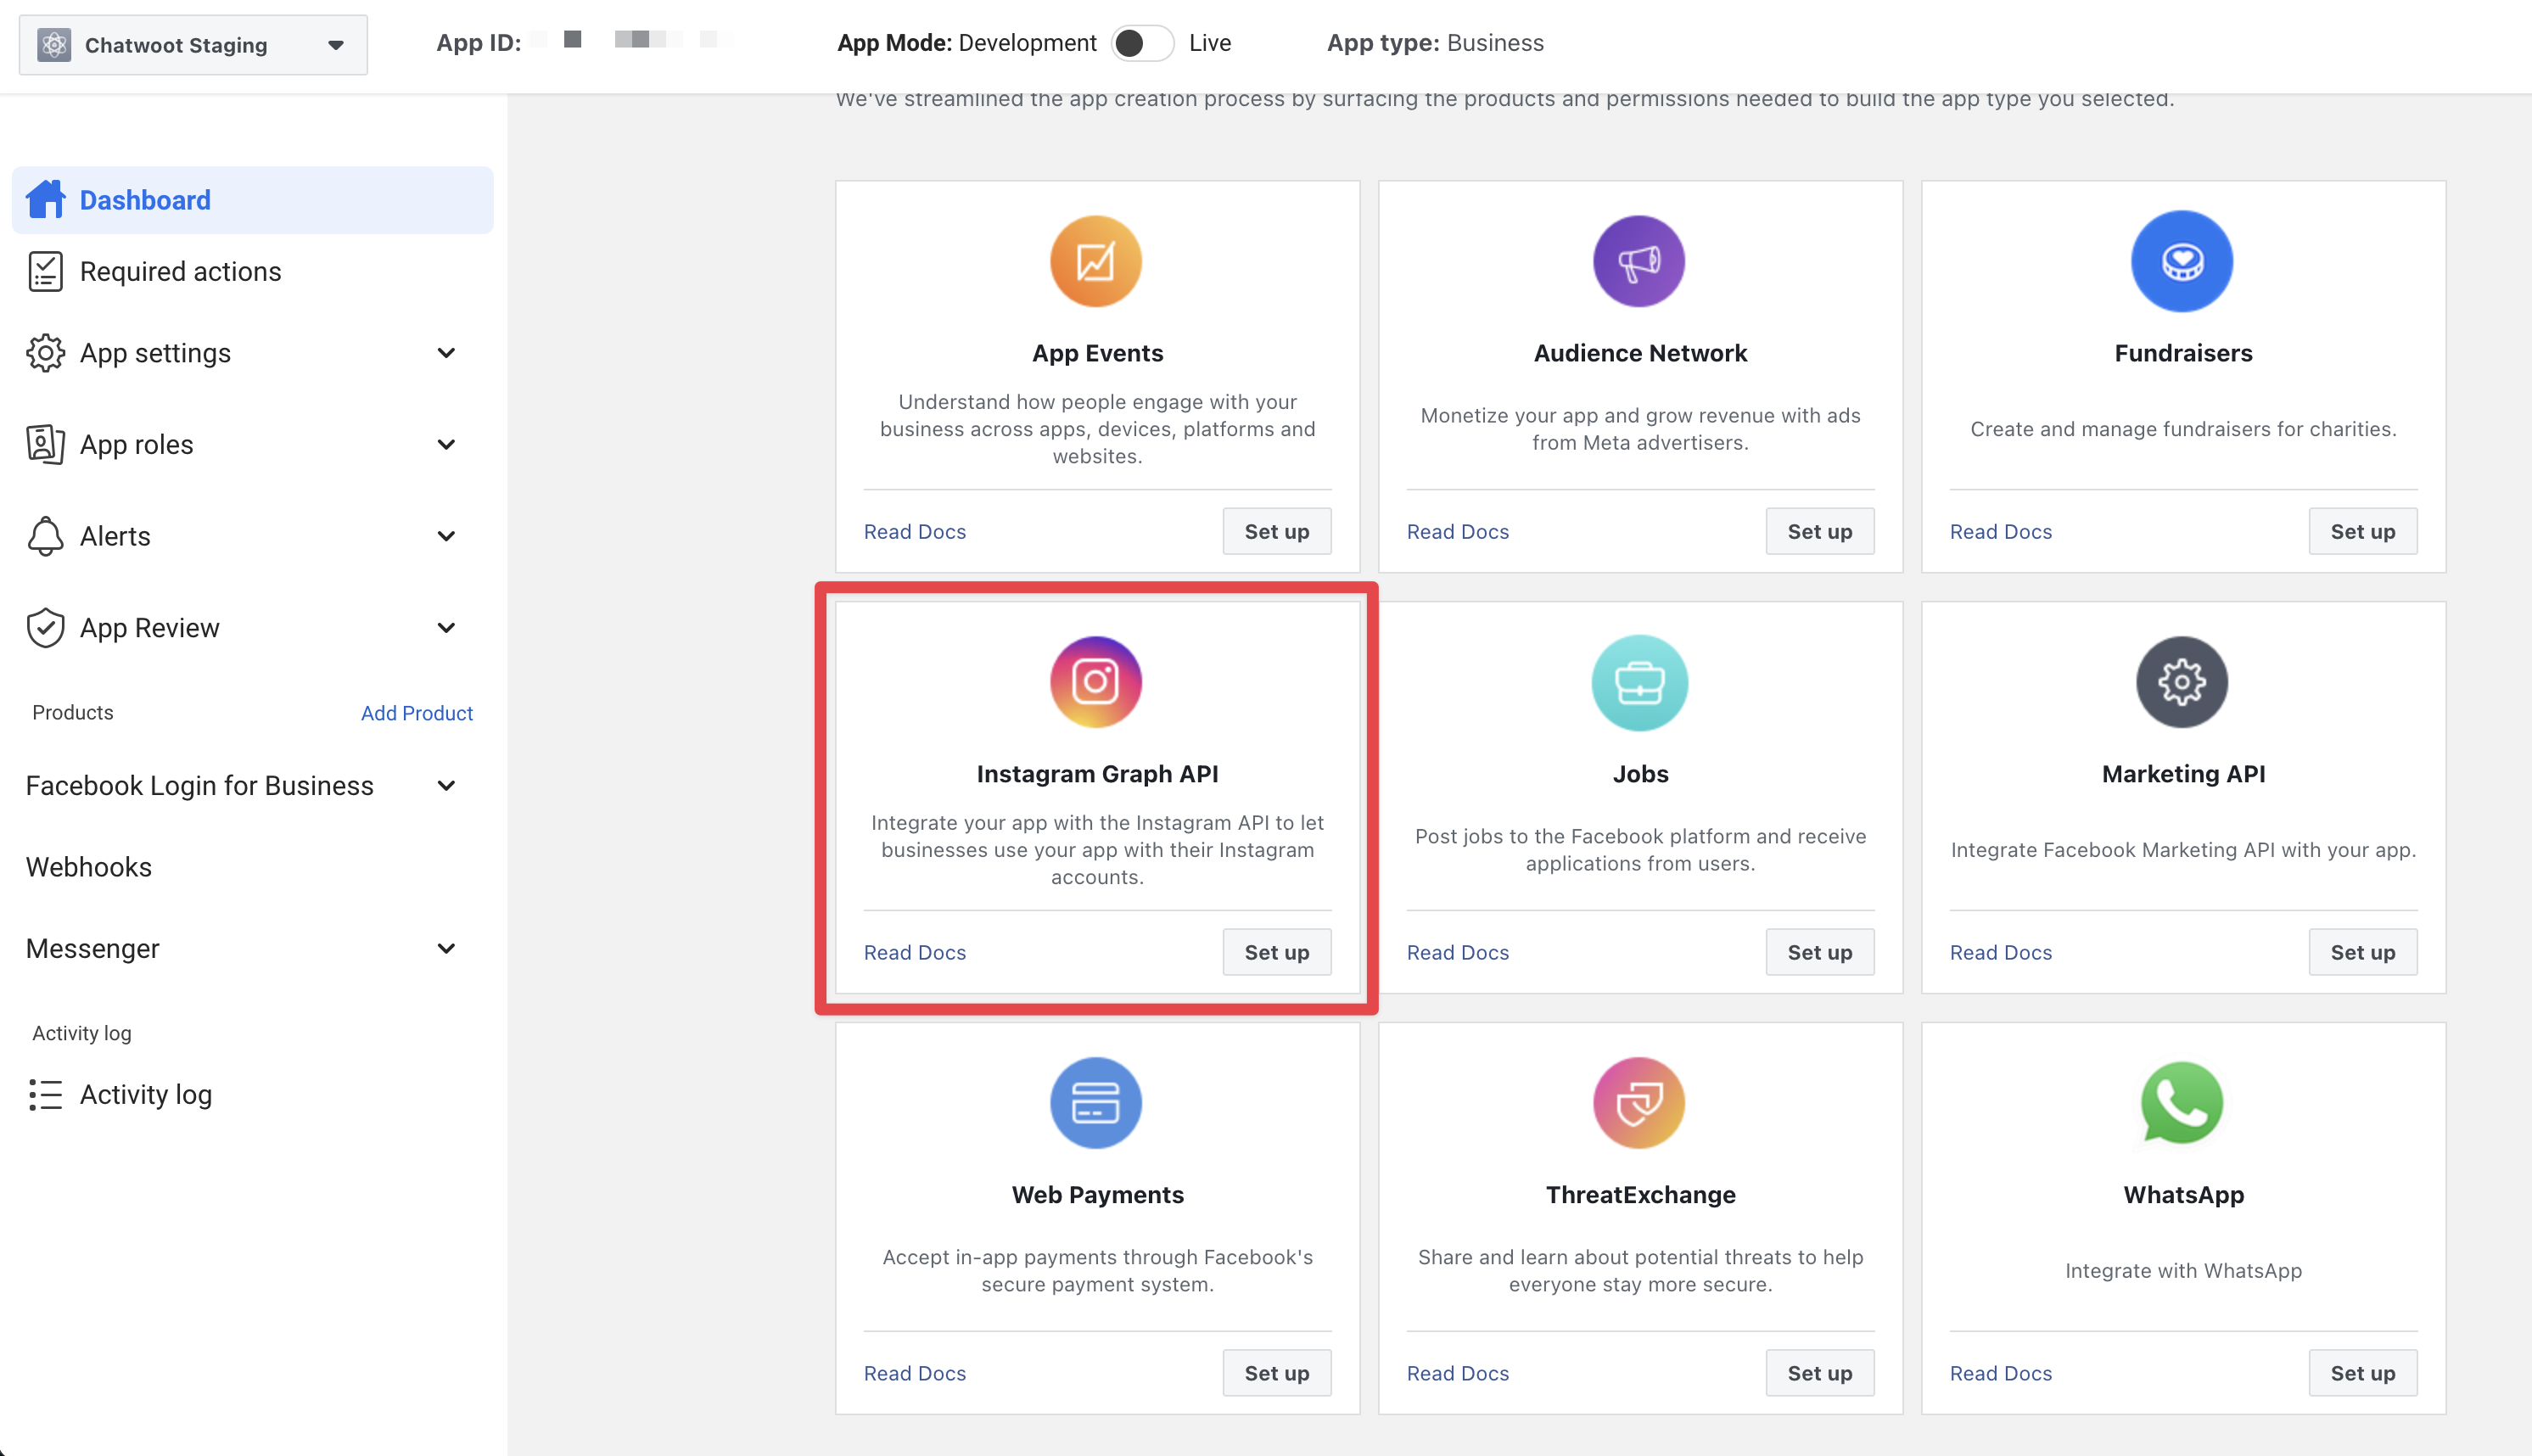
- Add the "Instagram Graph API" product via the Facebook app dashboard.
- Go to the app settings and select "Webhooks". From there, choose Instagram and click on the "Subscribe to this object" button.
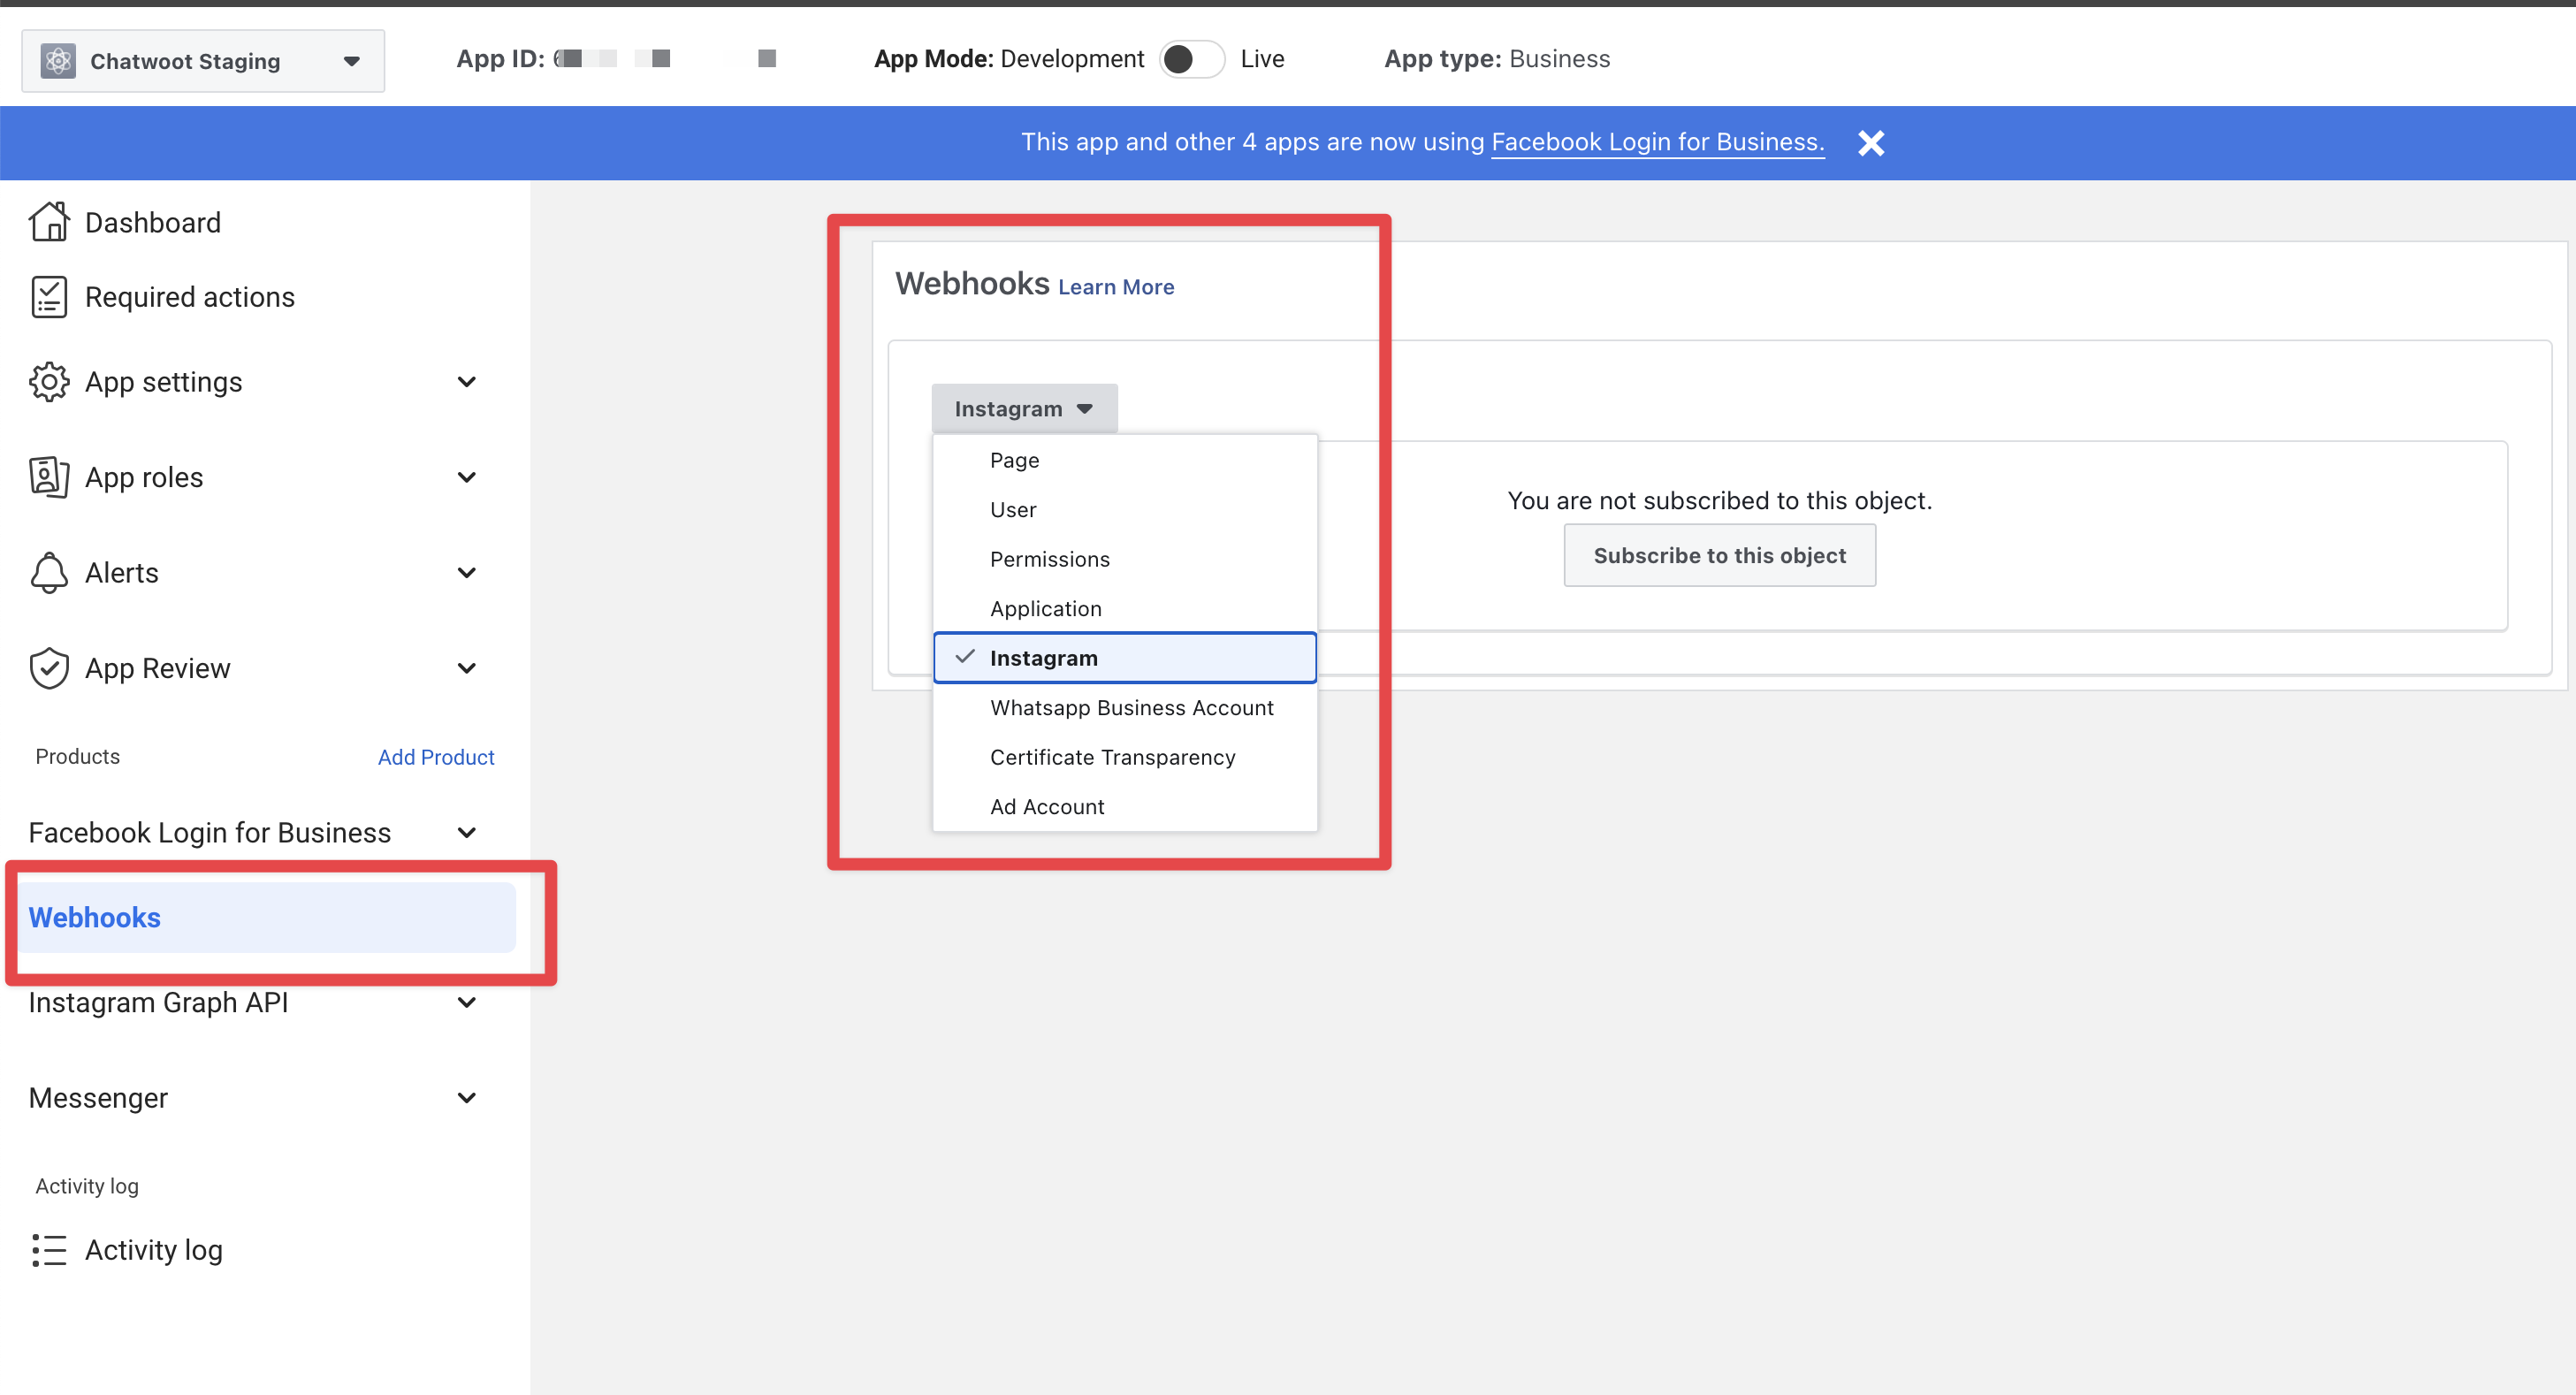
- Provide the Callback URL as
{your_Chatwoot_installation_url}/webhooks/instagramand the Verify token asIG_VERIFY_TOKENfrom your environment variable.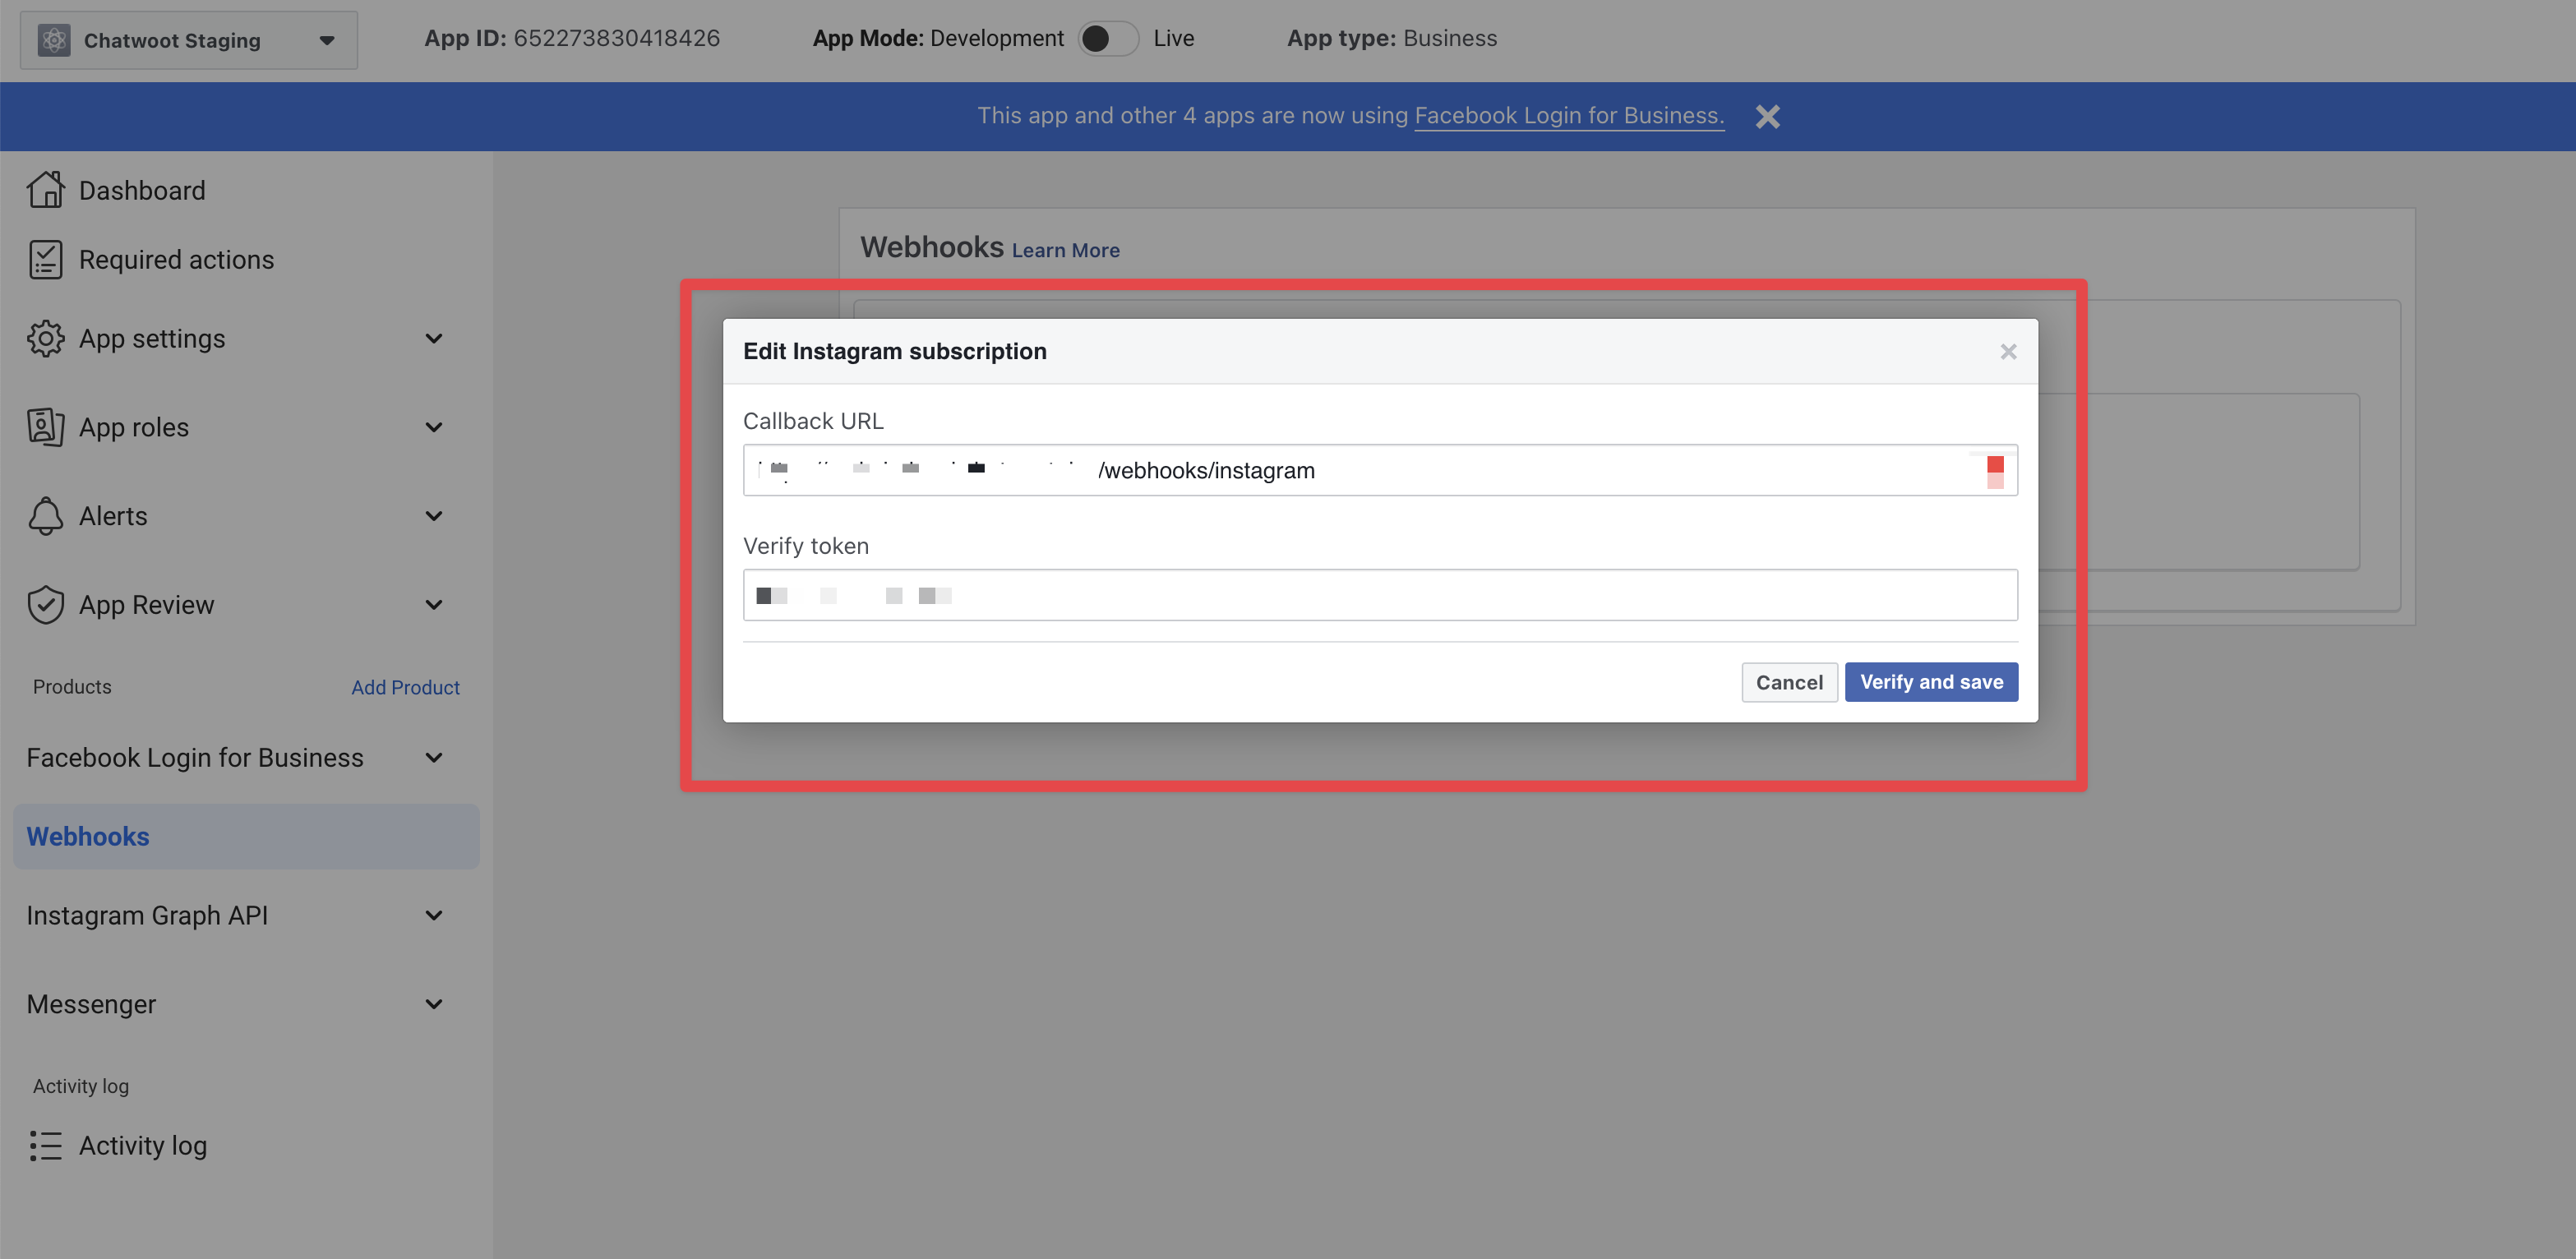
Connect the facebook page with instagram account
- Go to Facebook pages and select your page and open the settings
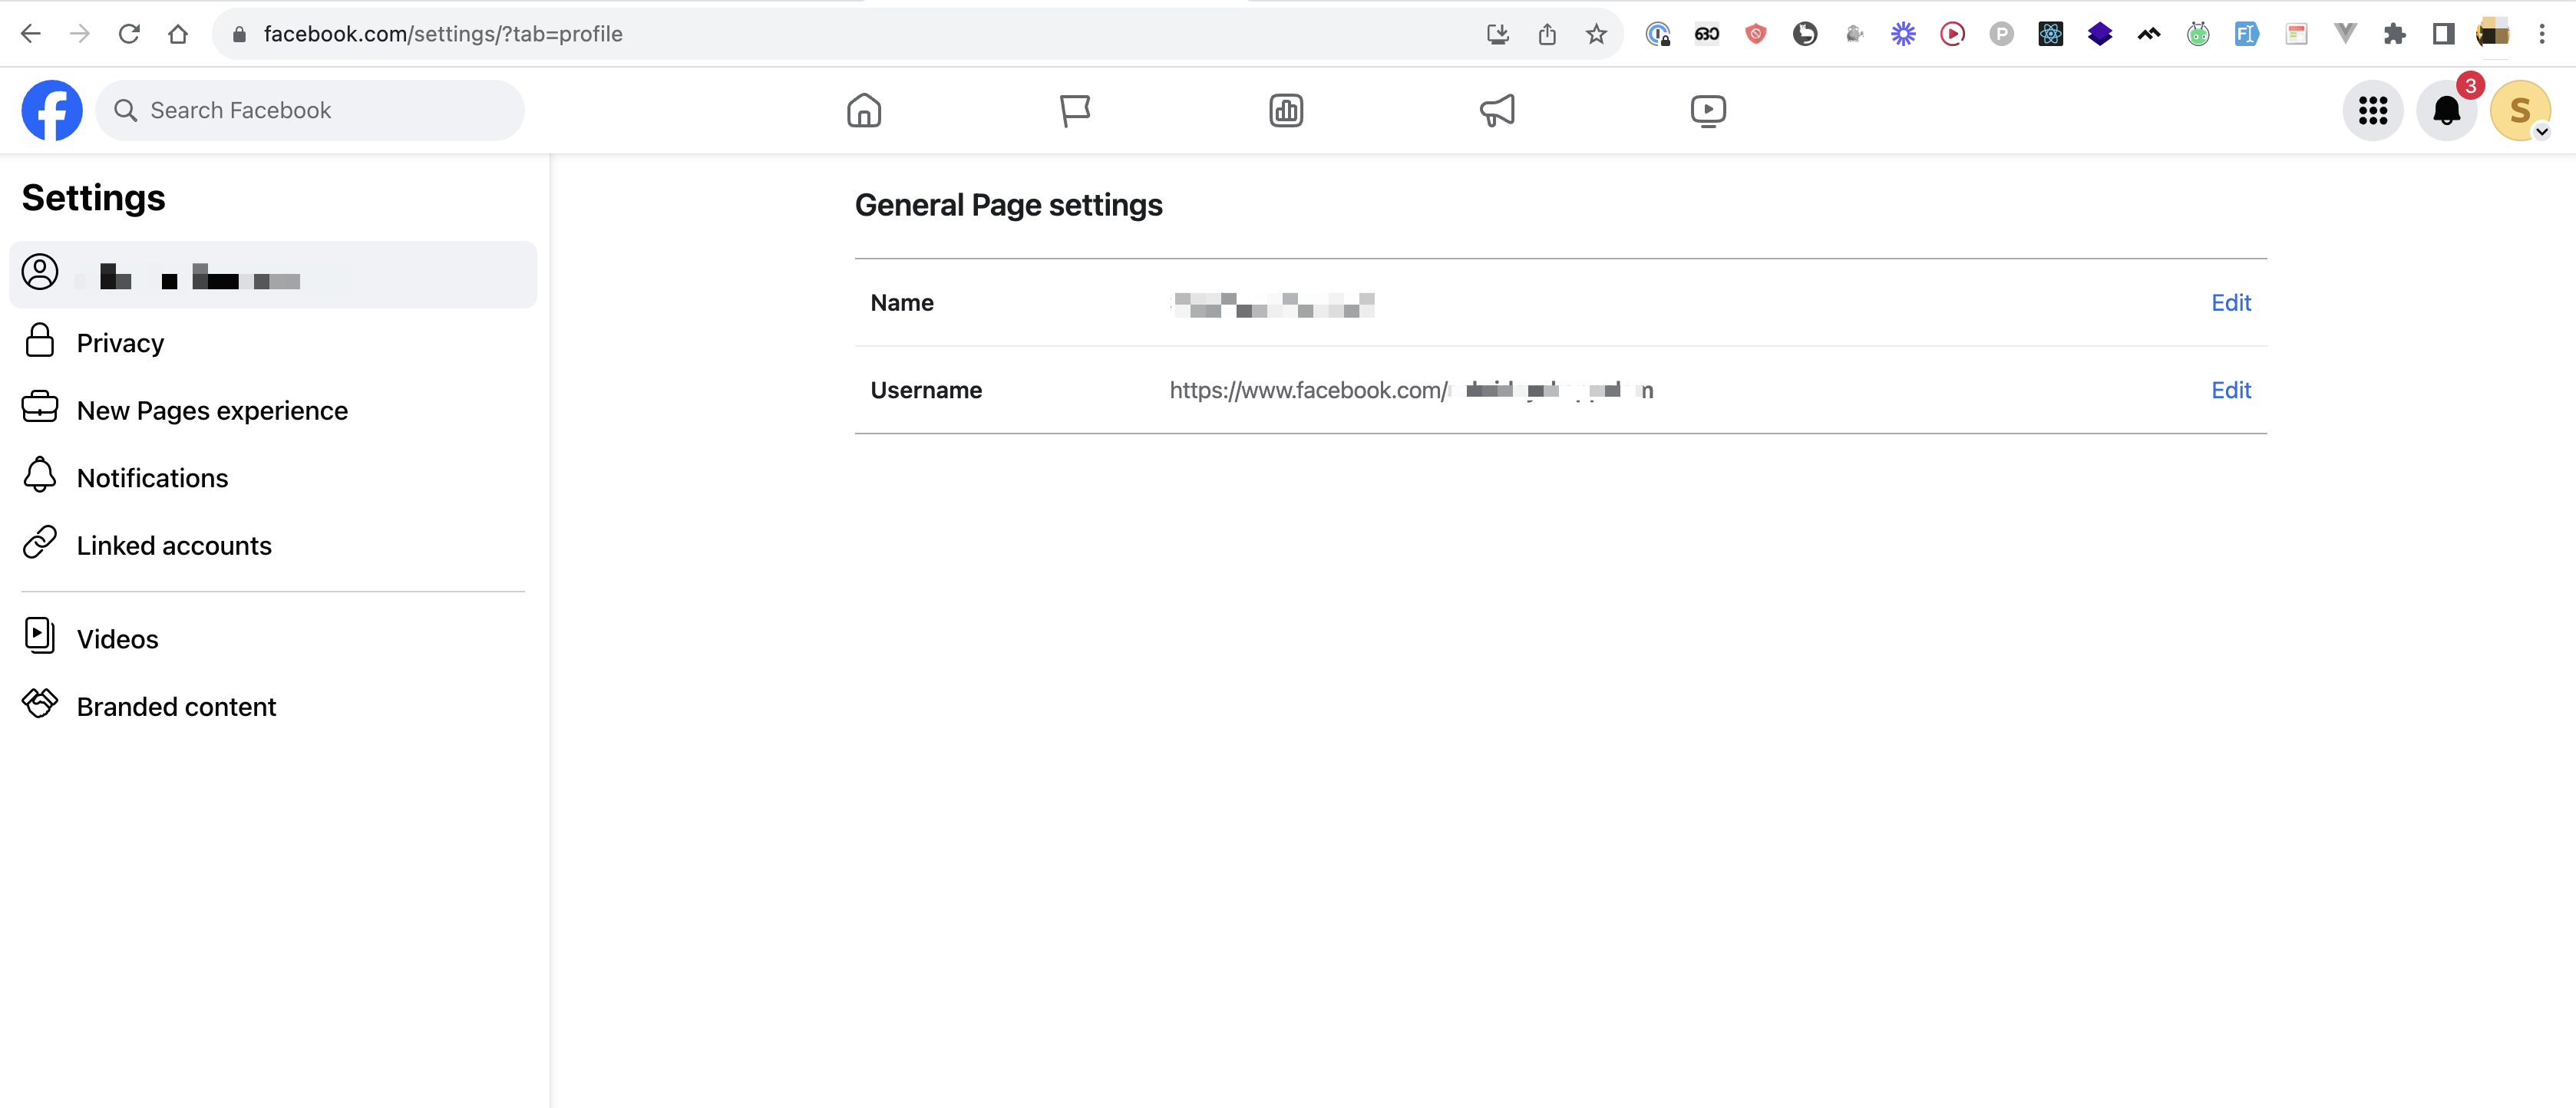
- Go to "Linked accounts" and connect your instagram professional account.
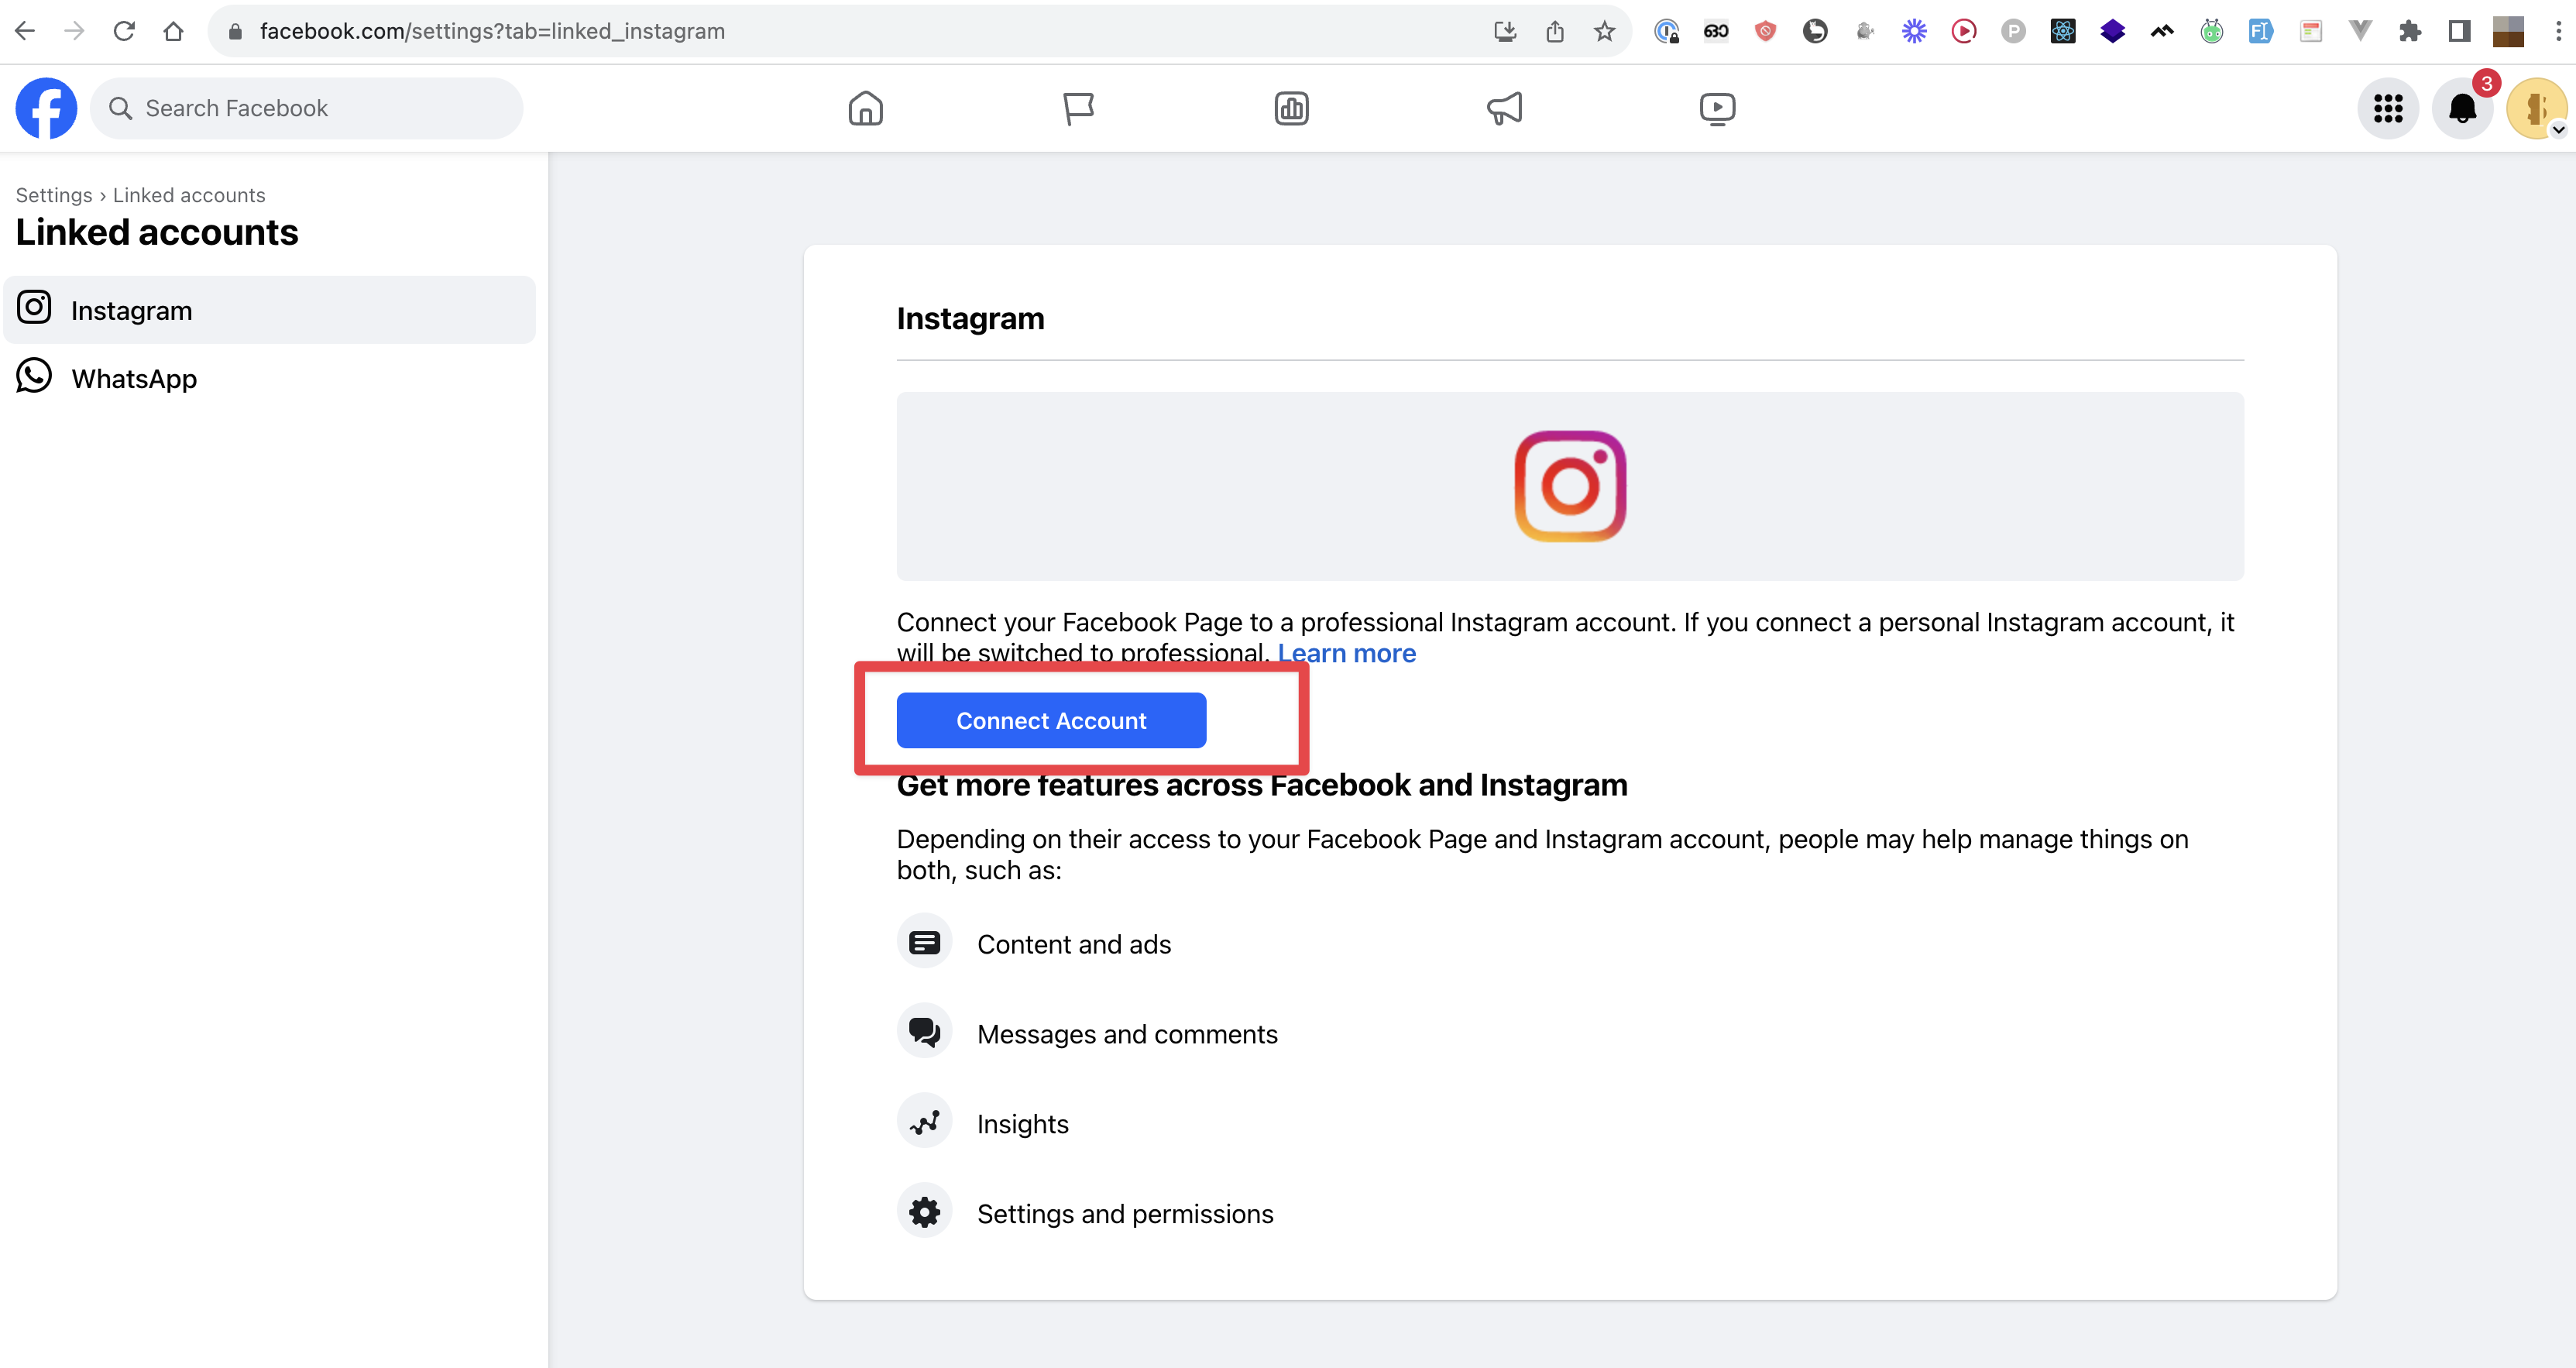
-
Select the option "Business"

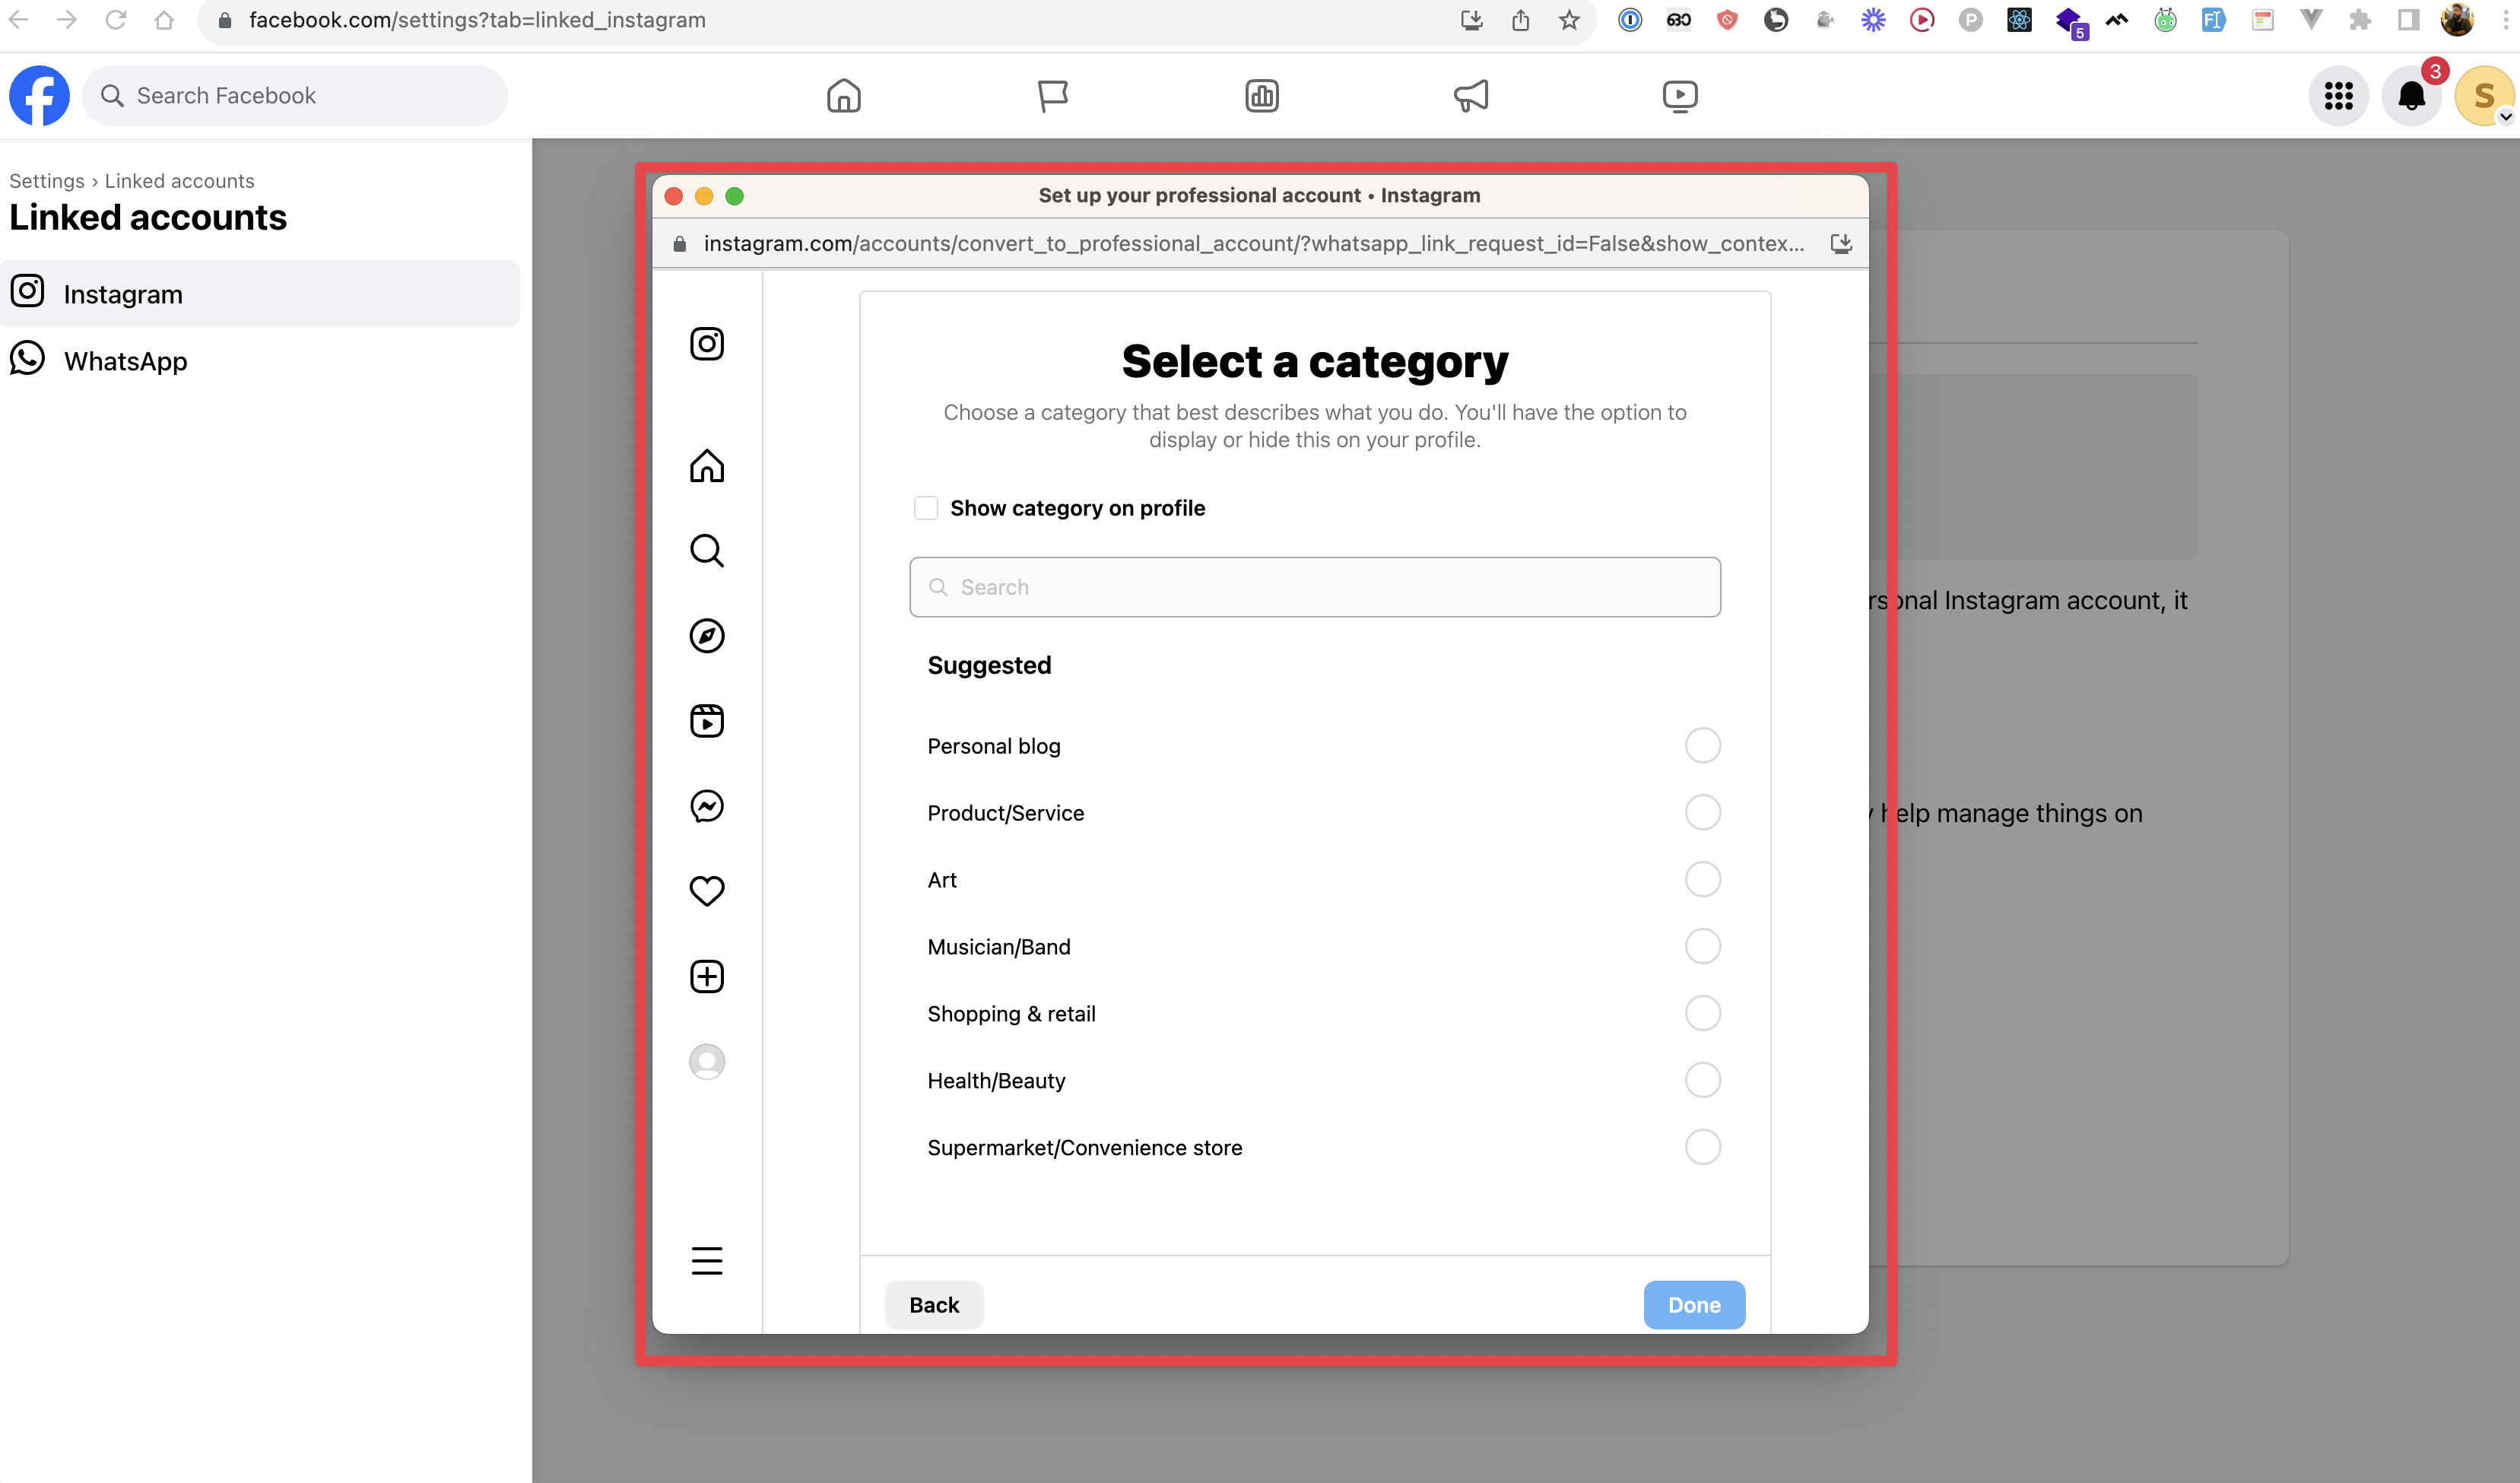
-
Select the instgram account category
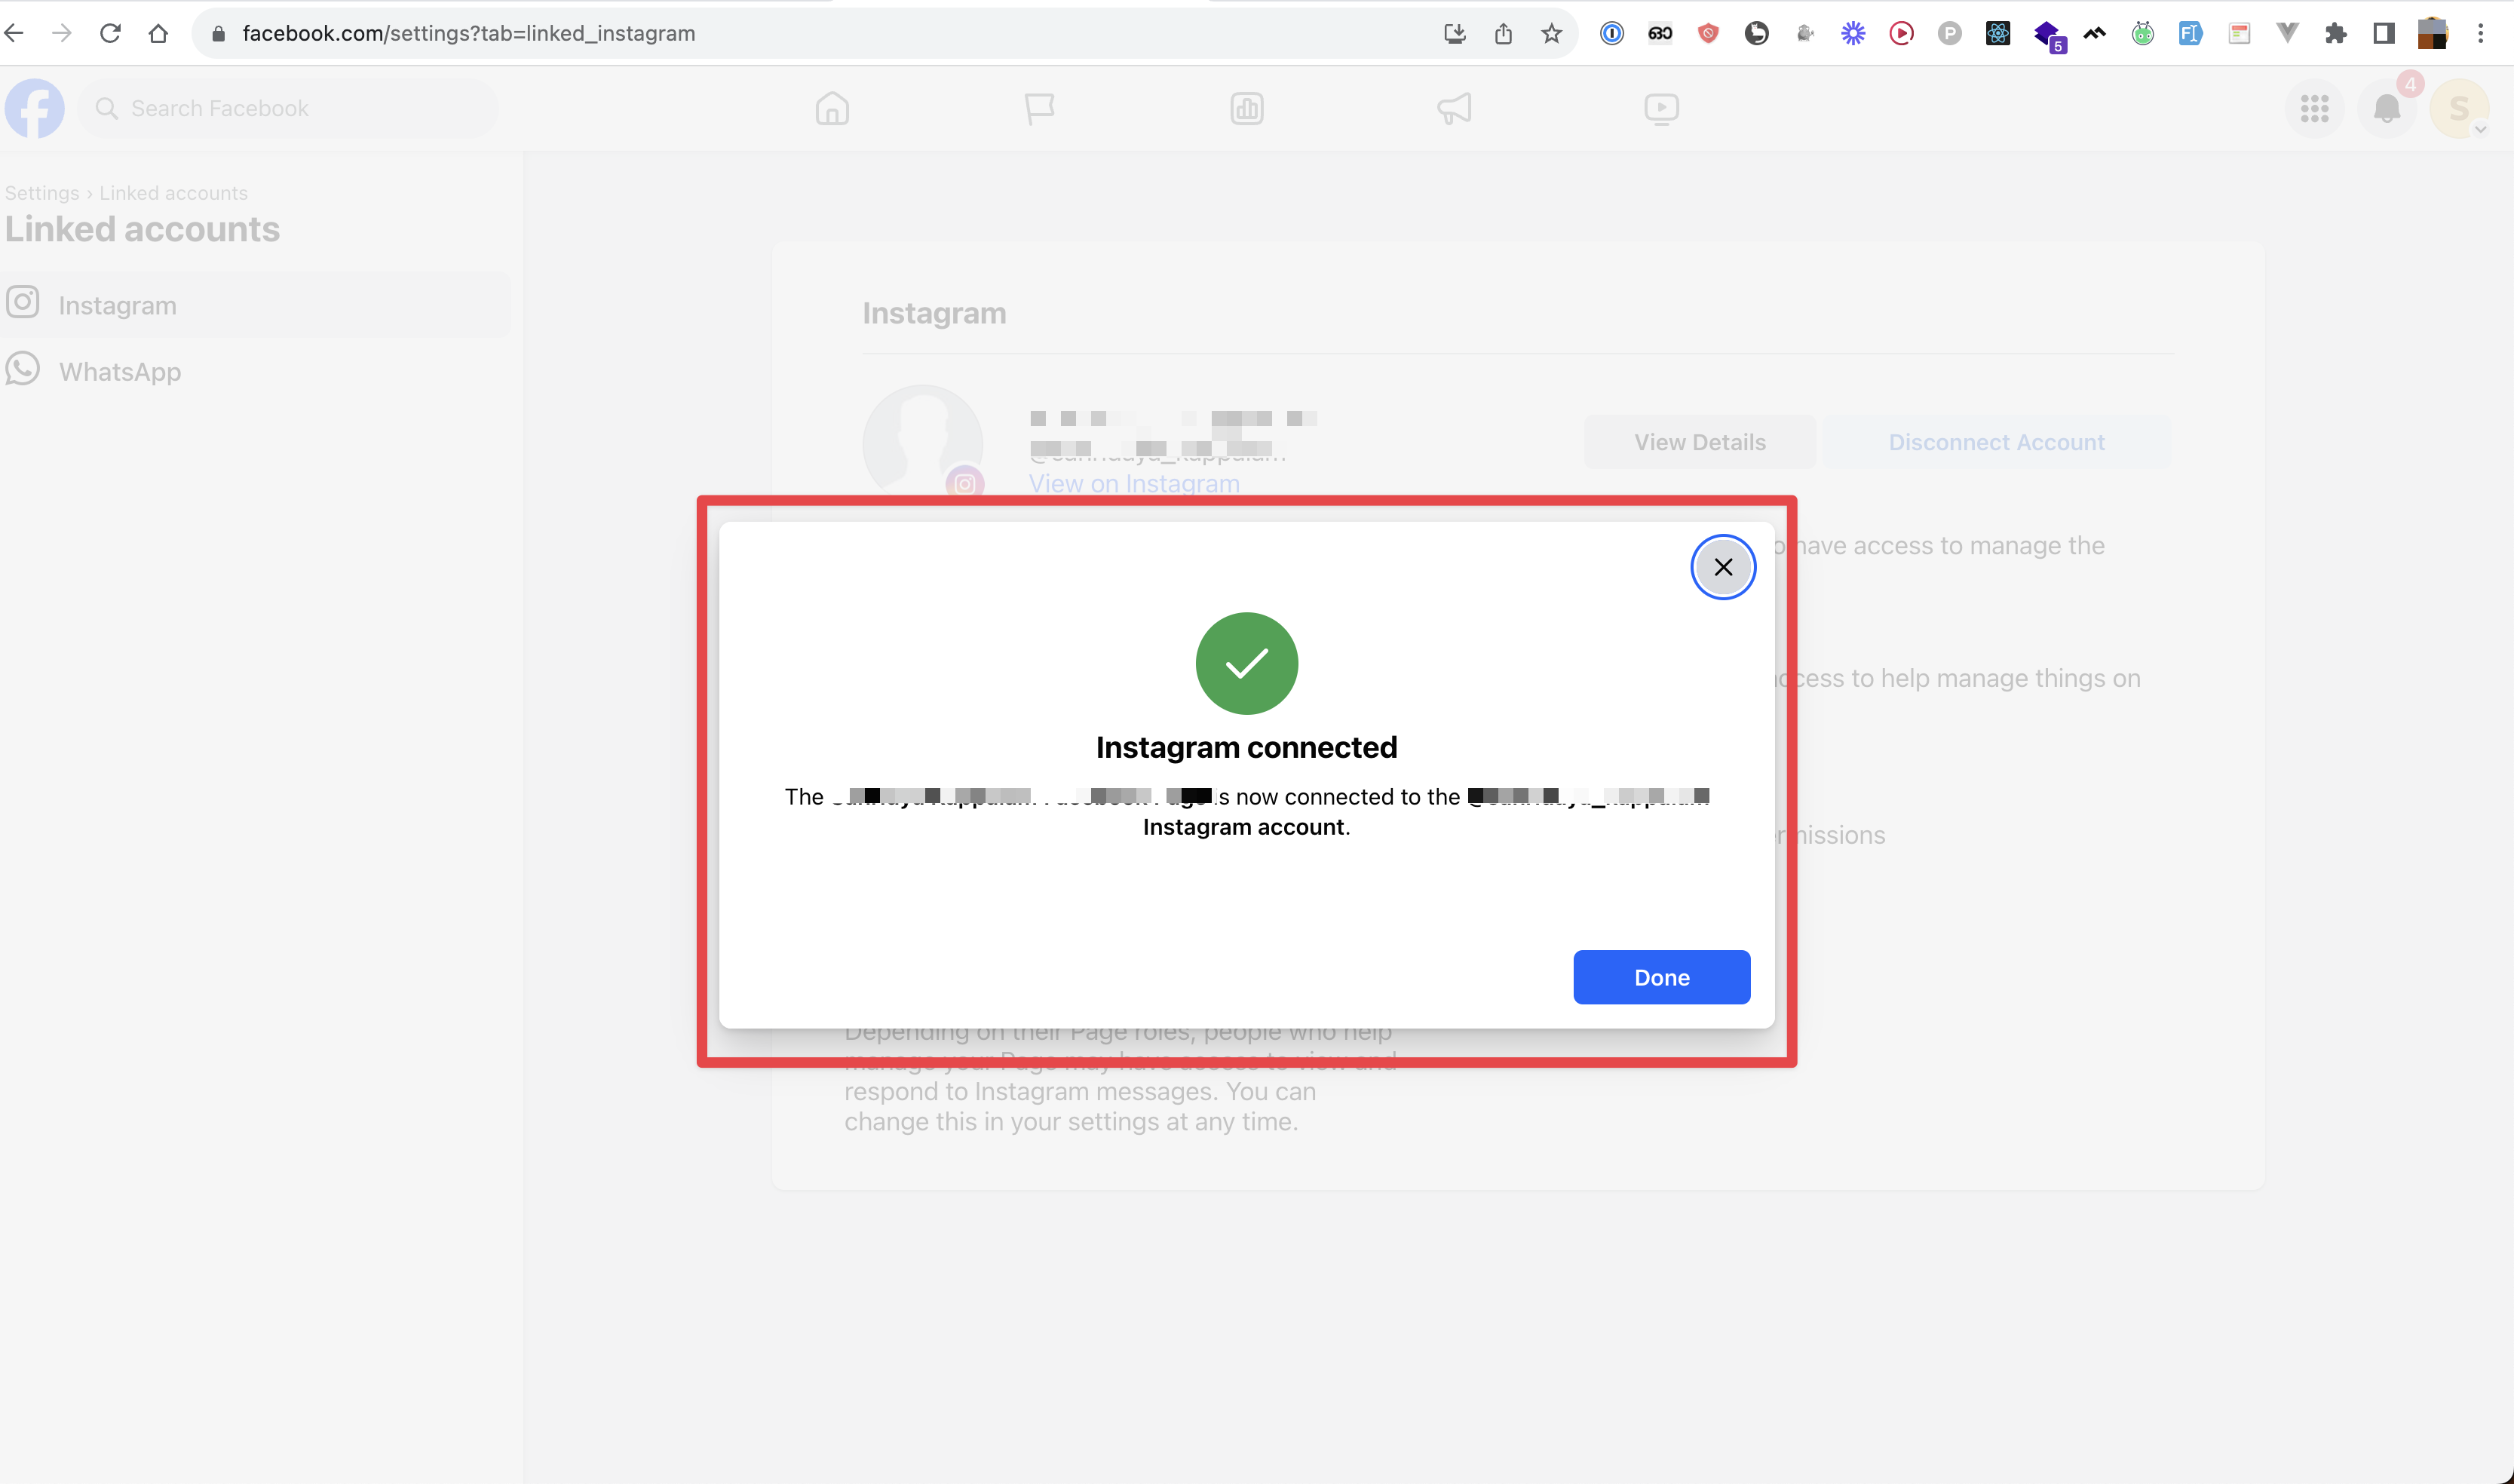
- If everything is okay, you will see the message "Instagram connected.”
- Head over to Chatwoot and create a Messenger inbox. Please refer to this guide for more details on creating a Messenger inbox in Chatwoot.
So whenever you receive any message on Instagram, it will redirect to your Facebook page.
Testing the Instagram channel
Until the application is approved for production, Facebook wouldn't send the new messages on your instagram to Chatwoot. To test the changes until the app is approved for production. Follow the steps
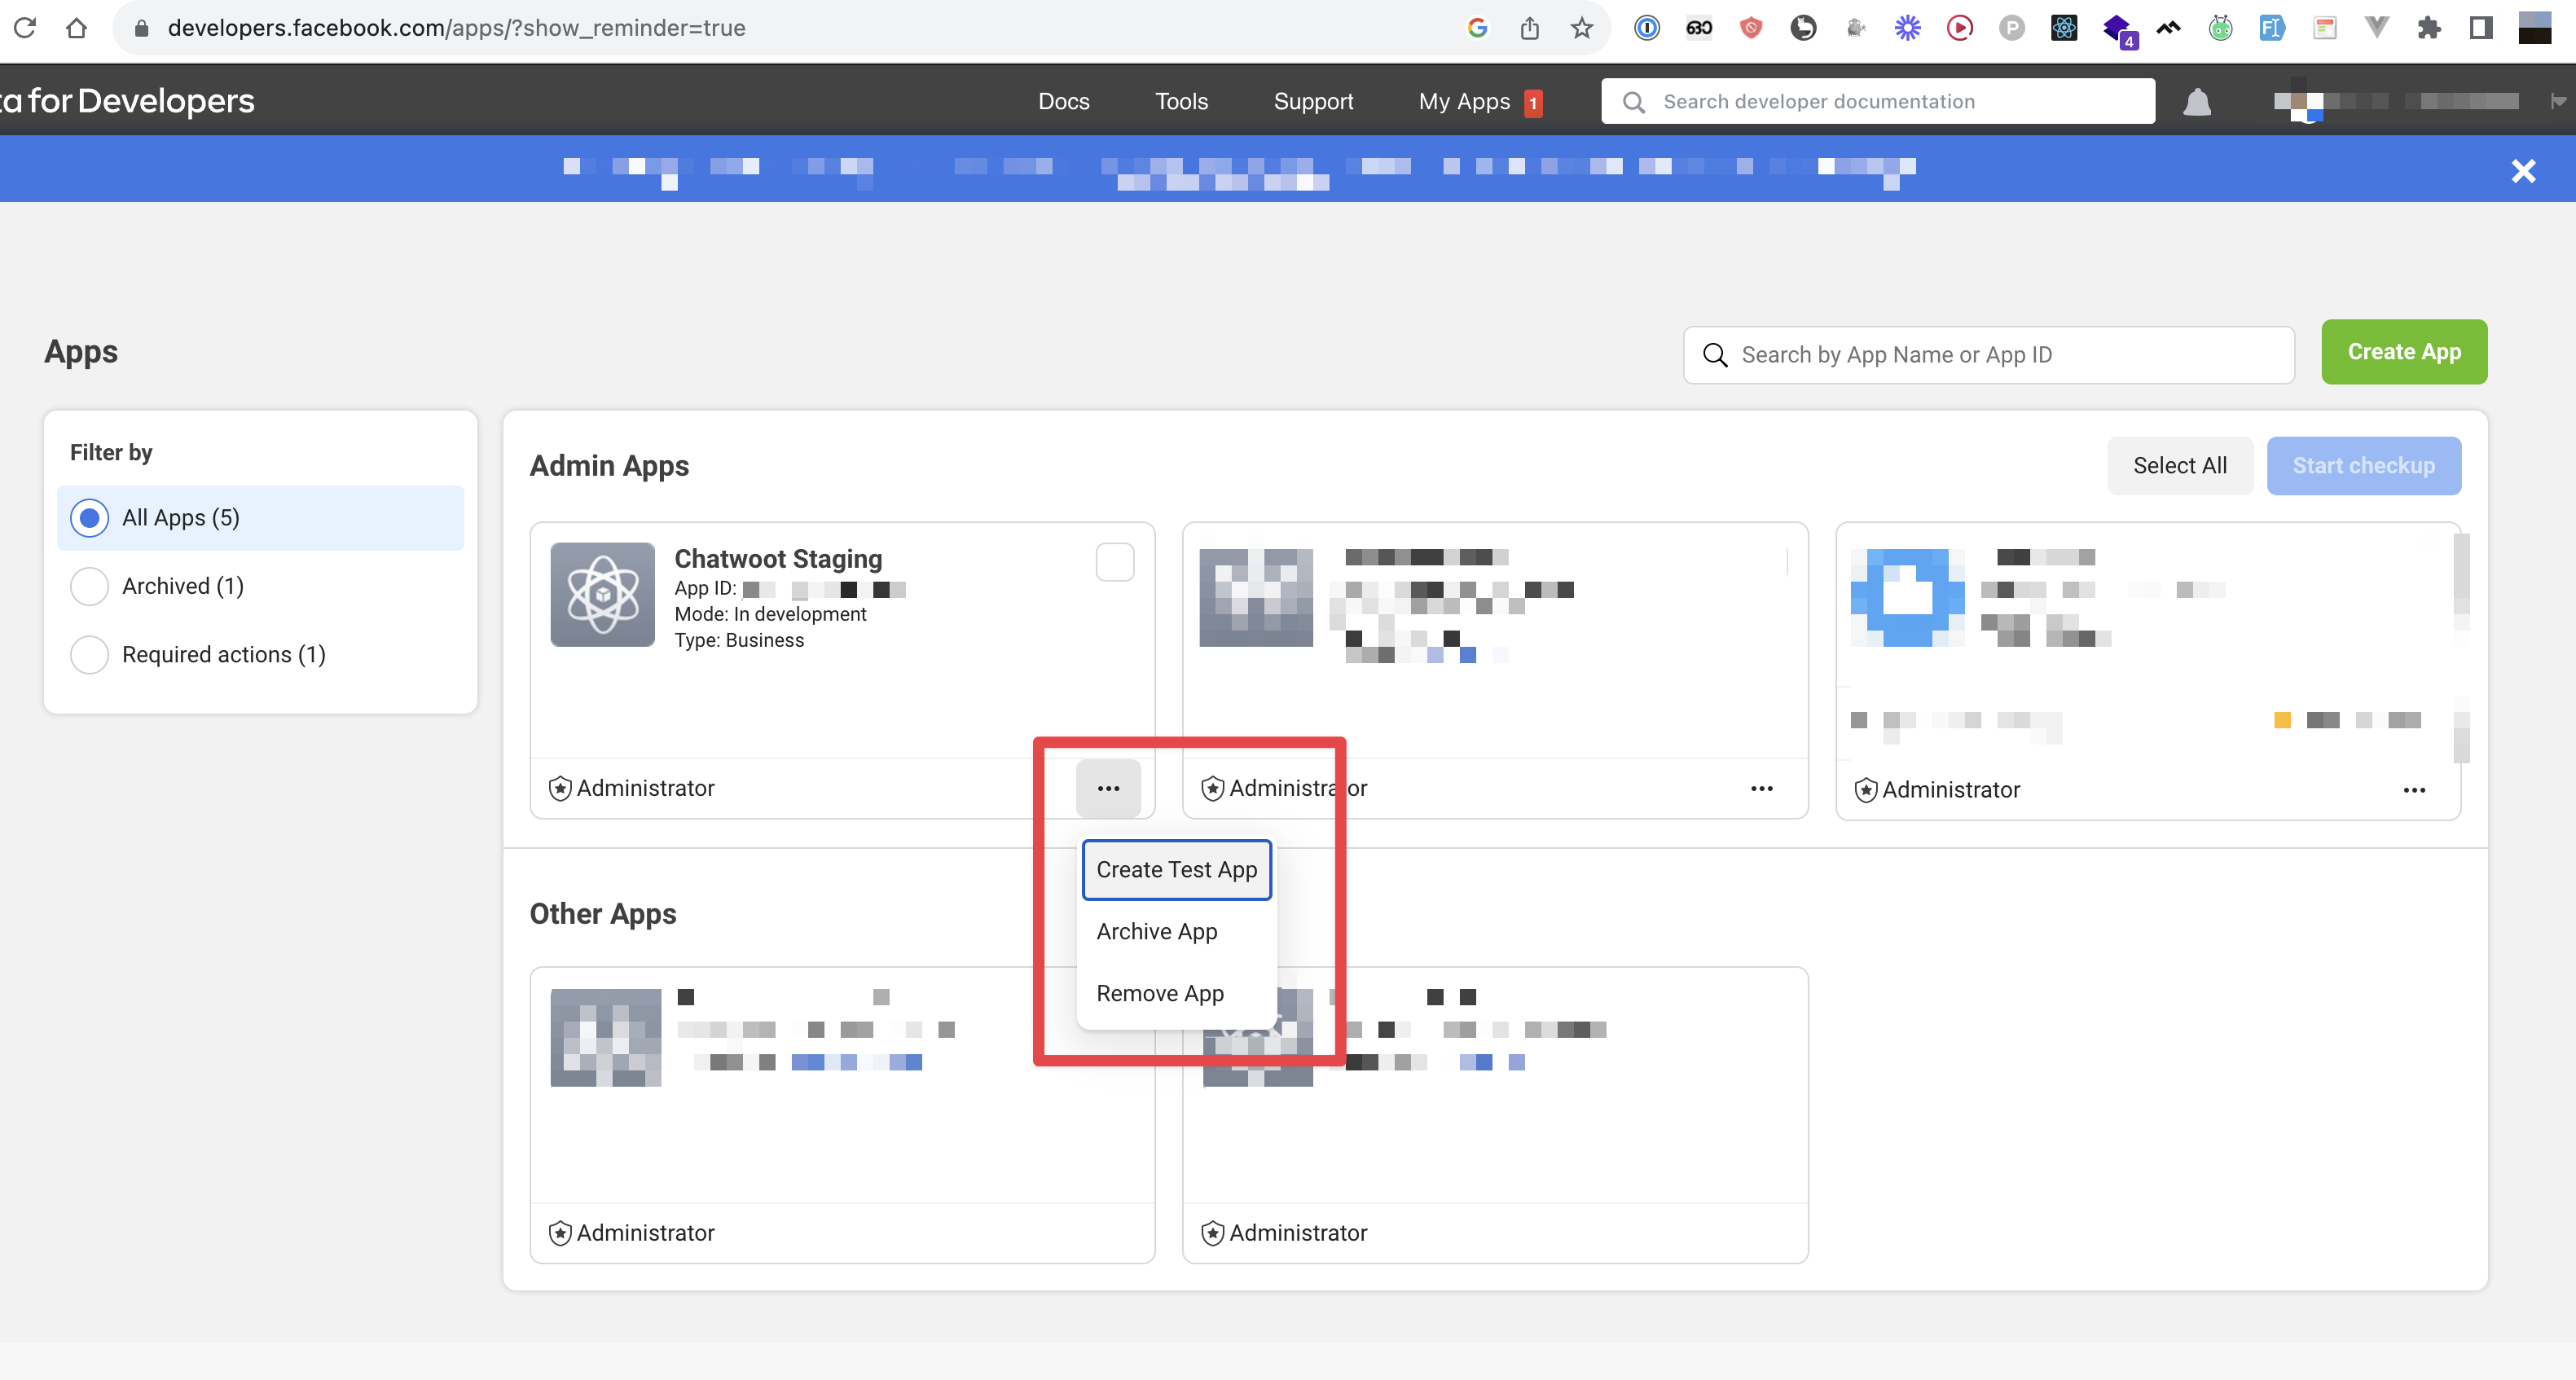
- Create a Test app for your app.
-
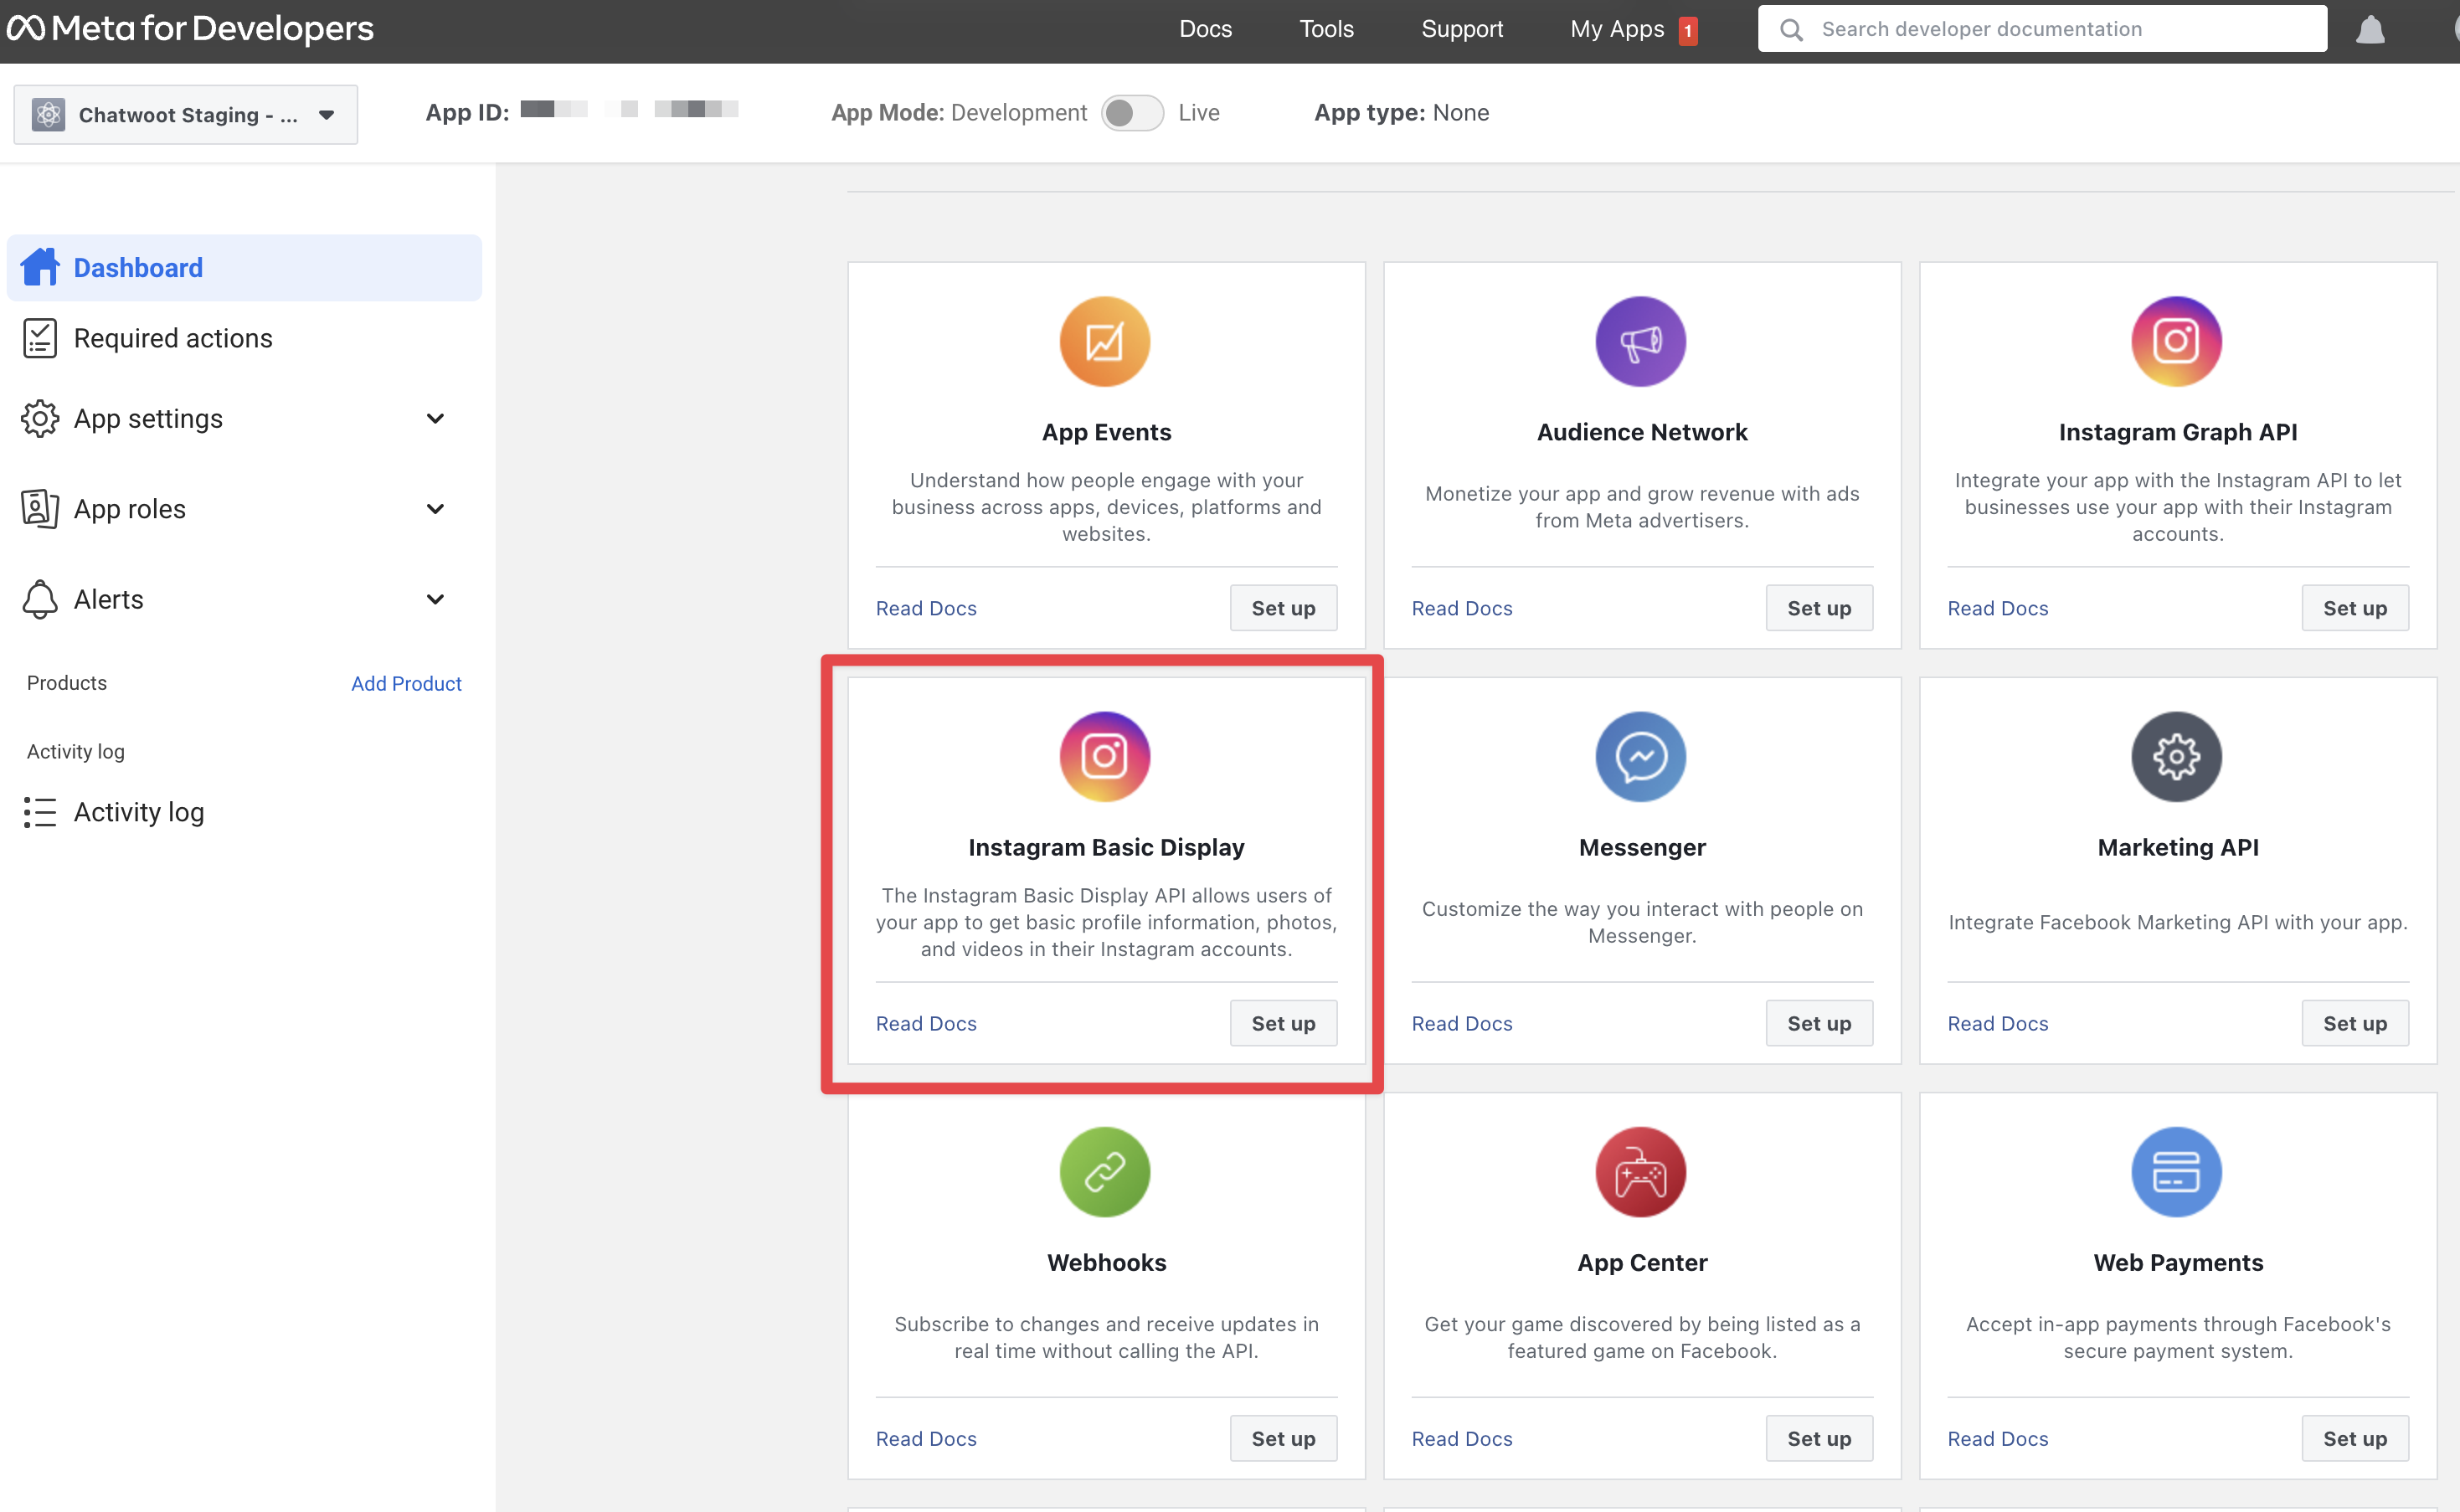
Add the
Instagram Graph APIproduct via the Facebook app dashboard. -
Go to the app settings and select "Webhooks". From there, choose Instagram and click on the "Subscribe to this object" button.
-
Provide the Callback URL as
{your_chatwoot_installation_url}/webhooks/instagramand the Verify token asIG_VERIFY_TOKENfrom your environment variable. -
Open the test app and add extra product for the test app: Instagram Basic Display
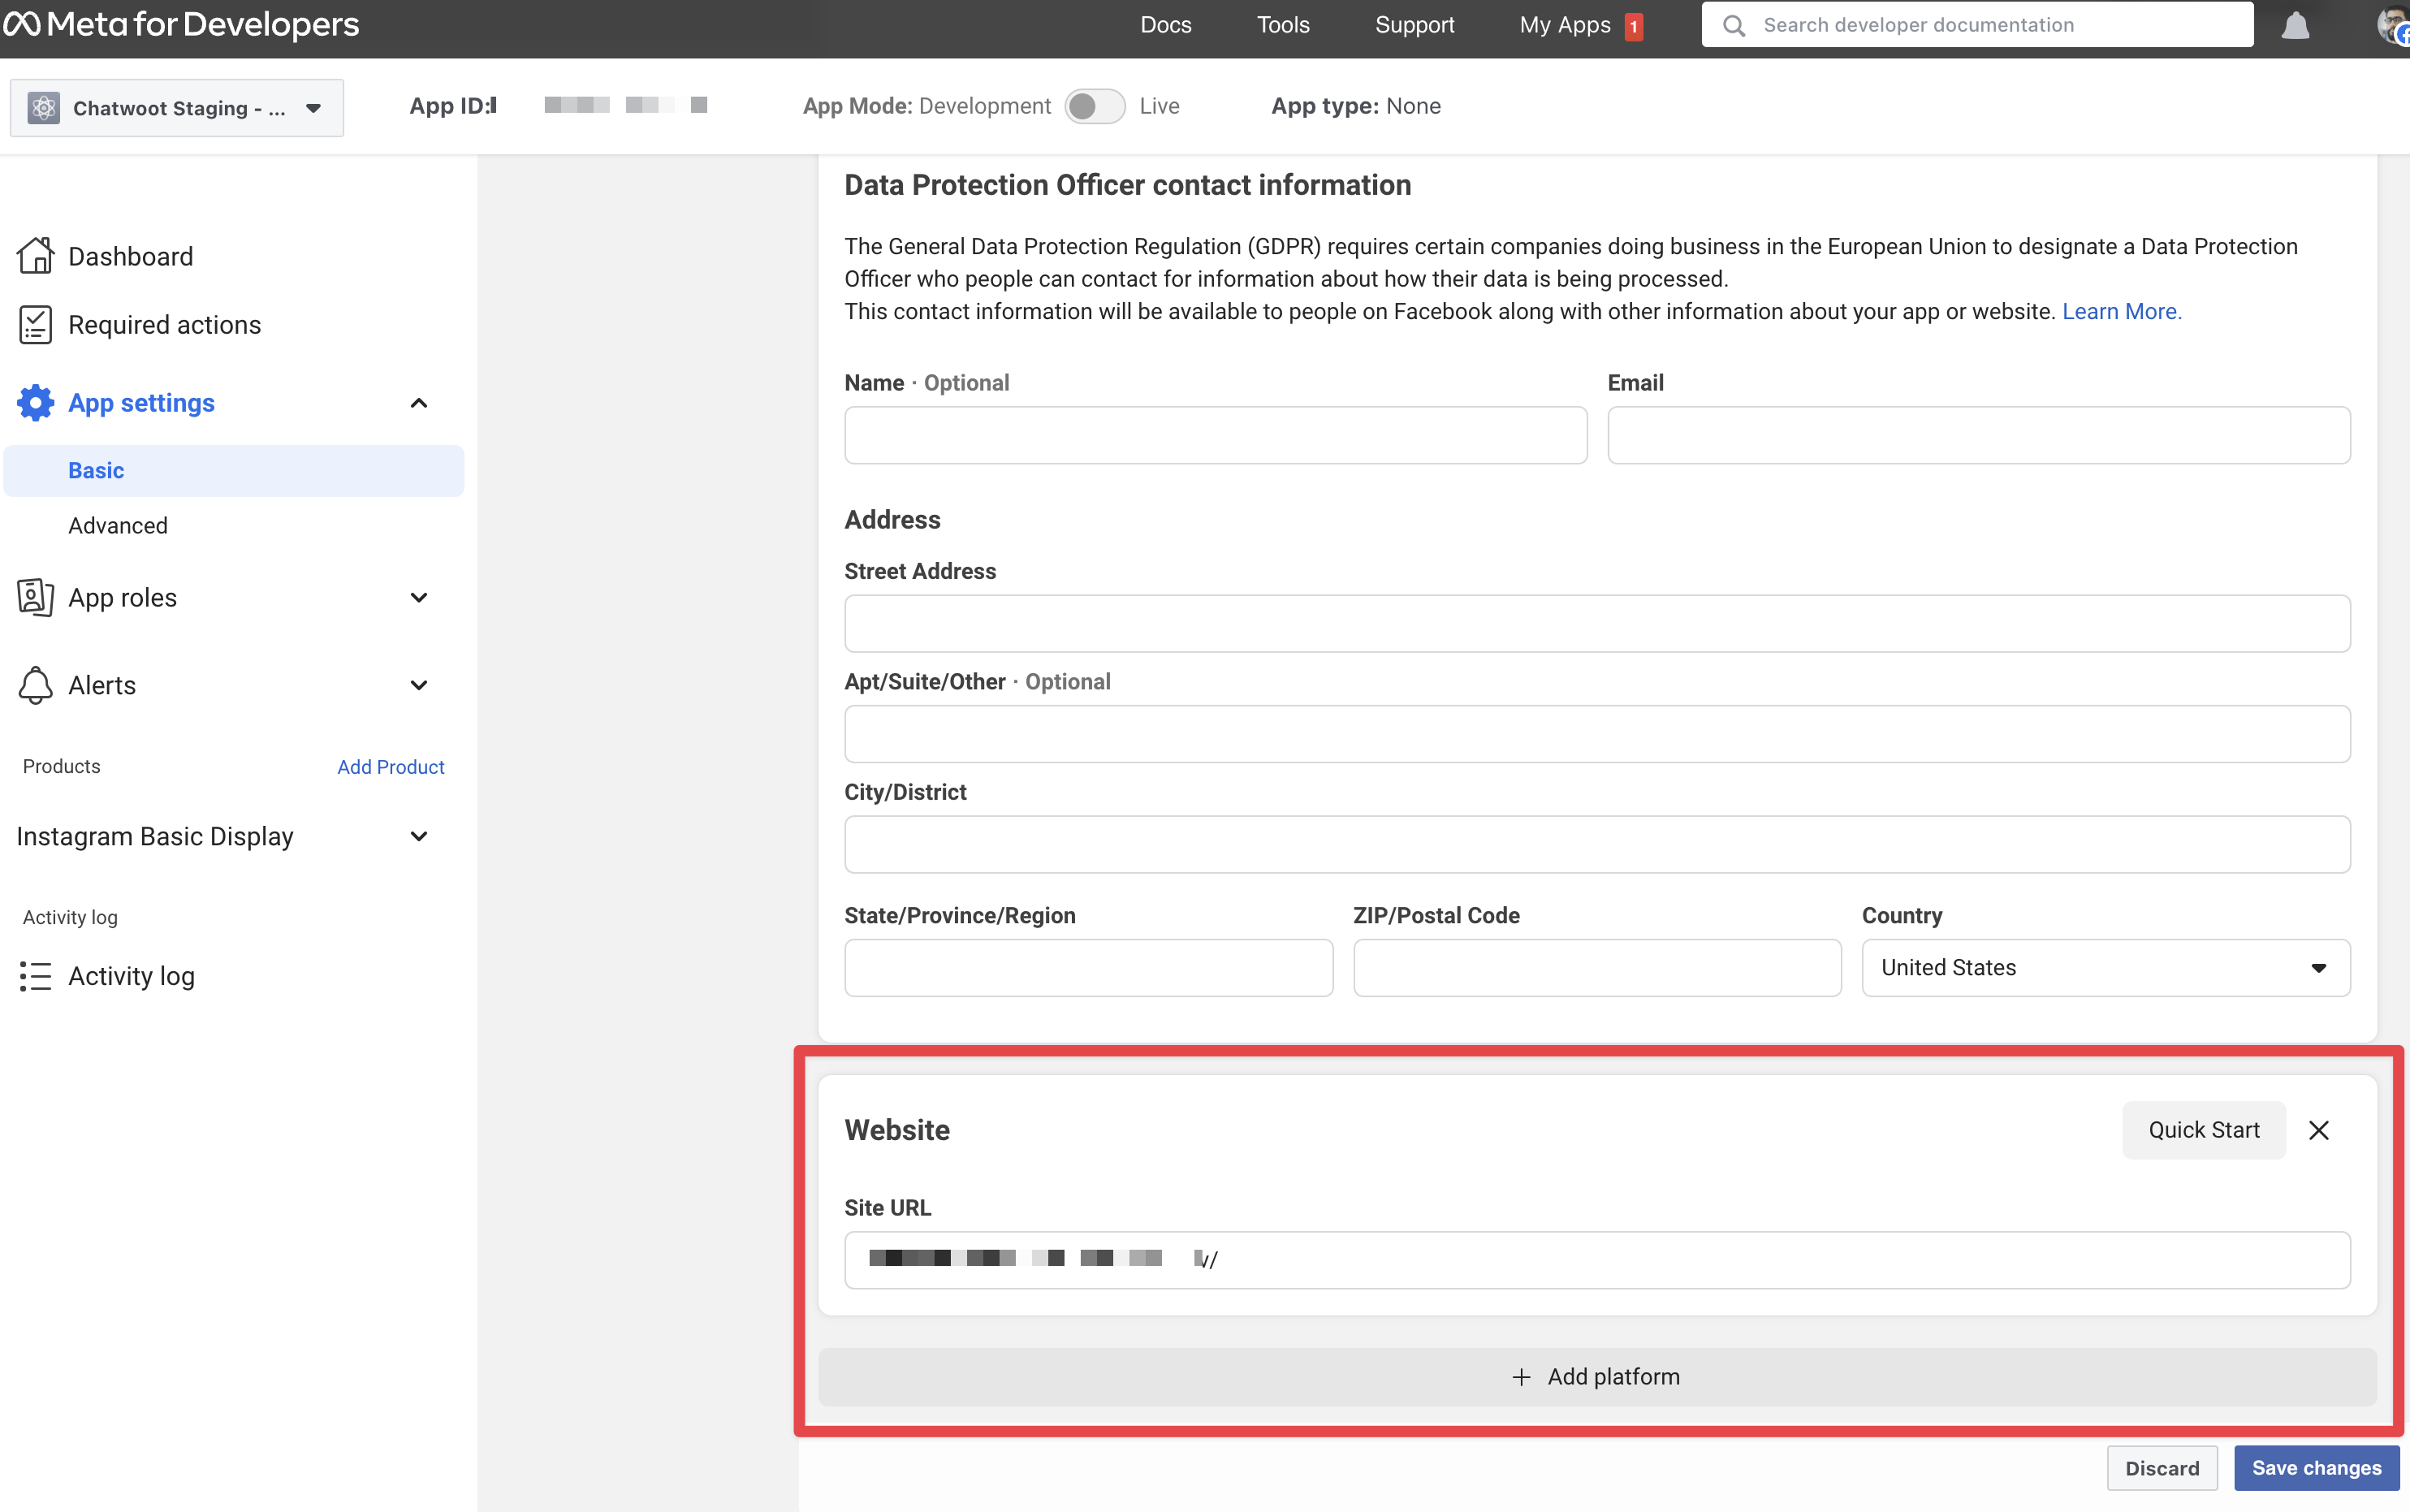
- In the app settings, add the platform "Website" and give
Site URLas your installation URL.
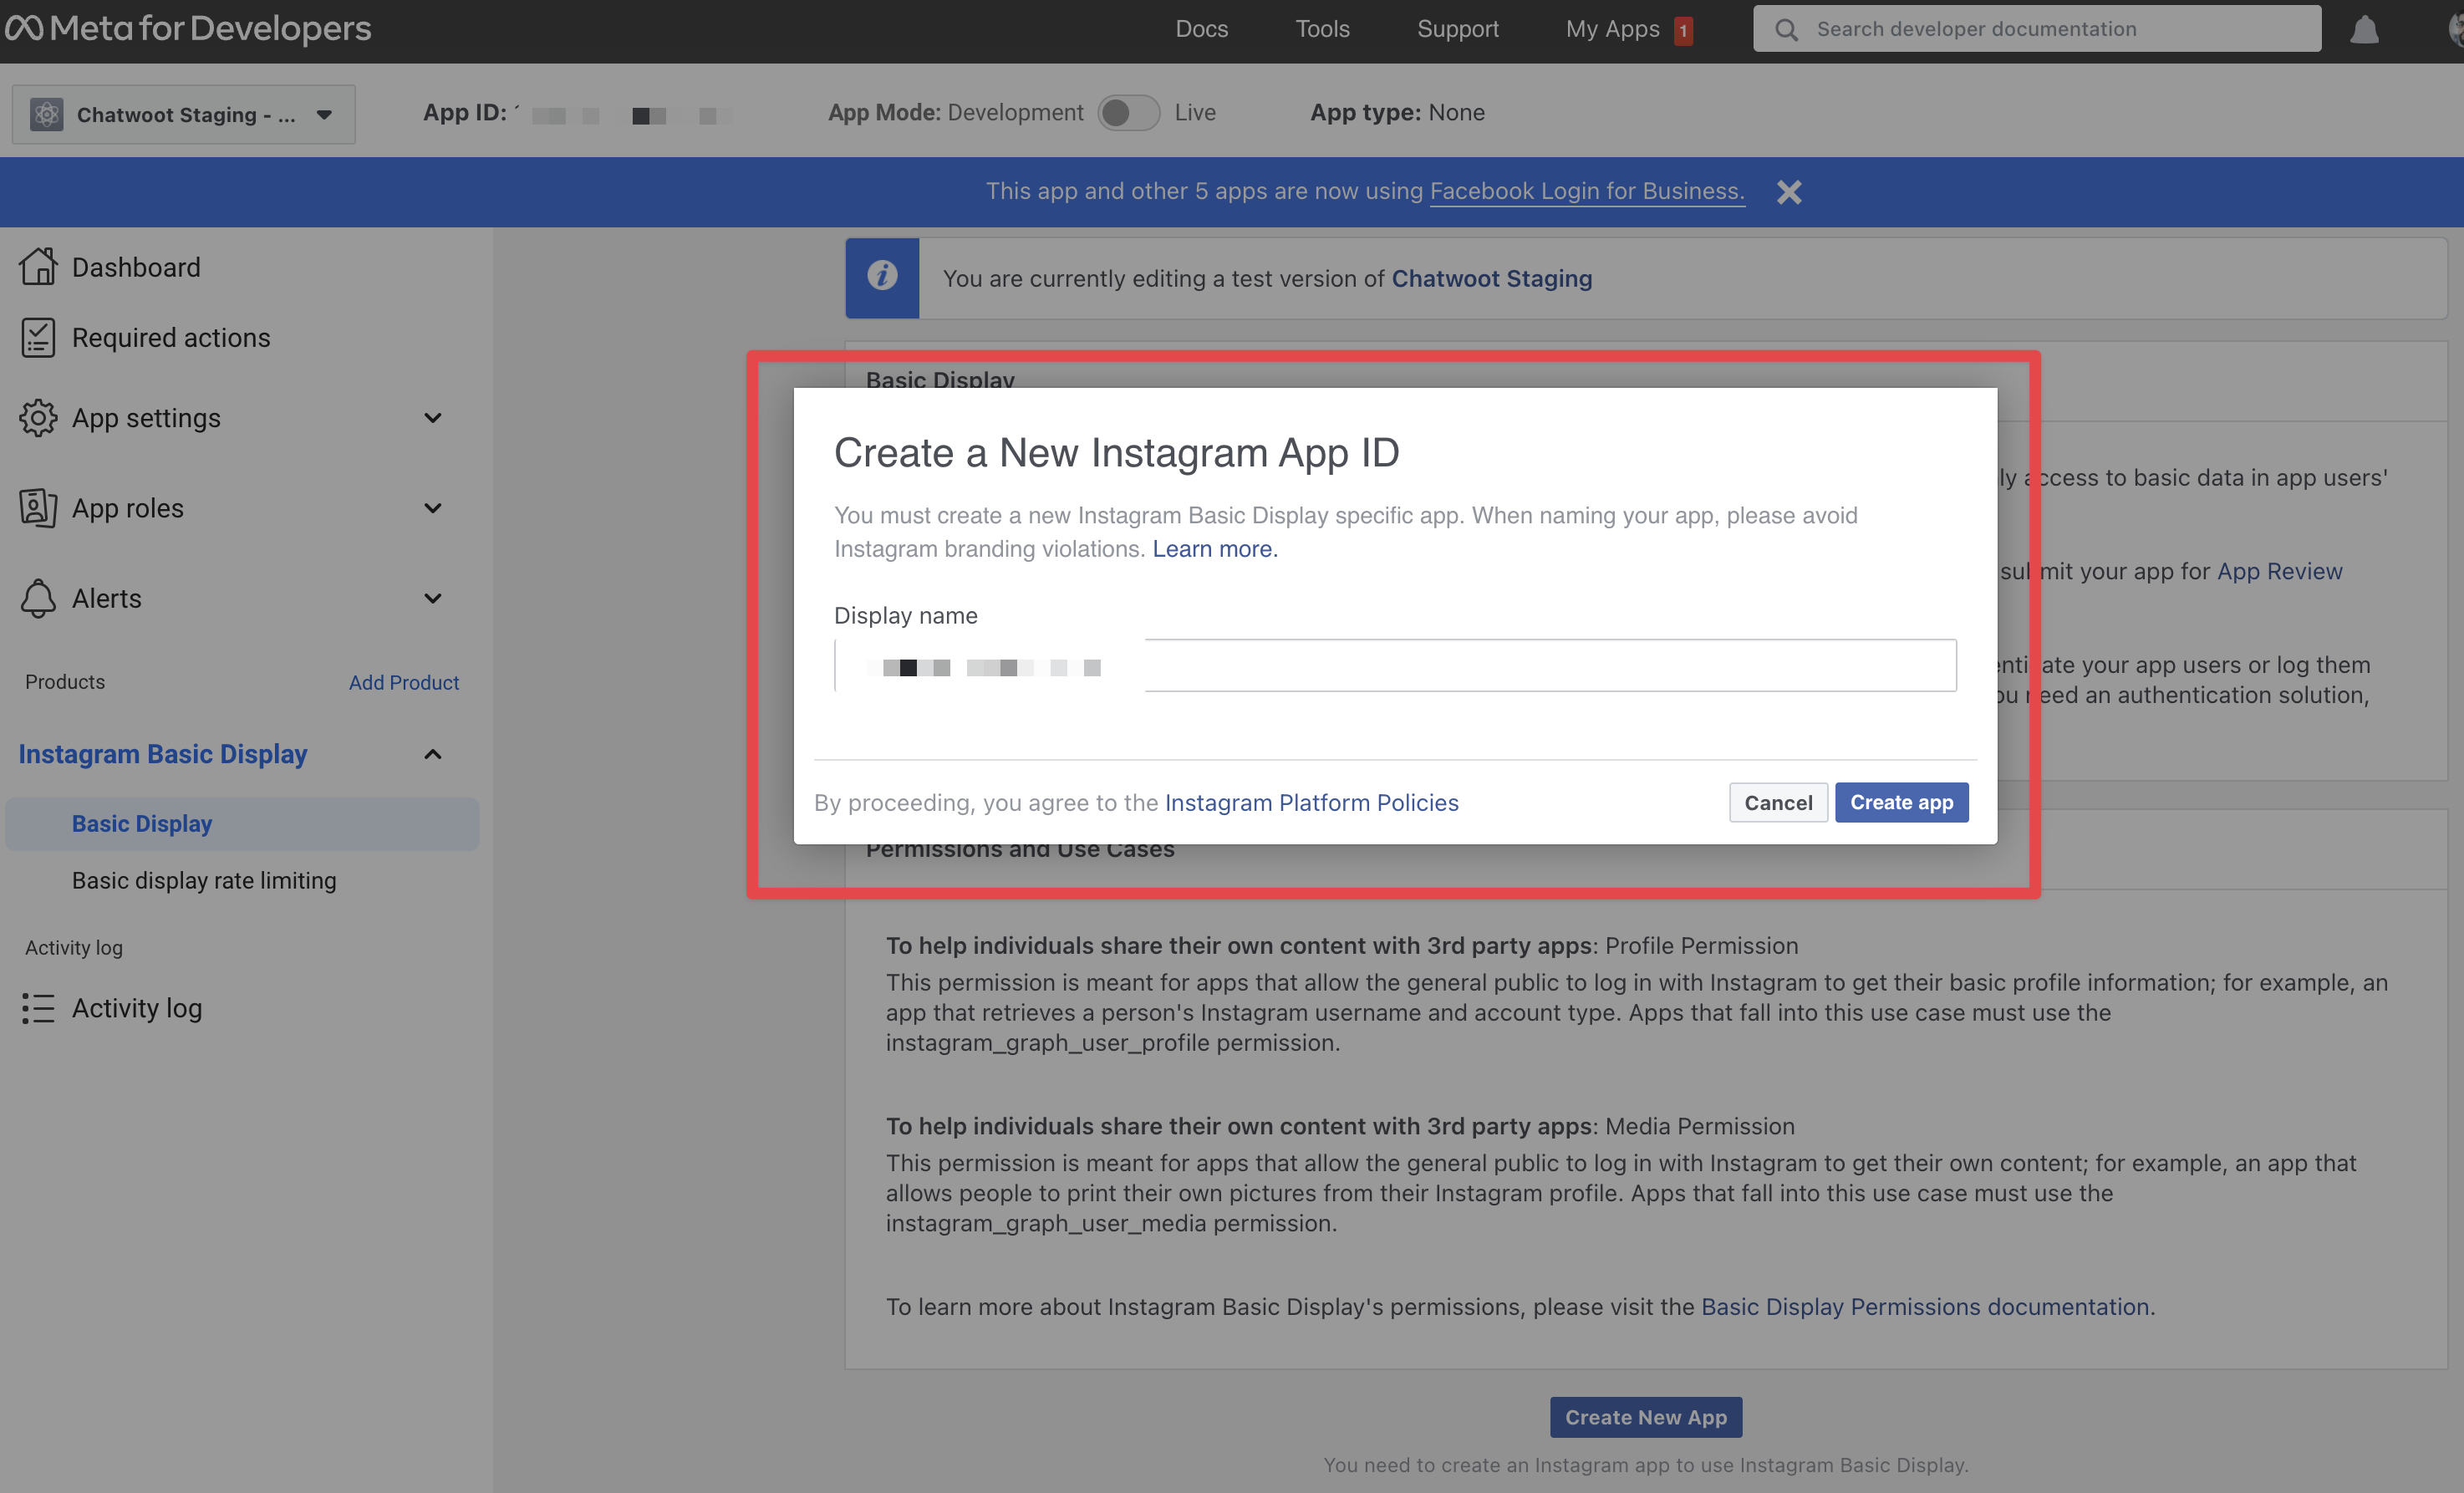
- Head over to the Instagram Basic Display section and create a new app.
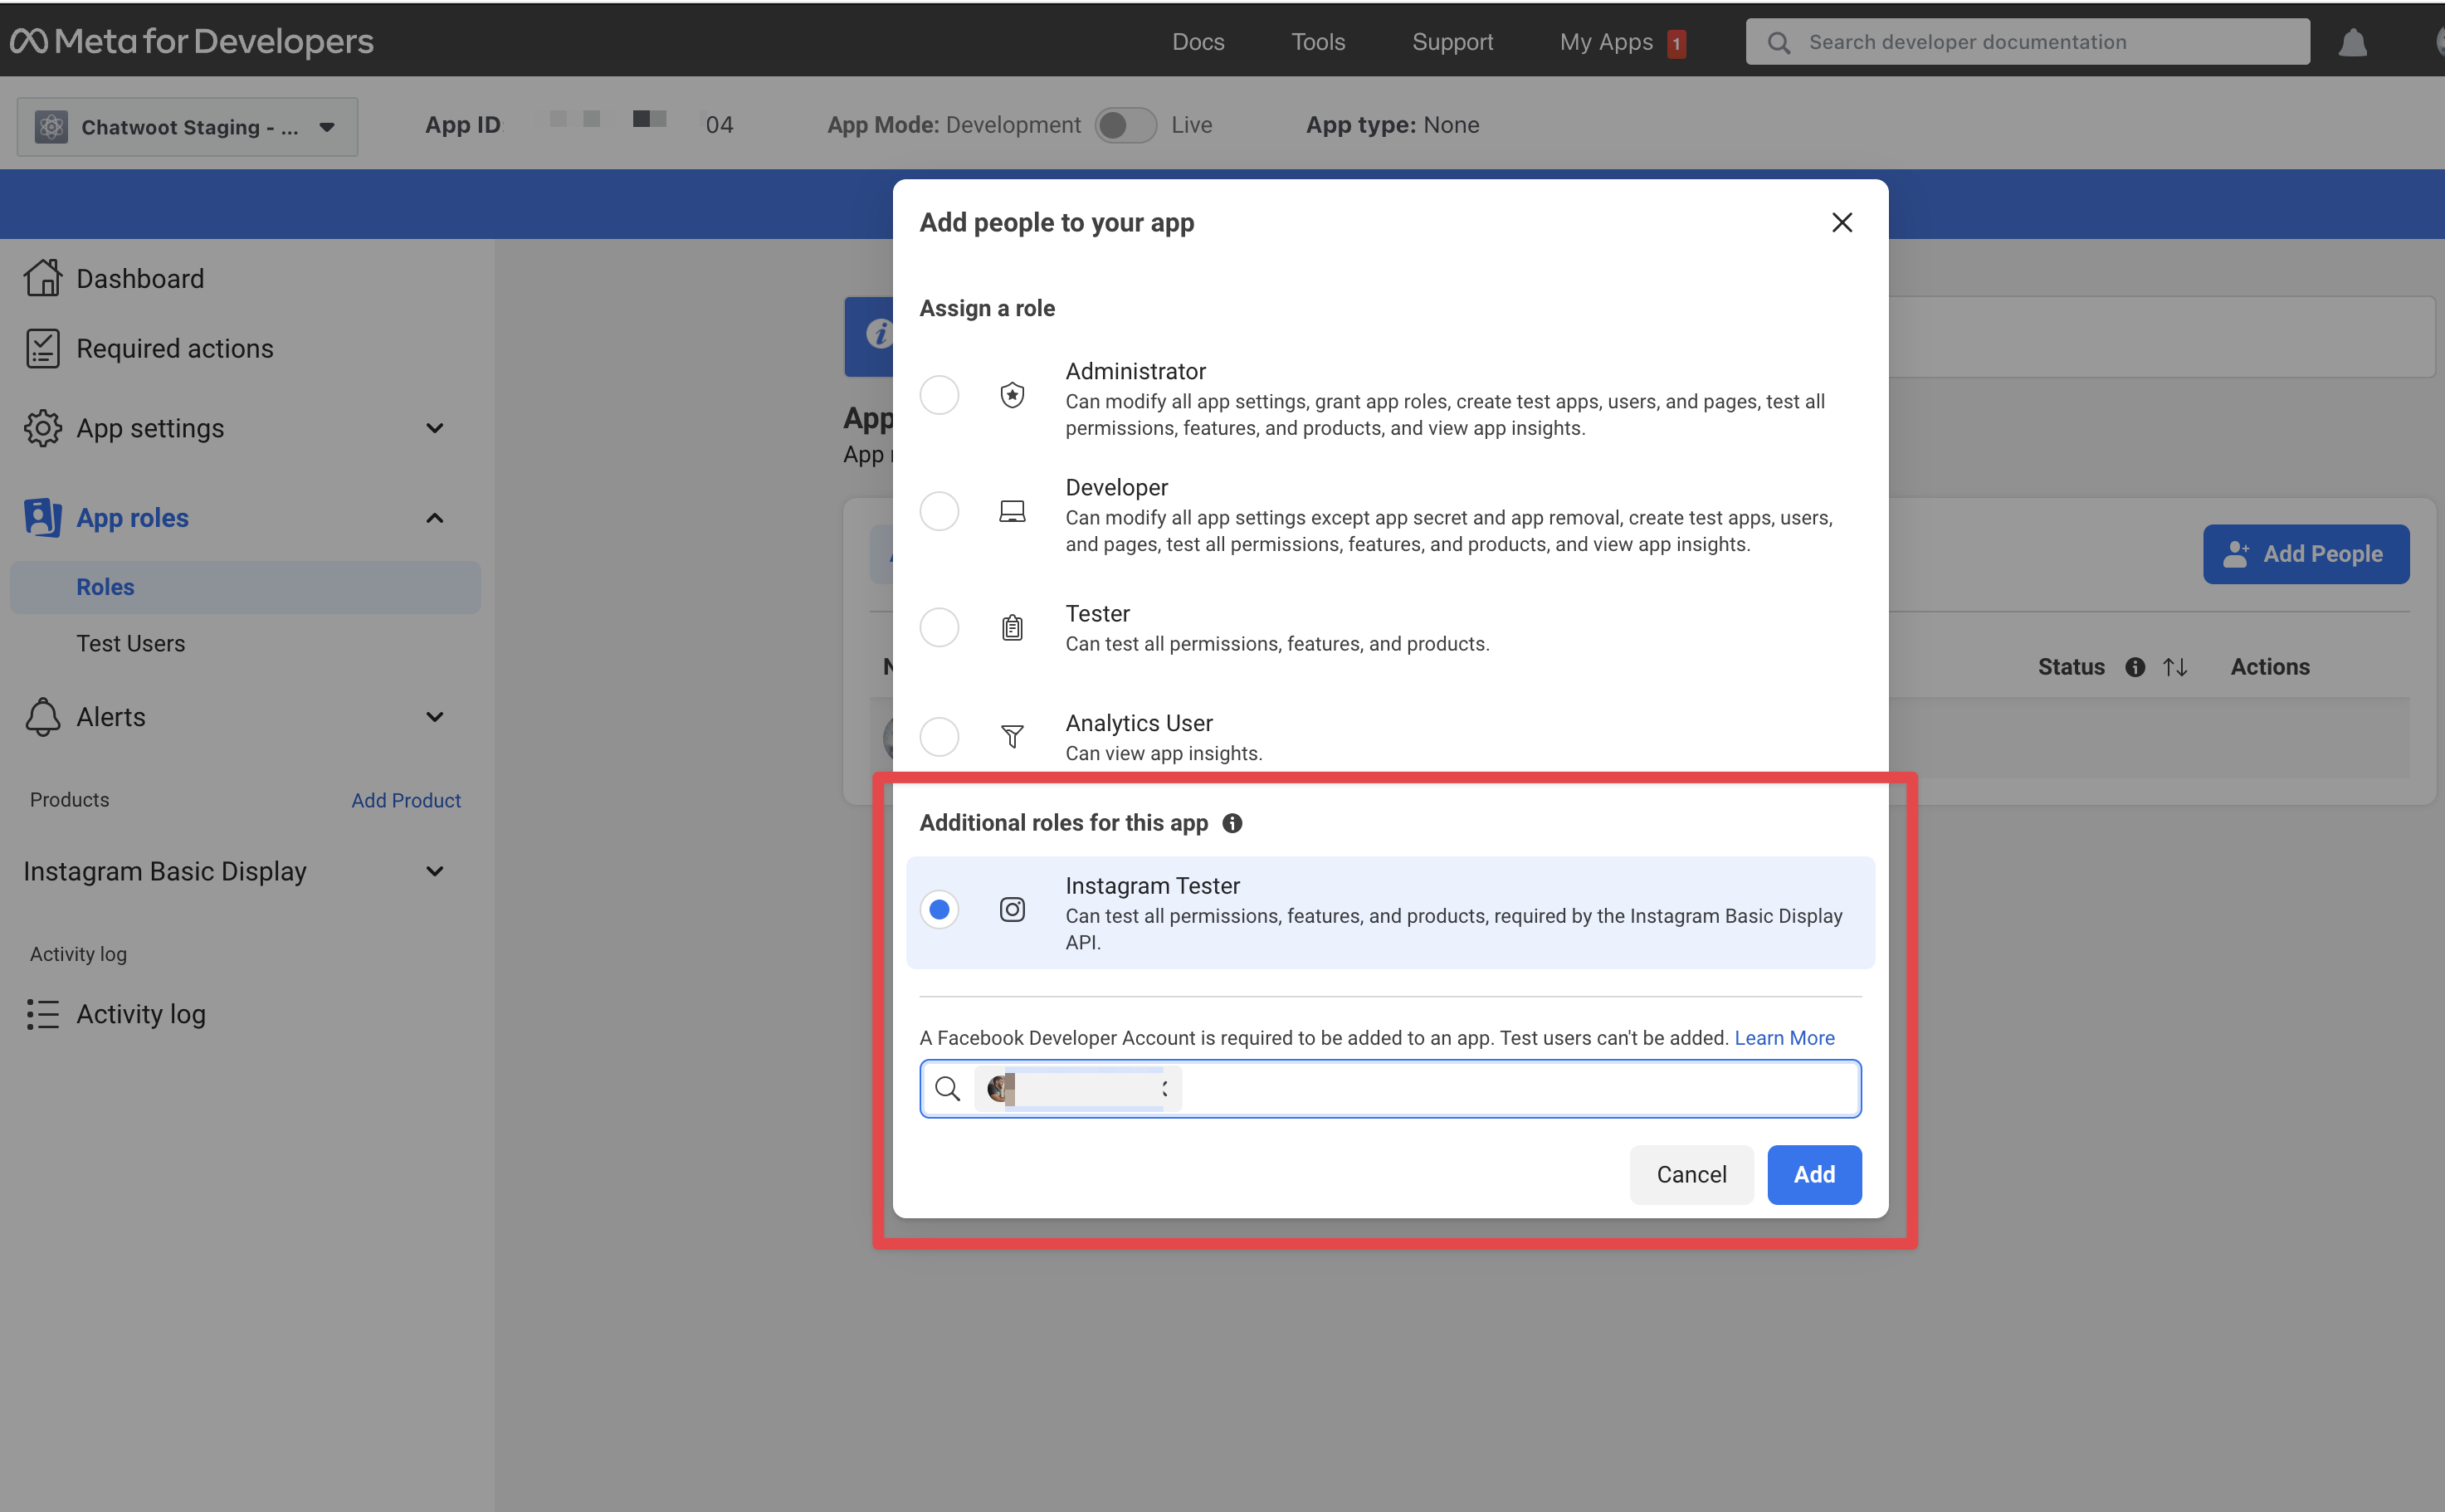
- Add Instagram Testers by clicking "Add or Remove Instagram Testers" button.
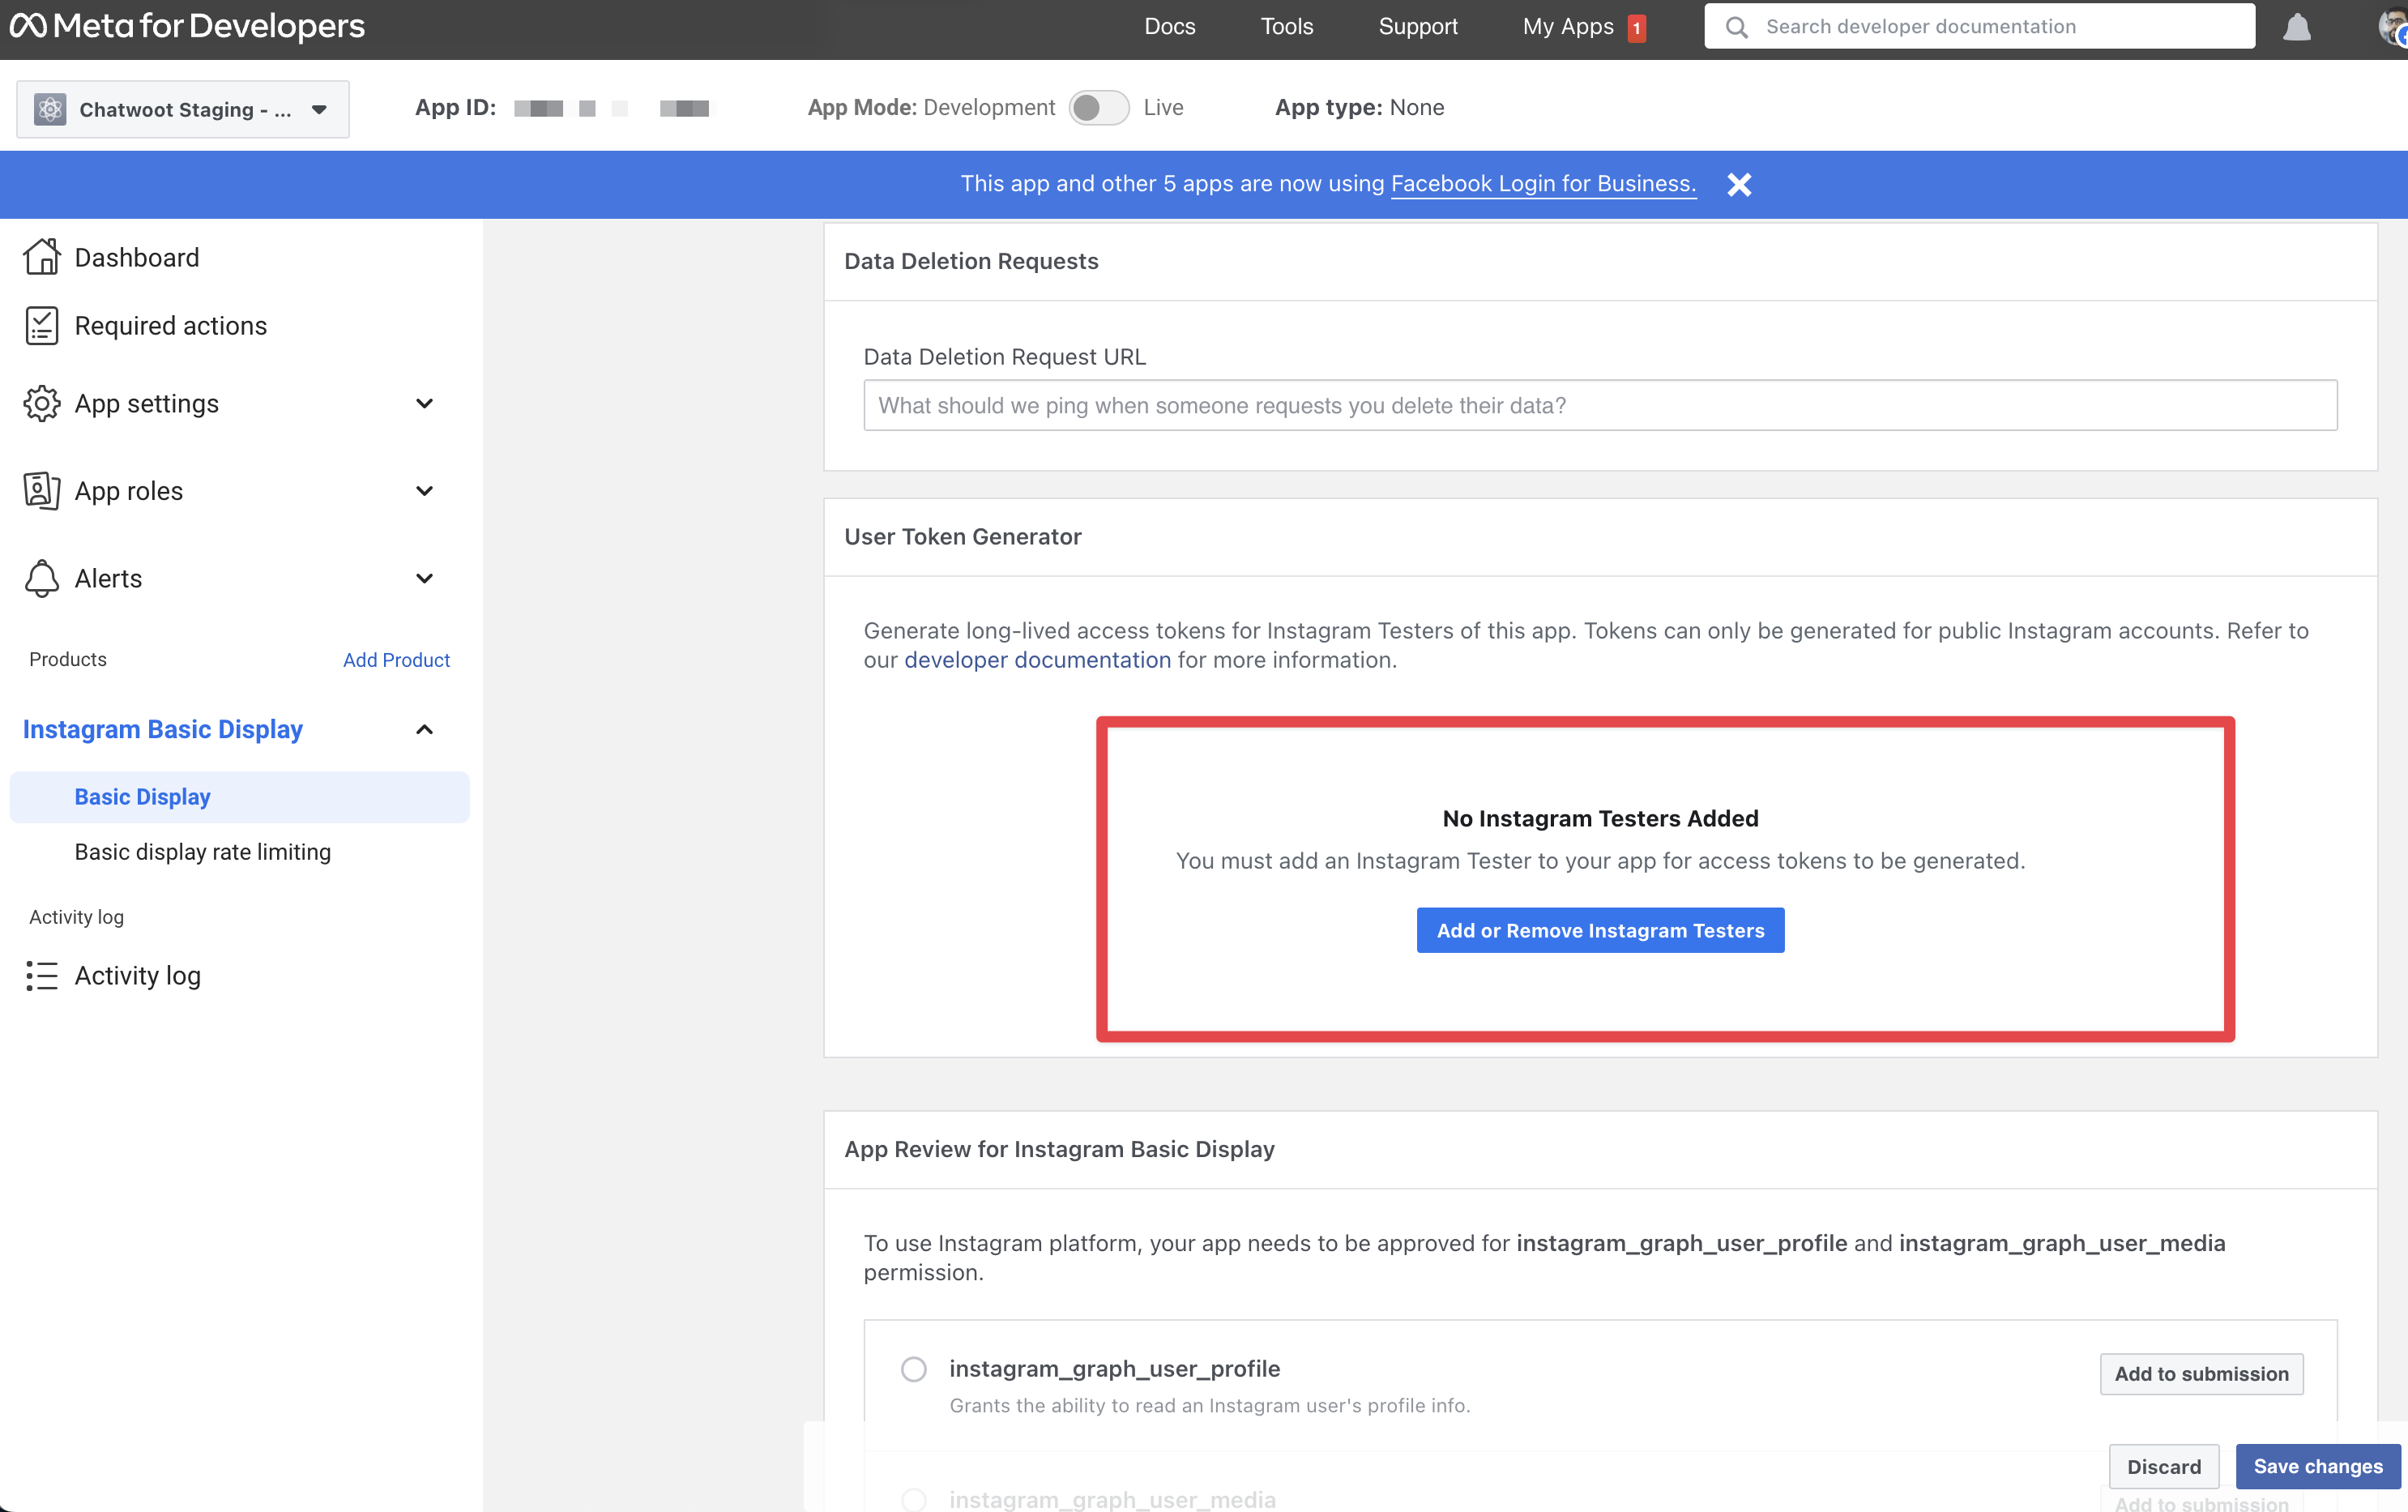
- Make sure that you have selected the role
Instagram Testerwhile creating a new tester.
- Click on Edit subscriptions under Webhook > Instagram and subscribe to the following,
message_reactions
messages
messaging_seen

Note: You should do this step for both normal and test apps.
- Head over to Chatwoot and create a Messenger inbox. Please refer to this guide for more details on creating a Messenger inbox in Chatwoot. . Send a message to the connected Instagram account from Instagram Testers, and it should appear in Chatwoot now
Going into production.
Before you can start using your Facebook app in production, you will have to get it verified by Facebook. Refer to the docs on getting your app verified.
Obtain advanced access to the required permissions mentioned below for your Facebook app
instagram_manage_messages
instagram_basic
pages_show_list
pages_manage_metadata
pages_messaging
business_management
Note: If your facebook app's version is more than 7.0 then you will need extra permission according to facebook's updated policy. Make sure you get permission for.
pages_read_engagement
Developing or Testing Facebook Integration in your machine
Install ngrok on your machine. This will be required since Facebook Messenger APIs will only communicate via https.
brew cask install ngrok
Configure ngrok to route to your Rails server port.
ngrok http 3000
Go to the Facebook developers page and navigate into your app settings. Add localhost as your app domain and add a privacy policy URL in the app settings.
In the Webhook > Instagram settings shown in the above image, configure the callback url with the following value.
{your_ngrok_url}/webhooks/instagram
Update verify token in your Chatwoot environment variables.
You will also have to add a Facebook page to your Access Tokens section in your Messenger settings page.
Restart the Chatwoot local server. Then, your Chatwoot setup will be ready to receive Facebook messages.
Test your local Setup
- After finishing the setup above, create a Messenger inbox after logging in to your Chatwoot Installation.
- Send a message to your Facebook Page from your Instagram account.
- Wait and confirm incoming requests to
/webhooks/instagramendpoint in your ngrok screen. - You can also verify your callback URL by clicking on Test for the subscribed Instagram fields.
Go to webhook Instagram and click on Test with
v11.0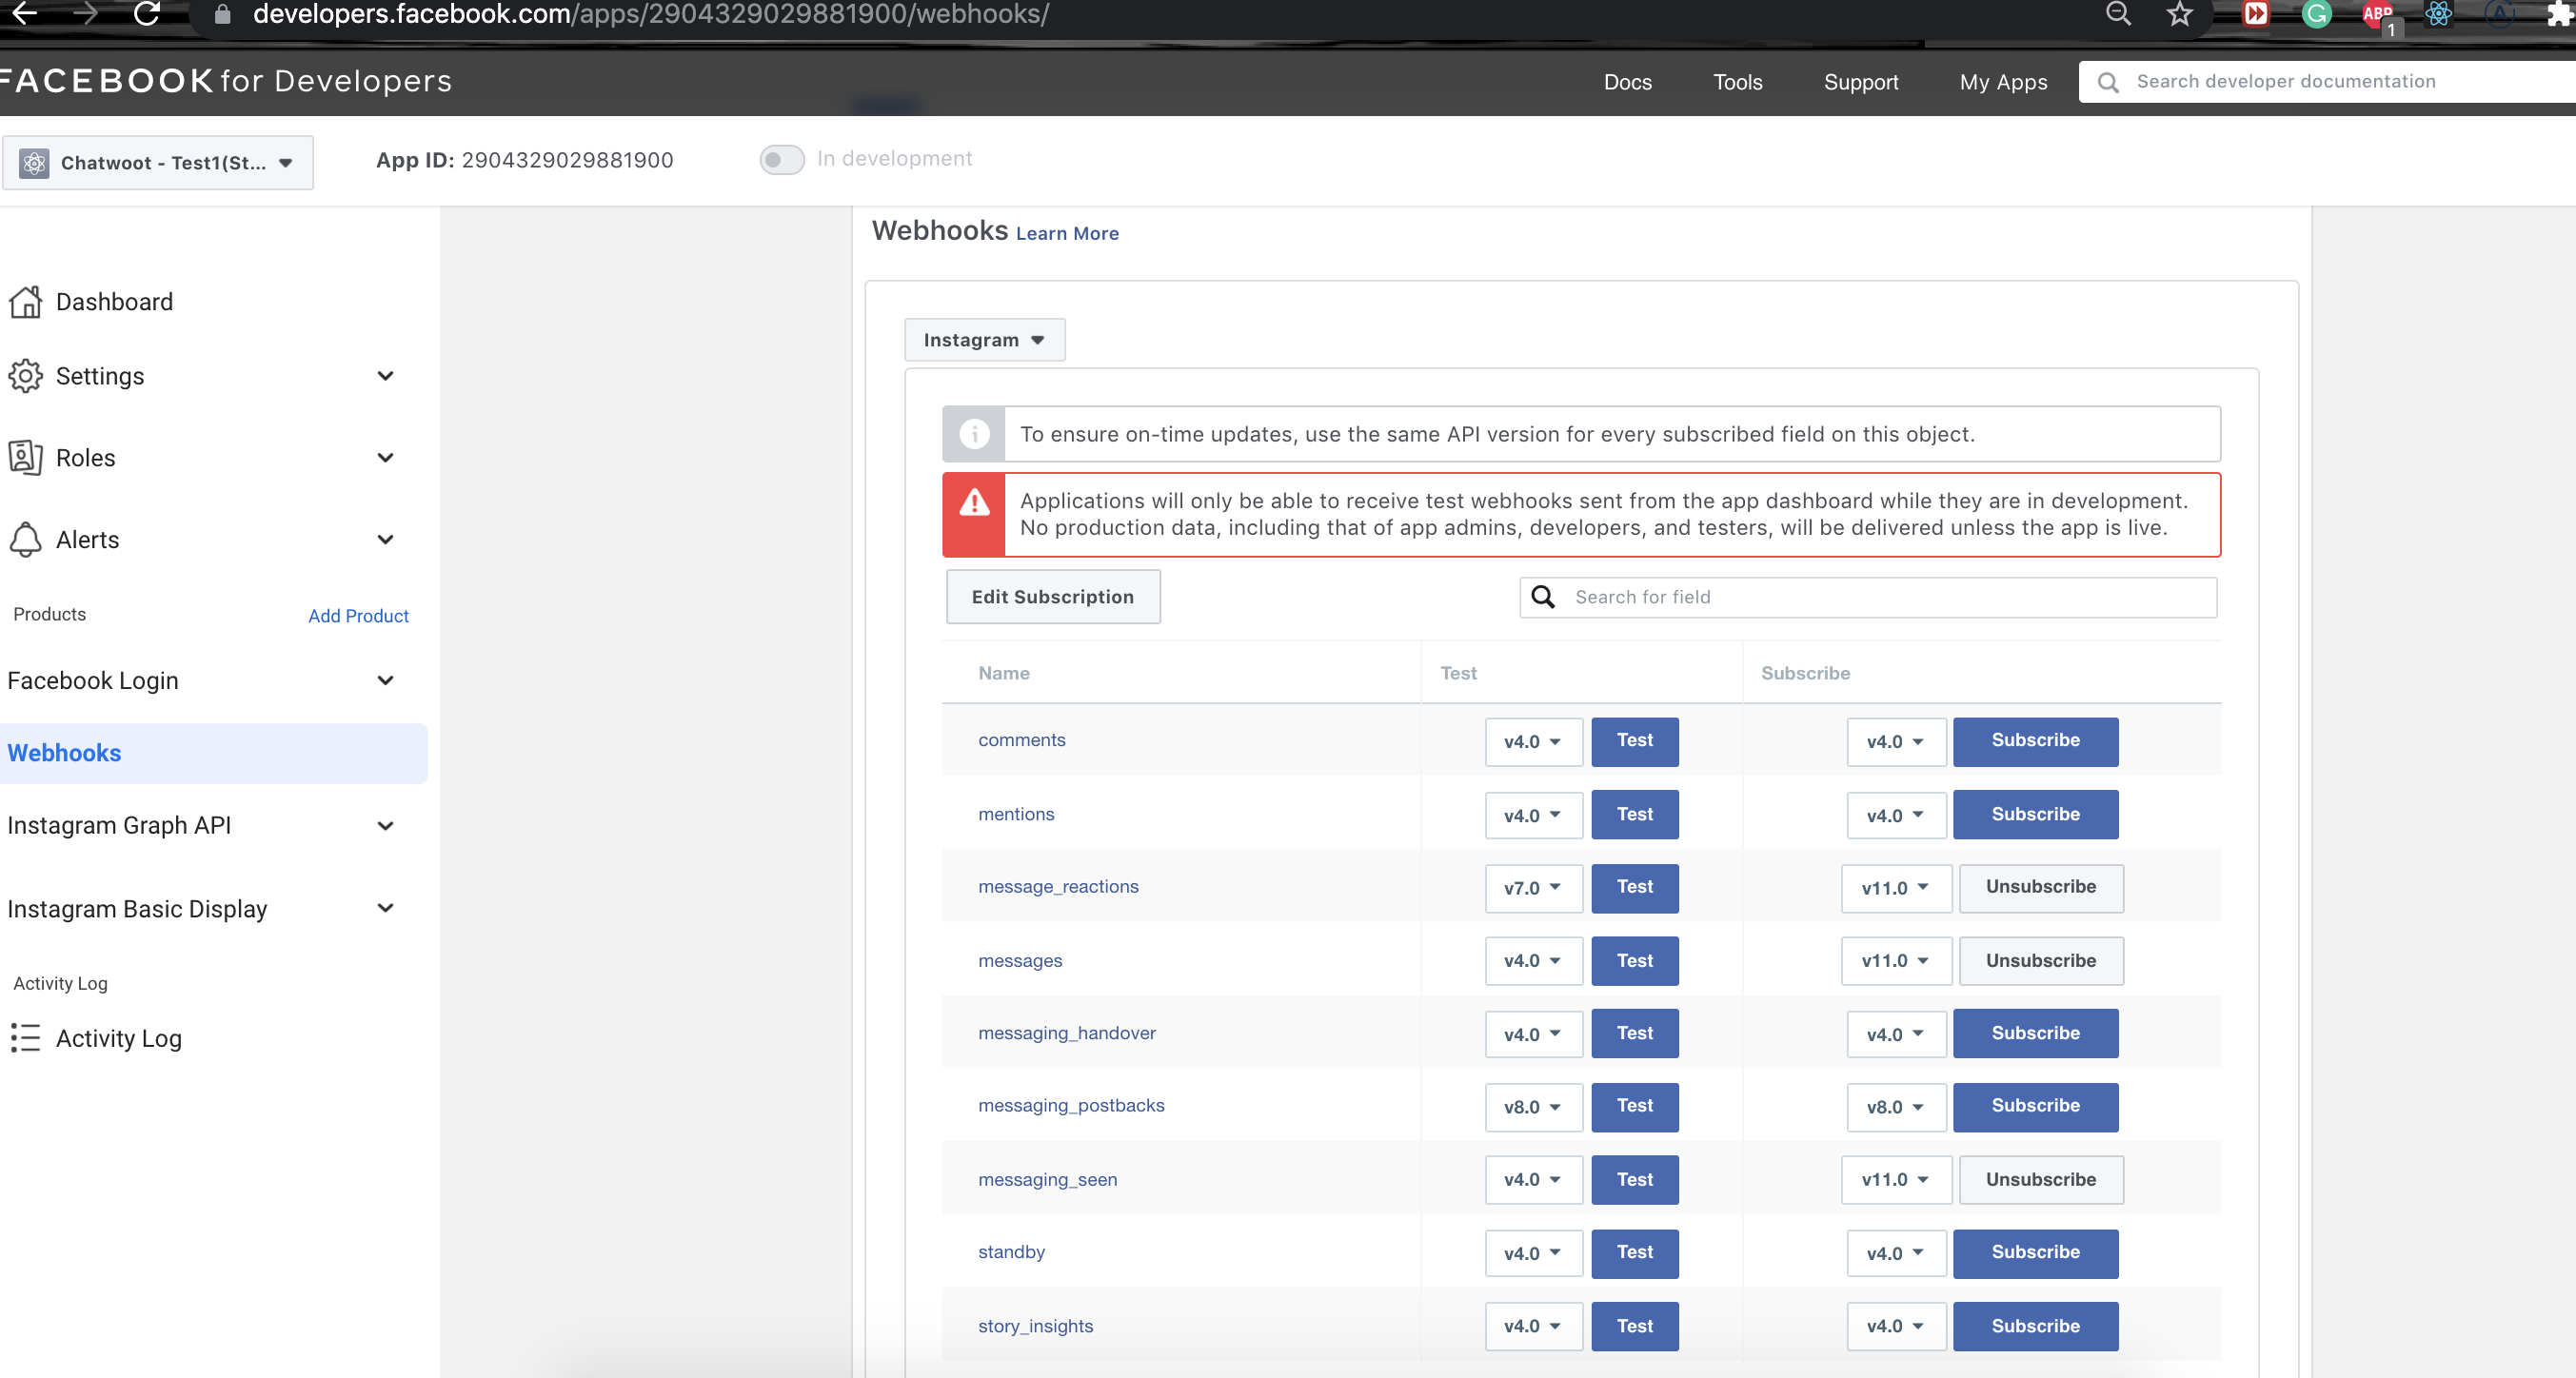
Note: You can have only one app connected to the Chatwoot for Instagram and Facebook combined as the Messenger platform is common. But suppose you want to have separate channels for Instagram and Facebook. In that case, you can have multiple Facebook pages inside your app that would be connected to Facebook users and Instagram users separately and then connected to the different inbox in the Chatwoot page.
Checklist
- Integrate the Facebook test app and Send a message from the Instagram tester to the connected account.
- Make sure your Instagram account is a business account.
- If the Instagram test account can receive the message and forward it to the webhook URL, then submit it for review.
- If the Instagram test account is not able to receive the message and forward it to the webhook URL
- Check the logs if you are receiving the message to
{your-app-url}/webhooks/Instagram - If the logs are present for the above endpoint, if there are any errors, then reach out to us. We will help you out.
- If the logs aren't present for the above endpoint, then raise a bug for the Facebook team or follow this bug https://developers.facebook.com/support/bugs/468852858104743/
- Check the logs if you are receiving the message to
- If you are not facing the above issue and can get the message, but the review isn't passing, then reach out to the reviewer.
- When your app gets rejected, open the rejected submission. You can see the messenger icon in the bottom right corner to support you with your rejected review.
- You can talk to the support team and ask your questions about the submission and the reason for the rejection.
- If your test app passed the review, it's good to go into production.
- If you face an issue on production that you cannot receive the messages, then reach out to us with the error logs.