Guide to setting up Conversation Continuity with SendGrid
This doc will help you set up Conversation continuity with SendGrid.
Installation
This example is based on a Heroku installation of Chatwoot, and using SendGrid for outgoing email. For more information about installing Chatwoot, go here.
Configuring inbound reply emails
Firstly, we need to tell our Chatwoot instance what mailer we're using to handle incoming emails. We do that with a config var. Go to your Heroku dashboard, click on your Chatwoot instance and click settings.

Then scroll until you see two blank fields with an add button. There, enter:
RAILS_INBOUND_EMAIL_SERVICE=sendgrid

Next, we're going to set a password. We'll use this later on with SendGrid. For this example, we'll use something simple - like potatosalad, but like all passwords - you should always use a secure mixture of letters, numbers and symbols.

SendGrid
Now we're going to set up the domain we're using for inbound emails. Because you're most likely going to have an email service like Google Workspace or Microsoft 365 for Business, you should use a subdomain for your inbound emails to Chatwoot.
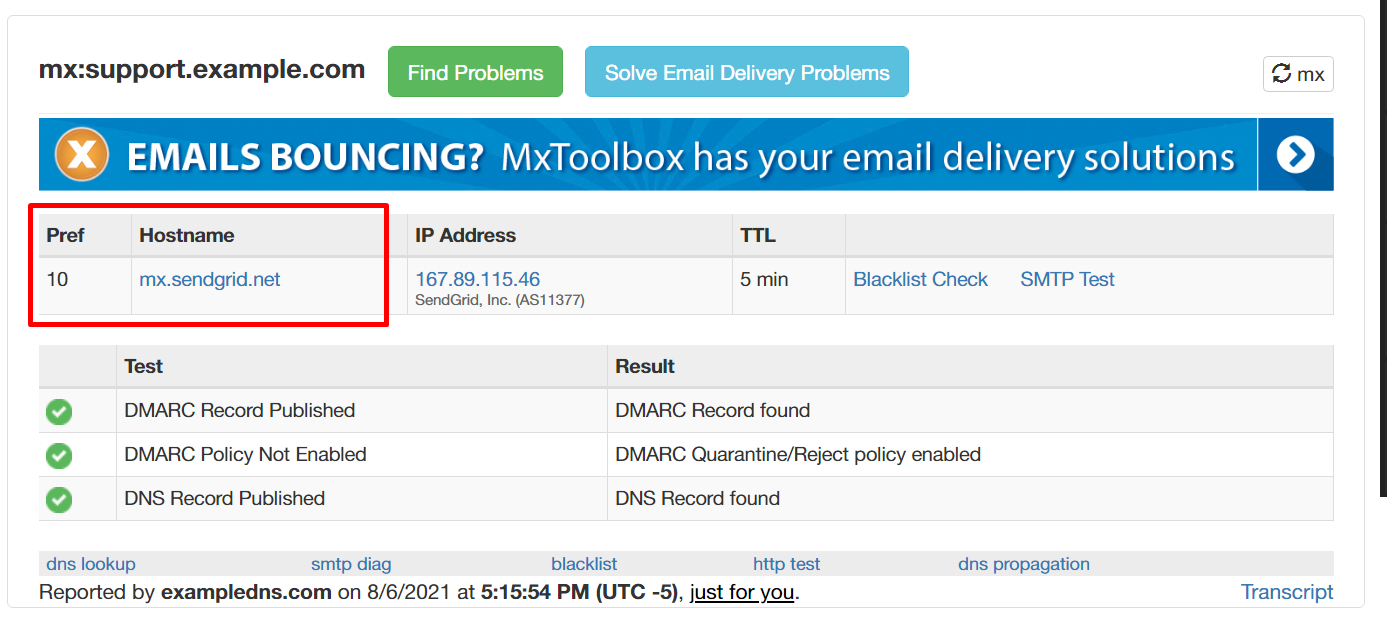
For example, let's say we used support.example.com as our domain. In this instance, we'd add an MX record pointing support.example.com to mx.sendgrid.net with a priority of 10.
You should wait a while (usually an hour will do). You can use mxtoolbox.com to check if the MX record has been propogated. If you see something like this, you can move onto the next step:
Now, go to the SendGrid dashboard at app.sendgrid.com. Select Settings, and Inbound Parse.

Then click "Add Host & URL".

Receiving Subdomain should be the domain you set up the MX record for earlier.

Then add your Destination URL. Your Destination URL should look something like this:
https://actionmailbox:potatosalad@chatwoot.example.com/rails/action_mailbox/sendgrid/inbound_emails
potatosalad is the password we set earlier, and chatwoot.example.com is the URL of our Chatwoot instance. Everything else should stay the same.

Make sure to check "POST the raw, full MIME message". In order to function correctly, Action Mailbox needs the raw MIME message.

Setting the inbound domain variable in Heroku
Finally, we need to tell our Chatwoot installation what domain we're using with SendGrid.
Your variable should look like this:
MAILER_INBOUND_EMAIL_DOMAIN=support.example.com
You should change support.example.com to the domain you used with SendGrid.

Next steps
You're done! Next, you should enable the email channel.