
Pre chat form is used to collect information about a contact/conversation before initiating a conversation. The Pre chat form is available only in website live chat.
How to add a pre-chat form?
Step 1. Go to Settings → Inboxes. Click on the specific settings of a website inbox.
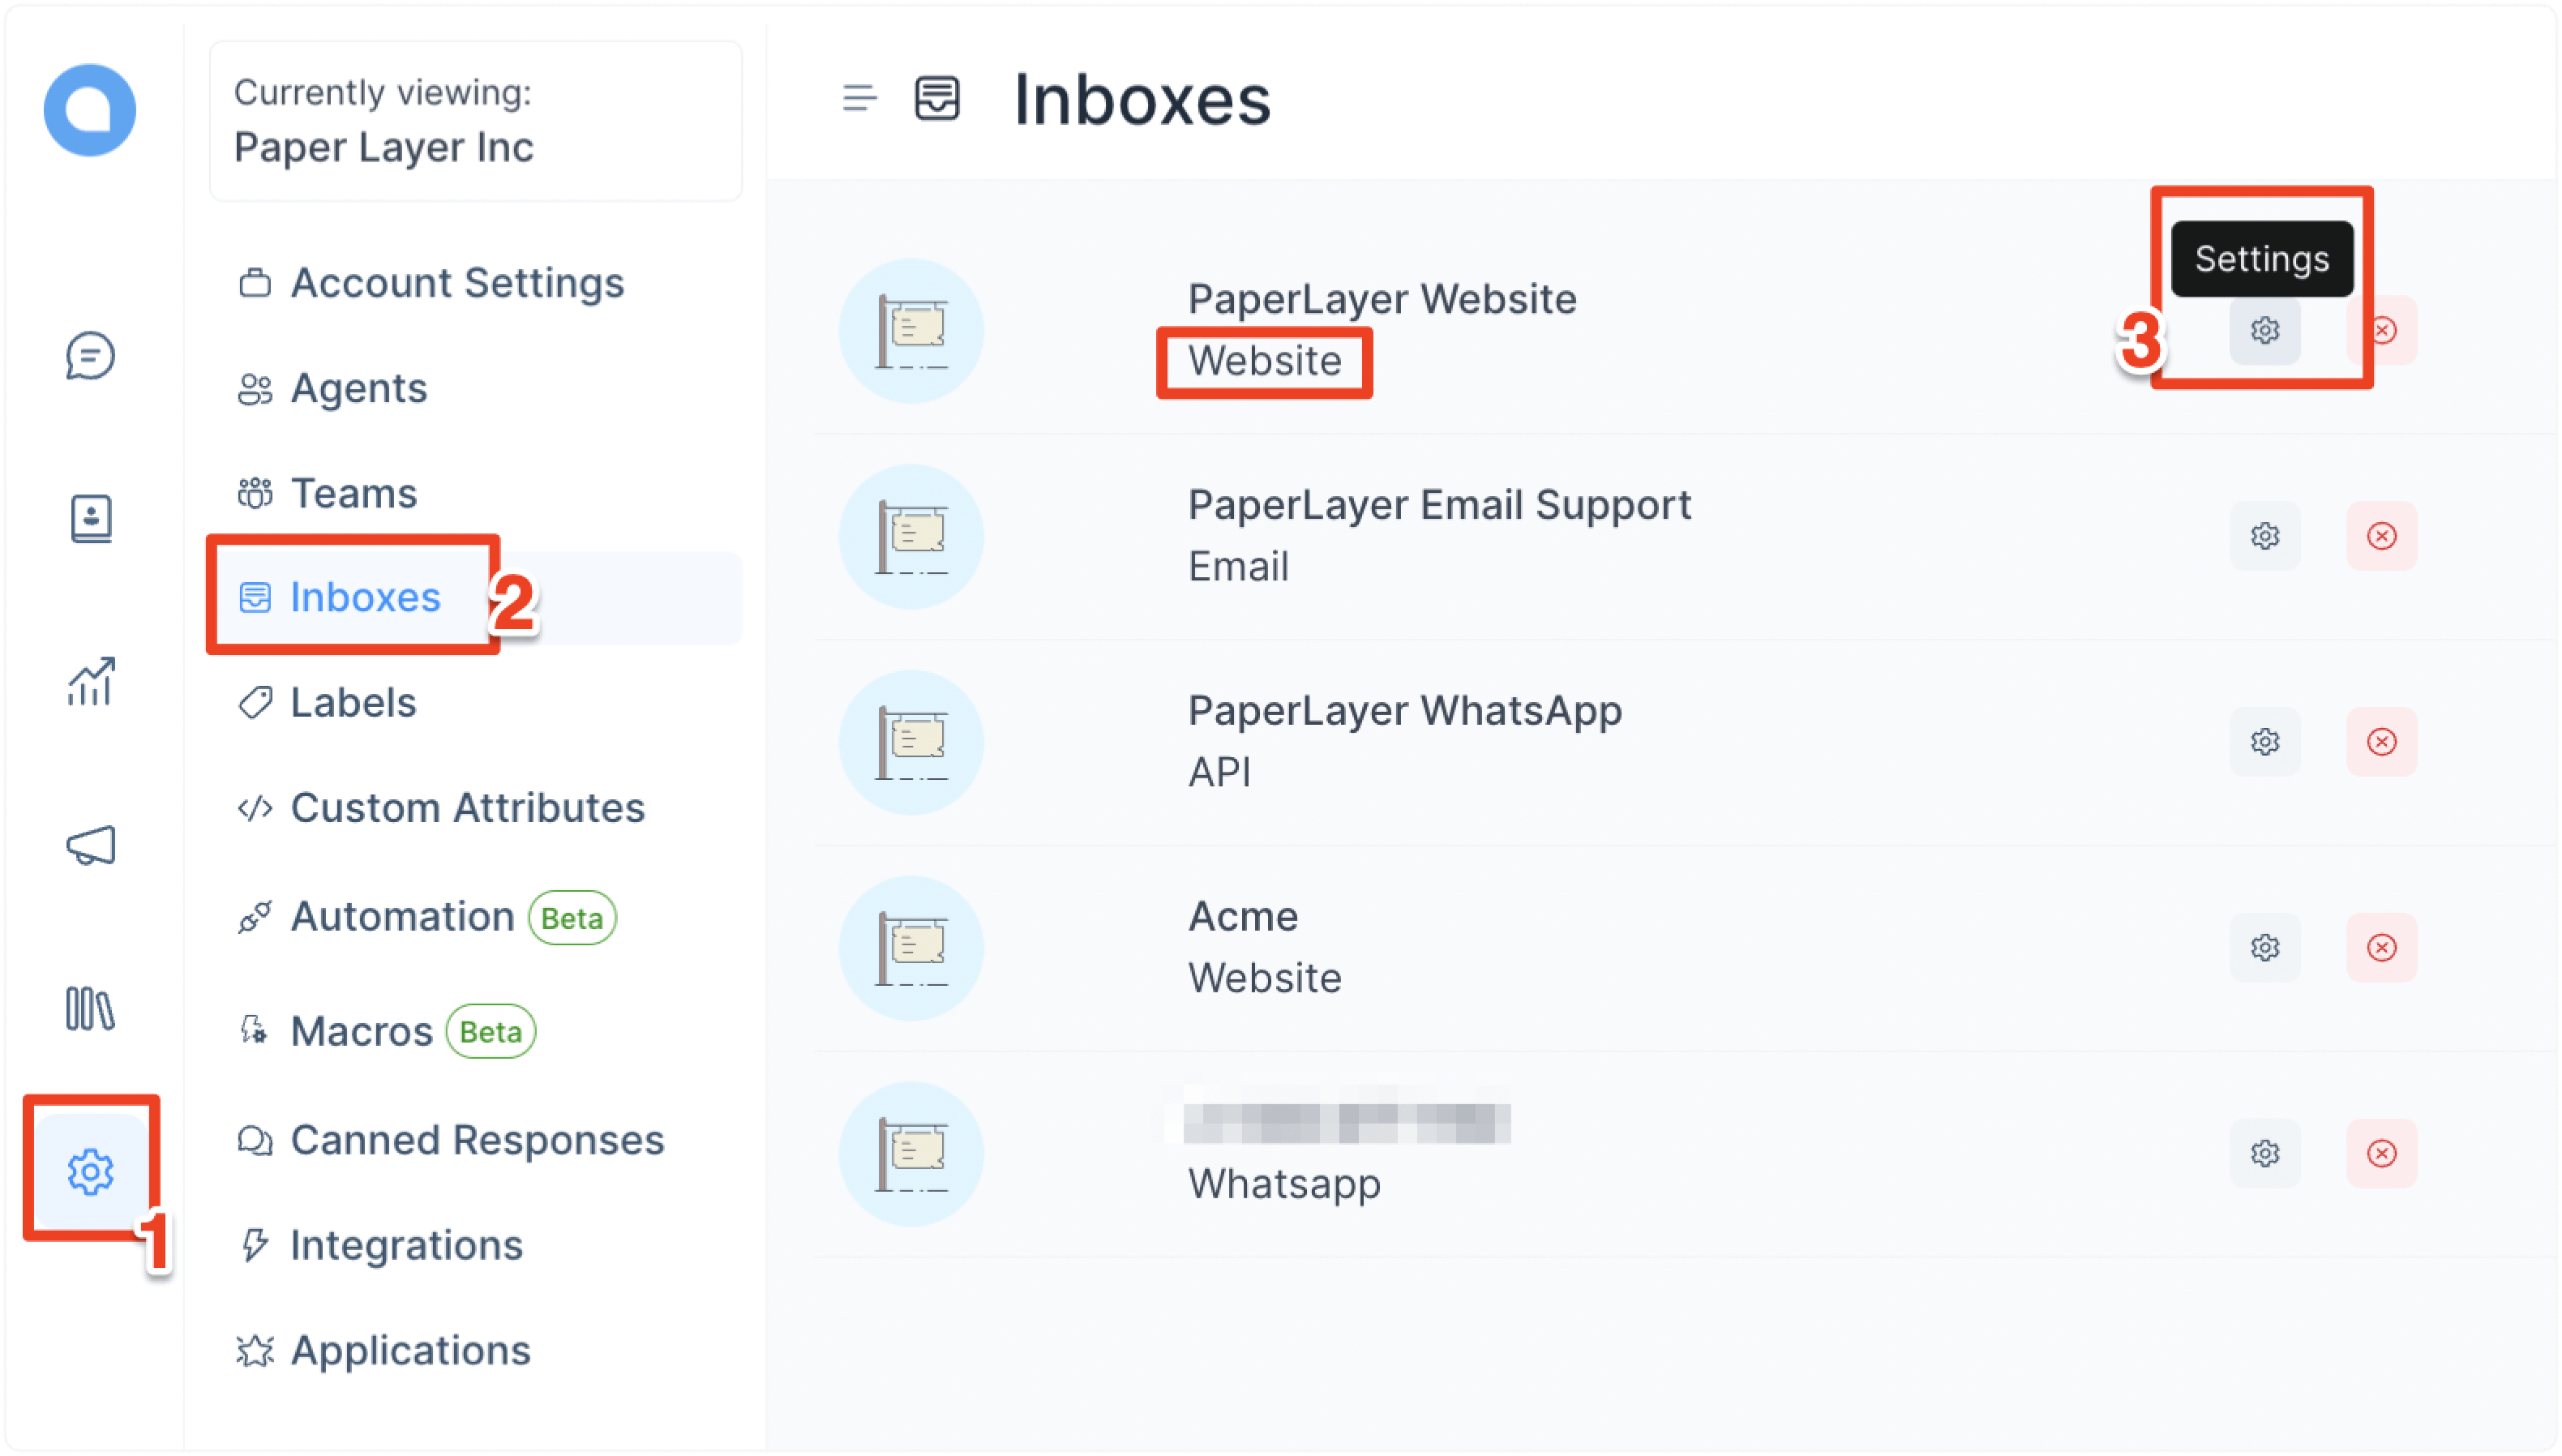
Step 2. Go to the “Pre Chat Form” tab.
There are two types of fields possible with the pre-chat form.
-
Standard fields: These are the primary contact fields––Email, Phone number, and Full name.
-
Custom fields: These are the fields that are created with custom attributes.
The Pre chat form settings list down both the standard and custom fields.
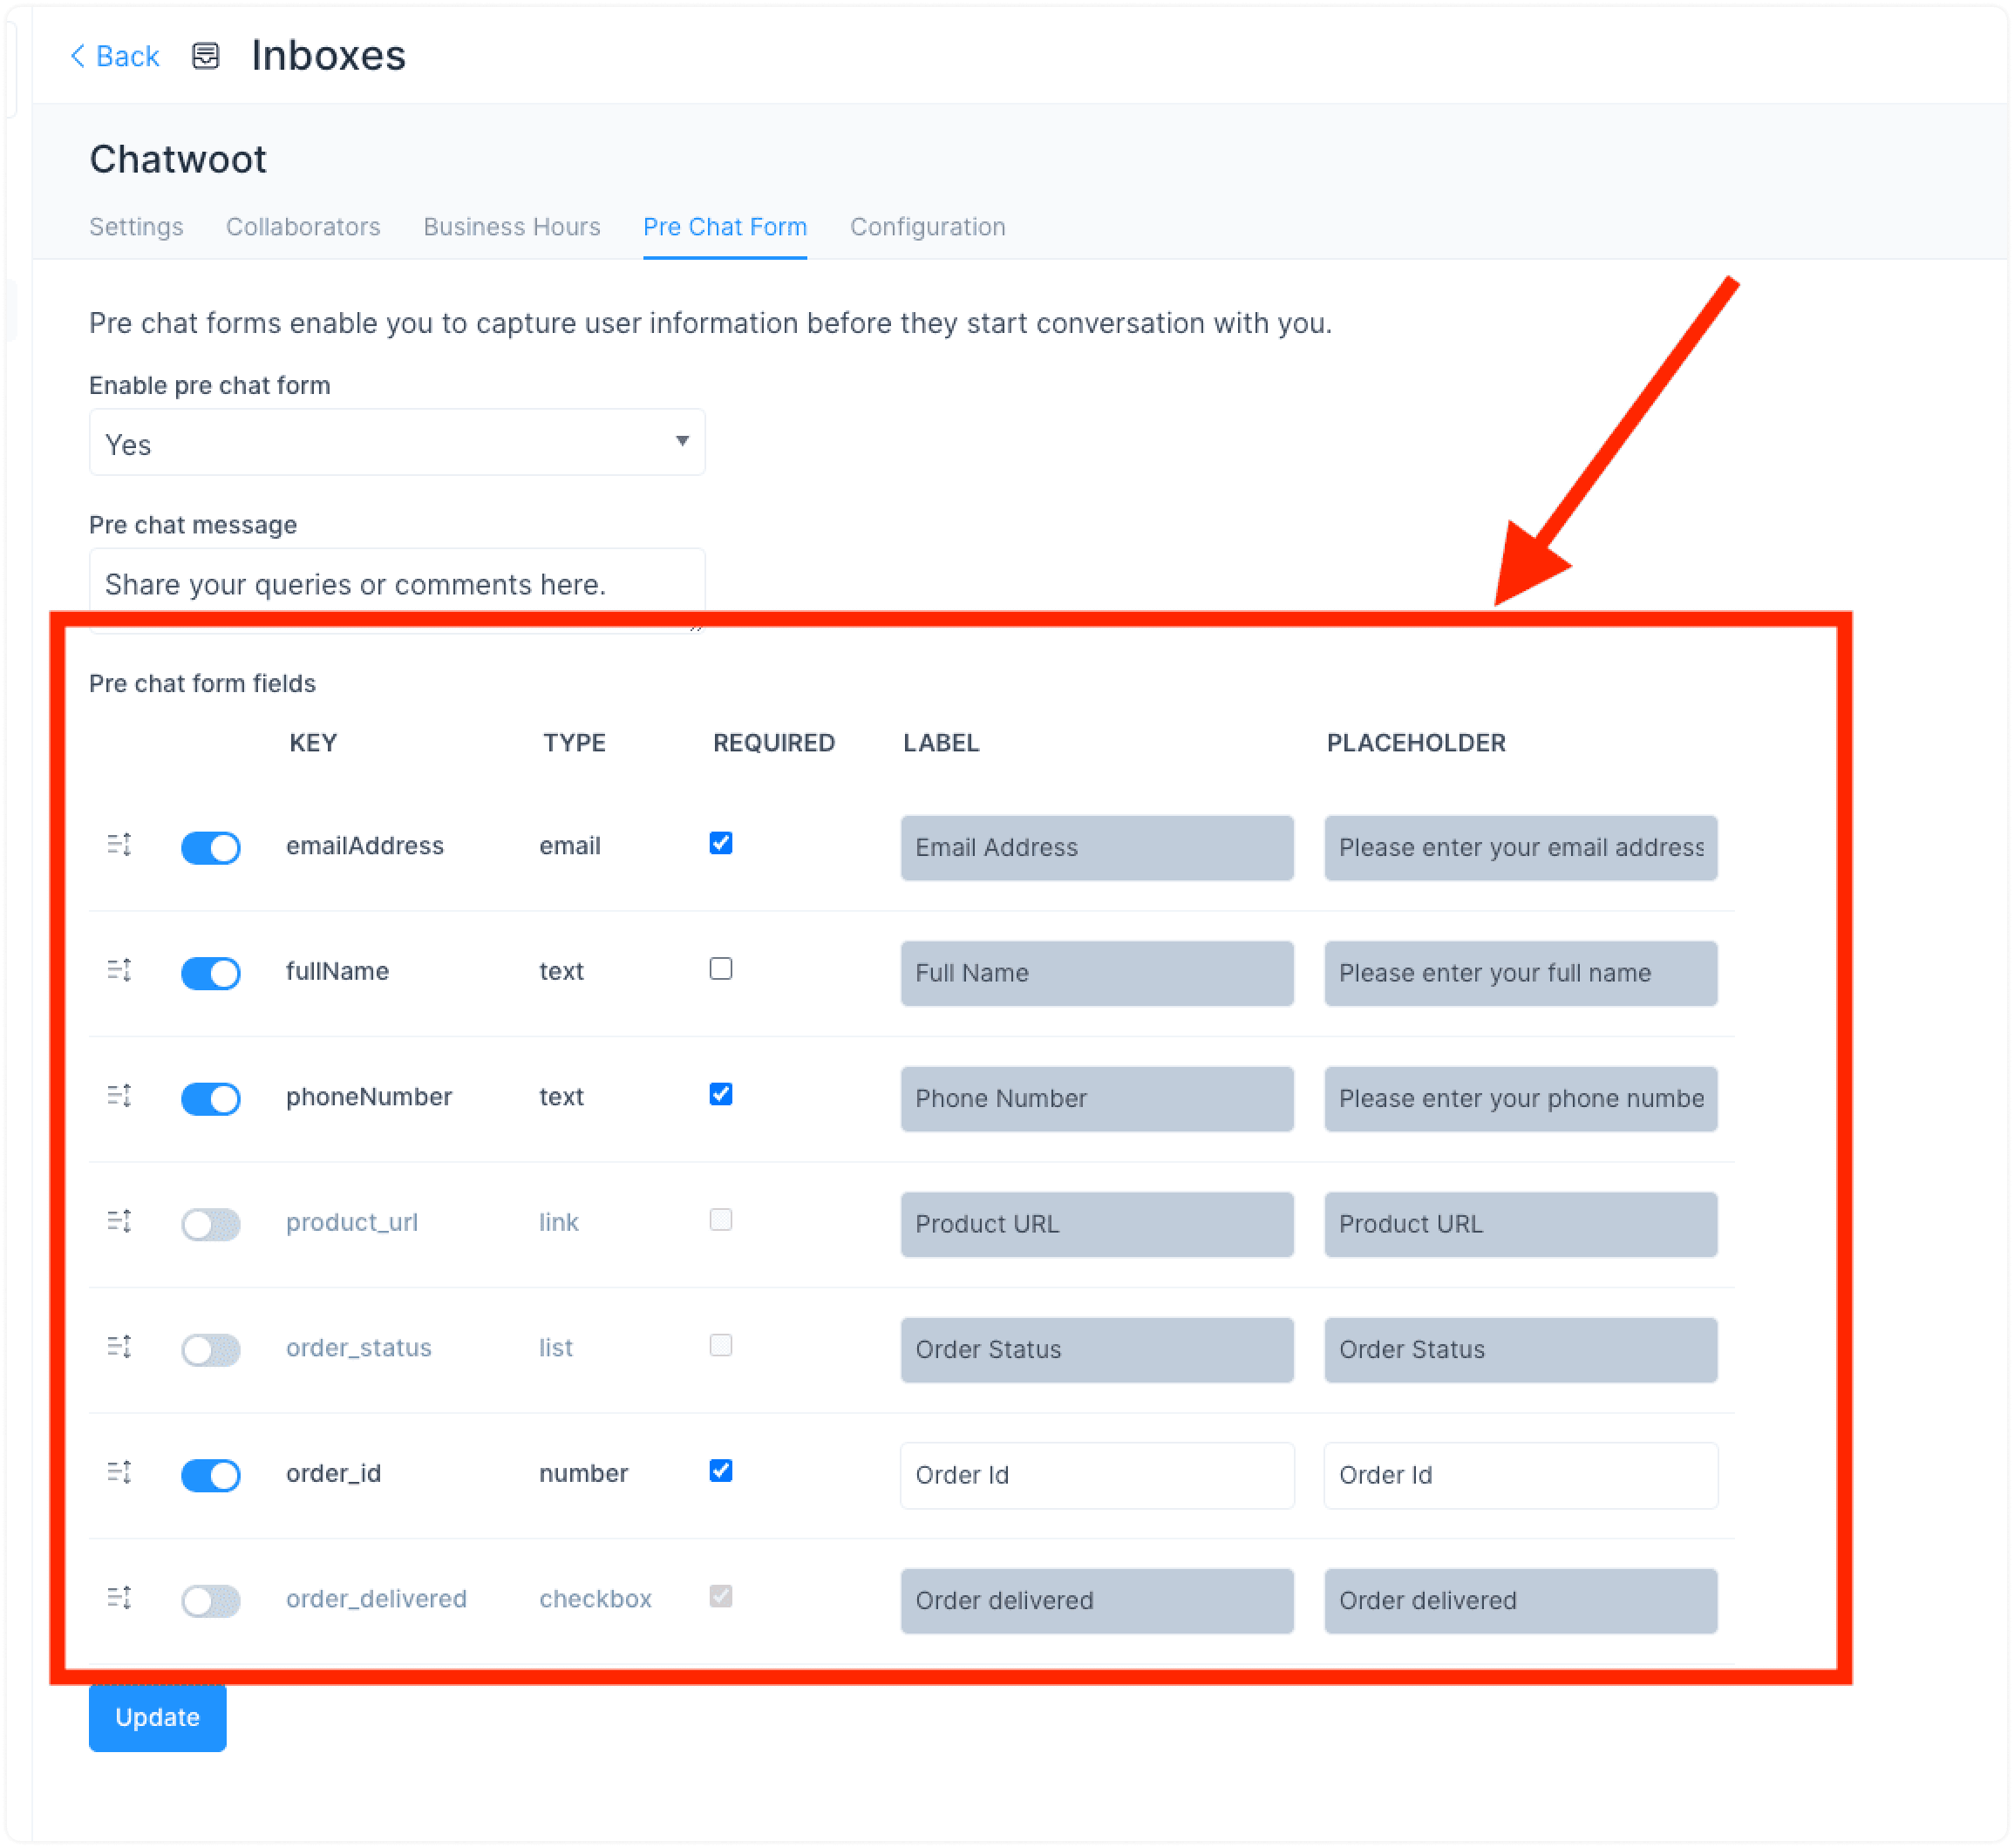
The columns in the settings of pre-chat forms are described below.
-
Key
Field unique identifier
-
Type
Type of the field (Text, List, Number, Date, Link, Boolean)
-
Required
Is the field required or not
-
Label
The label that will be displayed to the visitor on the widget
-
Placeholder
The placeholder value
All the fields would be displayed under the pre-chat form settings by default. The admin will be able to do the following.
-
Enable/disable fields
-
Change the order of fields
-
Update label/placeholder
-
Enable/Disable validation
Customize your pre-chat form according to your needs. In order to add more fields, add more custom attributes.
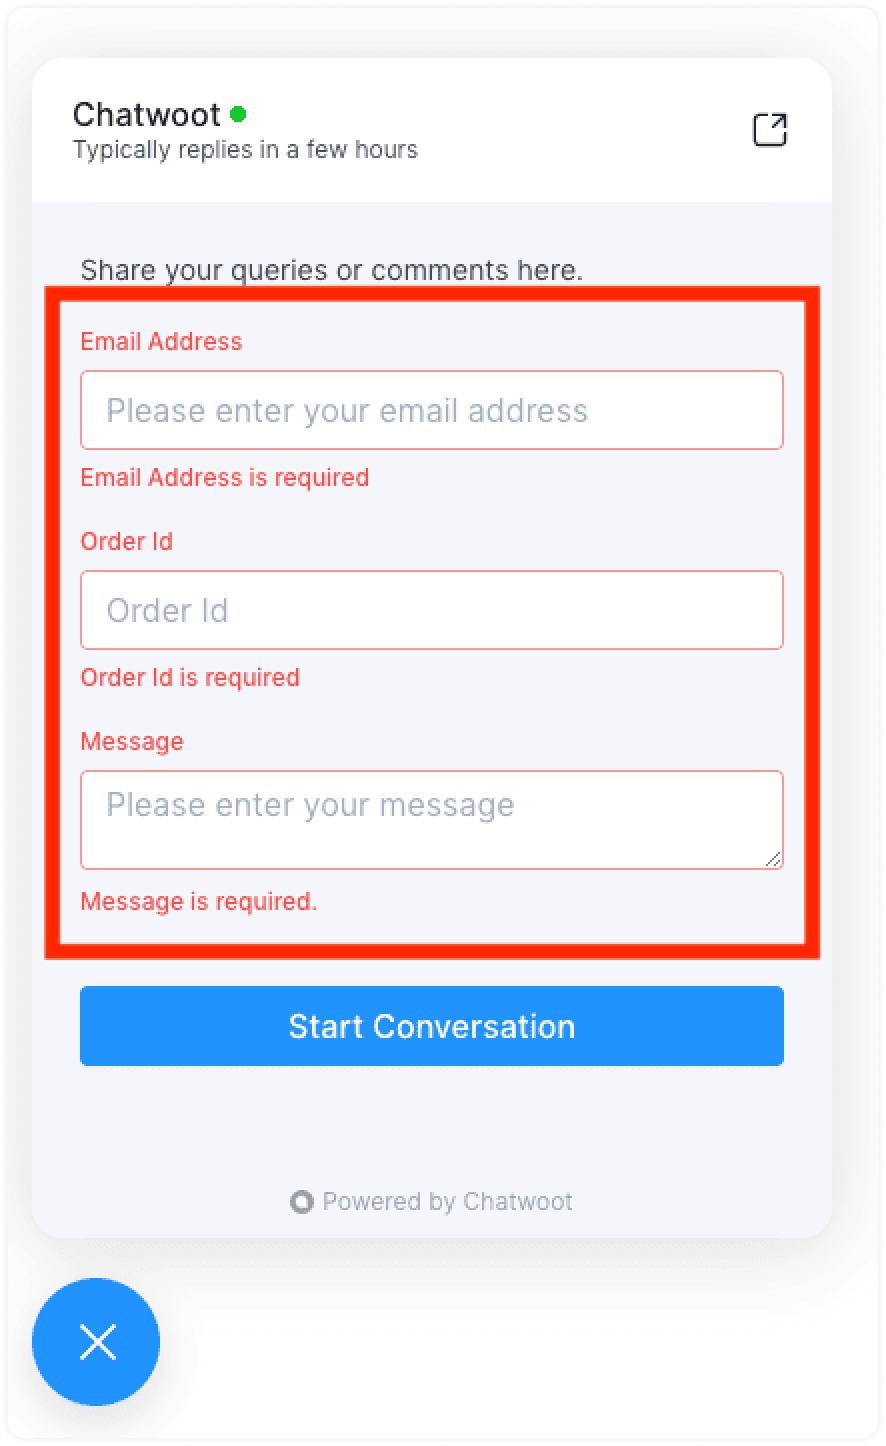
What does a pre-chat form look like?
Once the pre-chat form is enabled, it would ask your customers to fill out a form like the one shown below when they start a conversation through live chat.
Also, read: Pre chat form + Automations = 🚀