
Chatwoot's automation feature streamlines team workflow by automating repetitive tasks and saving time. It allows for various actions such as assigning labels, and teams and routing conversations to the most suitable agent, enabling the team to focus on their core responsibilities and spend less time on manual tasks.
How does Automation work?
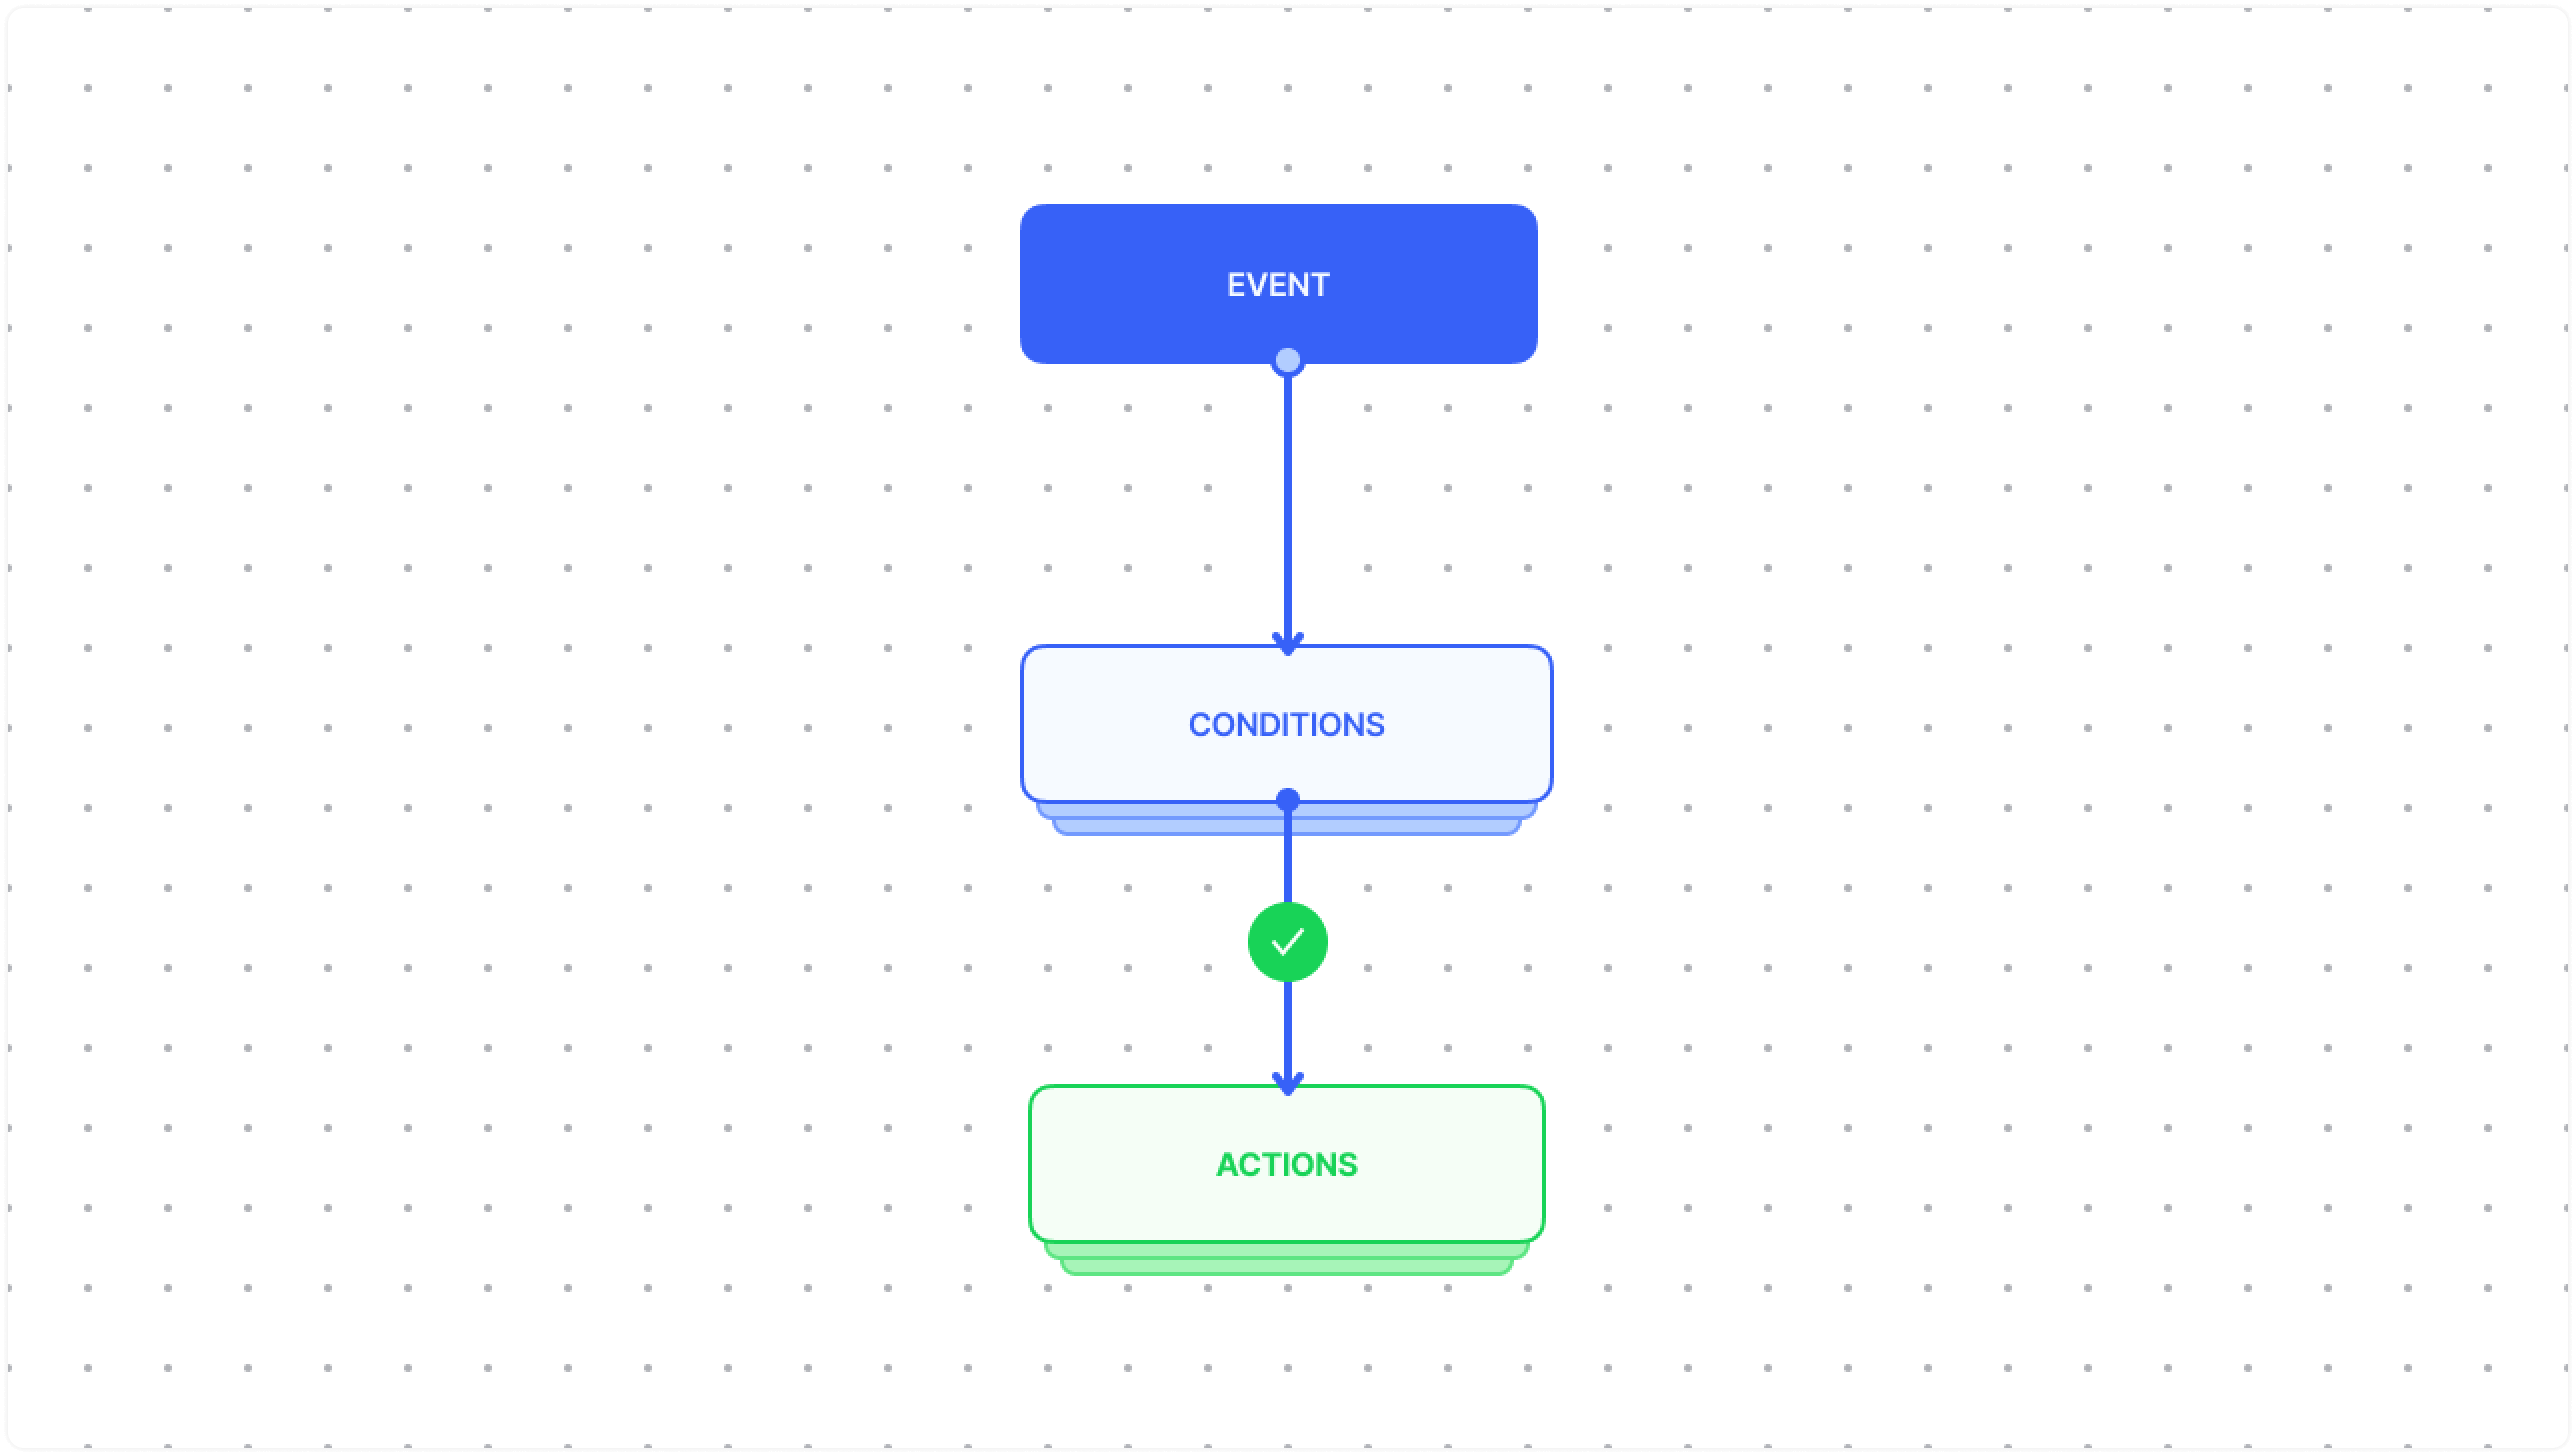
An automation rule is made up of three things––An Event, Conditions, and Actions. The Event is the trigger for automation to perform itself. The conditions are criteria that must be met before the actions are executed. The Actions are tasks that will be executed when the conditions are met.
Automation Events
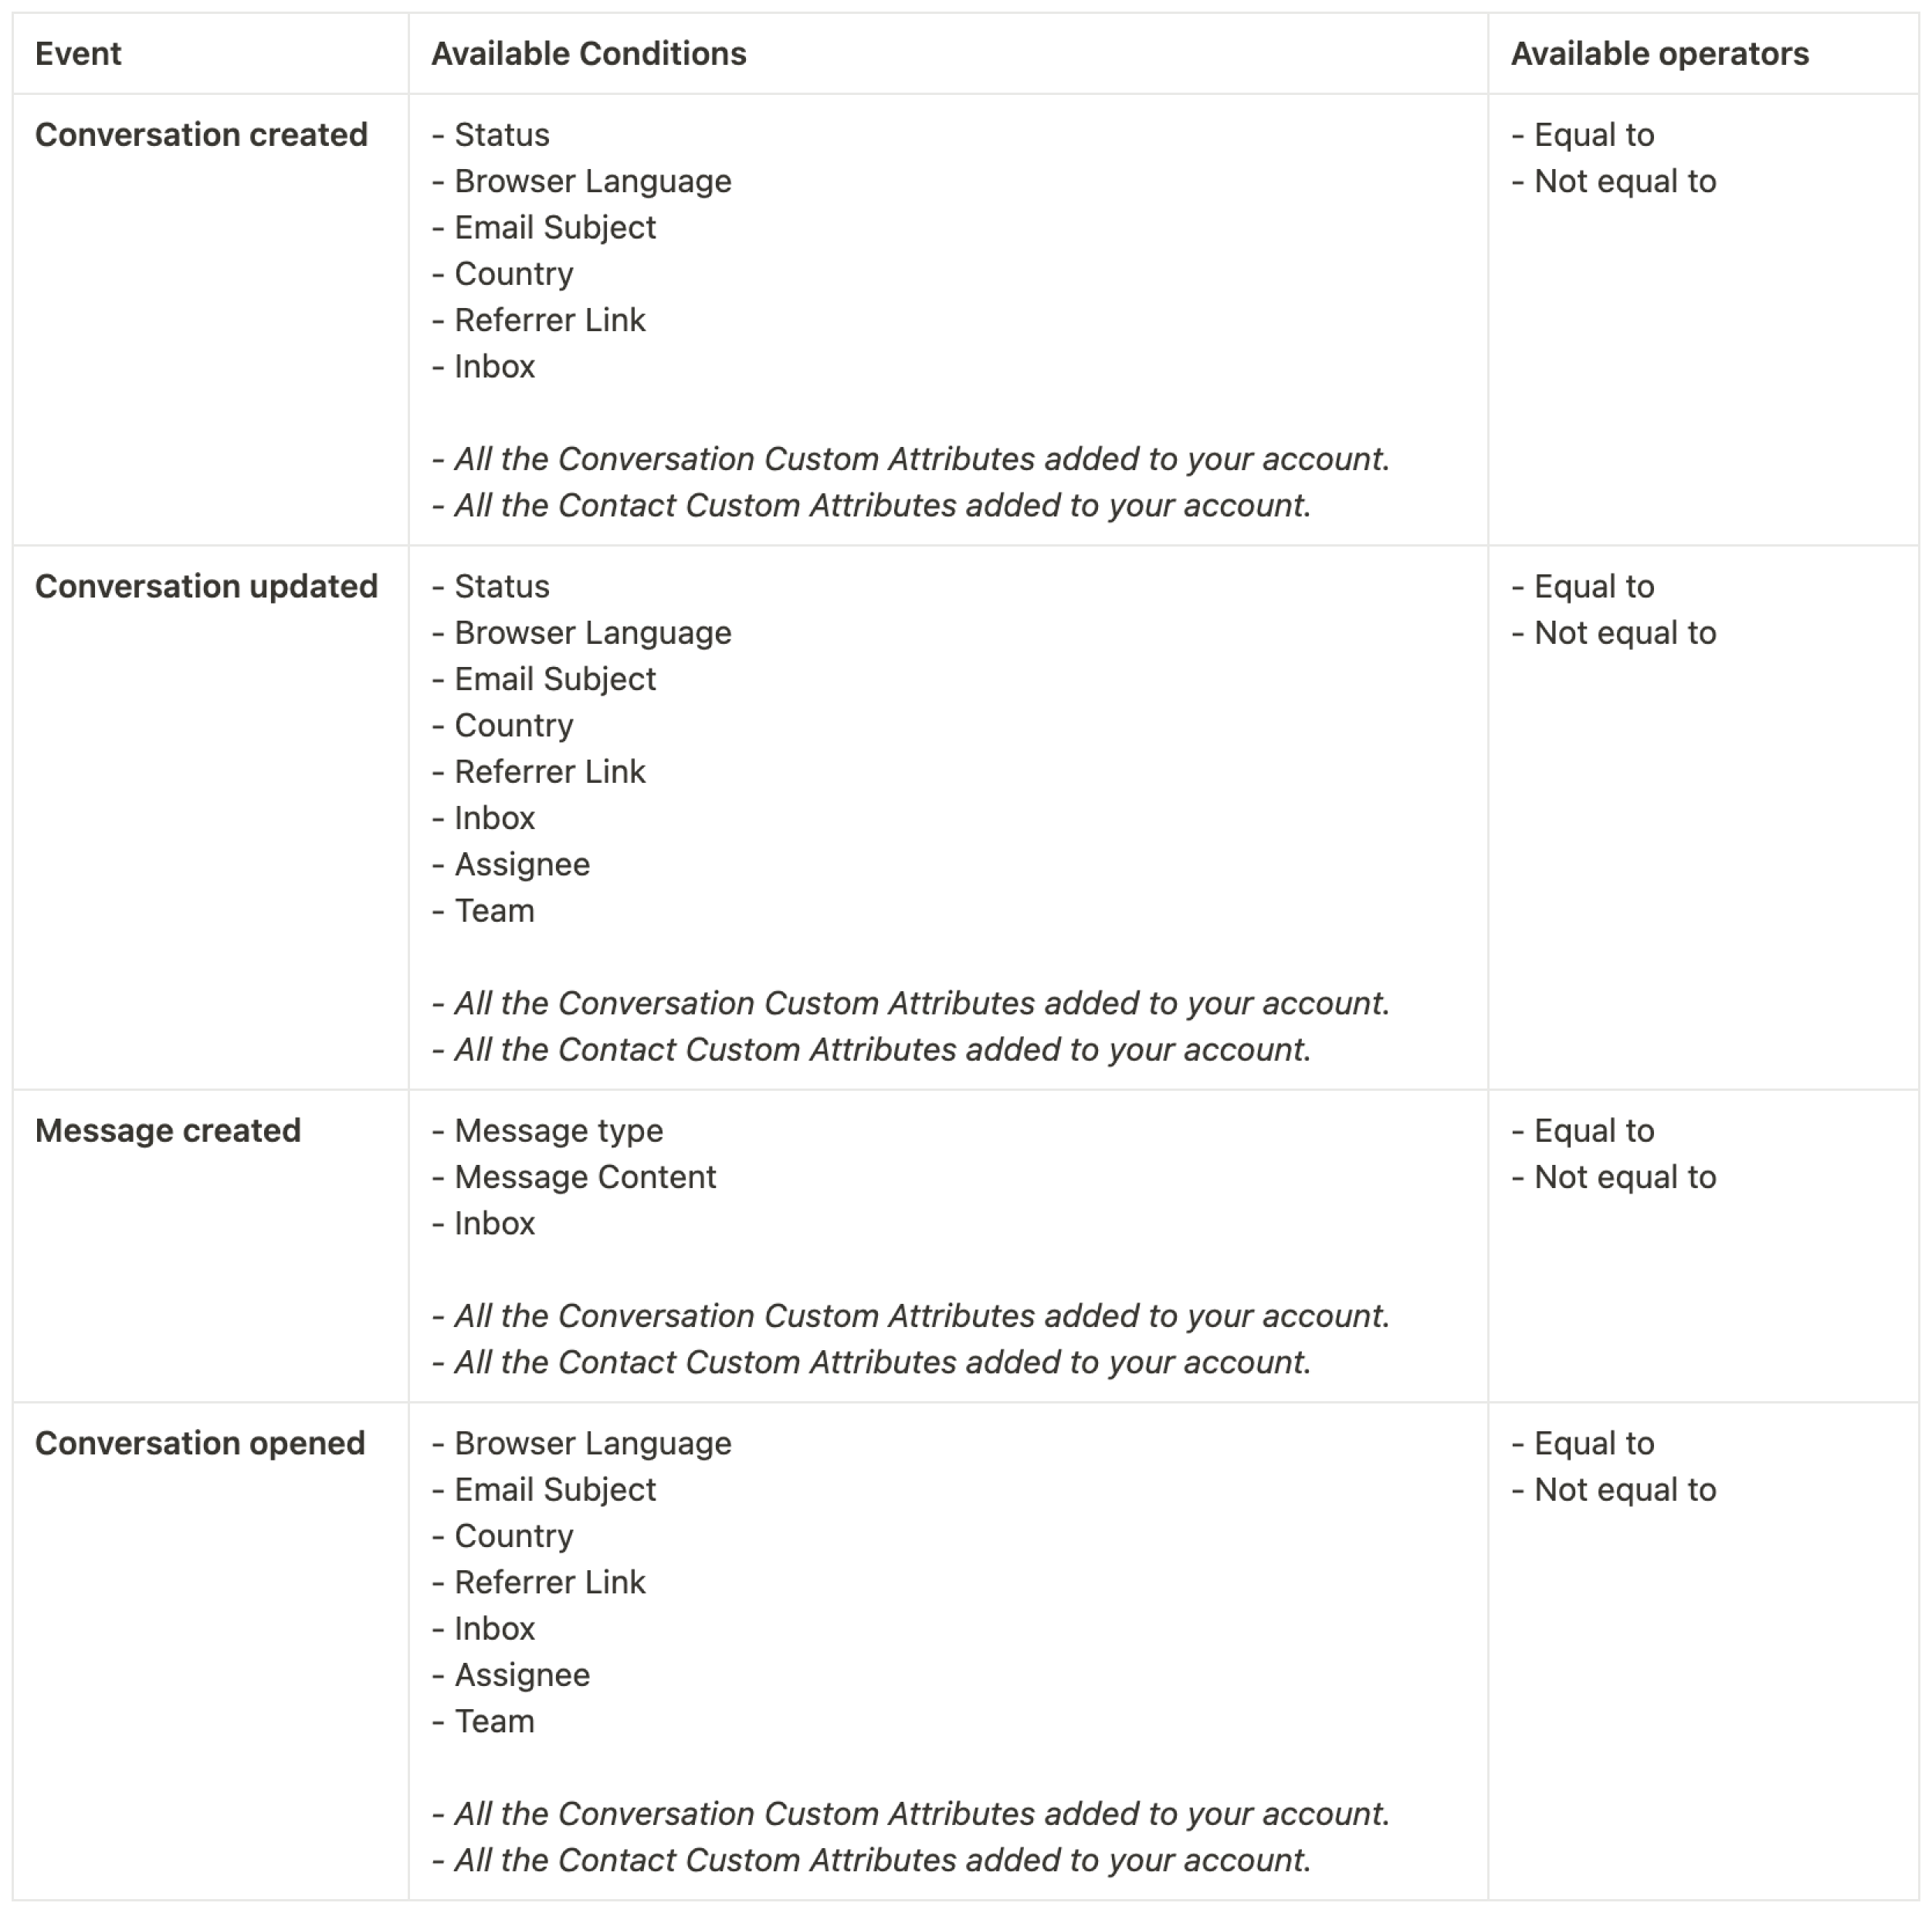
Automation Events are triggers that initiate the execution of automation. Chatwoot currently offers three types of events.
-
Conversation created: A trigger/event initiated when a new conversation is created. This includes conversations created in all channels.
-
Conversation updated: A trigger/event initiated when a conversation is updated.
-
Message created: A trigger/event initiated when a new message in a conversation is created.
-
Conversation opened: A trigger/event initiated when a previously snoozed, resolved, or pending conversation is opened again.
Automation Conditions
Conditions are the criteria that must be met before the actions are performed. They are evaluated in the order they are defined.
Conditions depend on the type of event you select. Here is a comprehensive list:
Automation Actions
Actions are tasks/processes that are executed whenever respective conditions are met. Chatwoot currently supports the following actions:
-
Assign to agent
-
Assign a team
-
Add a label
-
Send an email to team
-
Send an email transcript
-
Mute conversation
-
Snooze conversation
-
Resolve conversation
-
Send Webhook Event
-
Cancel
-
Send Attachment
-
Send a message
These actions are available irrespective of the Events or Conditions you choose.
How to create an Automation rule?
Step 1. Go to Settings → Automation. Click on the “Add Automation Rule” button.

Step 2. An automation rule creation modal will open up. Start filling the fields as listed below.
-
Give your automation a name to easily refer to it later.
-
Add a description (optional).
-
Select an event from the dropdown menu.
-
Add conditions. Use
equal toornot equal tooperators to define the conditions. -
Add actions.
You can add multiple conditions and actions as well. Use AND, OR operators to do this.
Example
You want to assign all new conversations to the France sales team whenever the Browser language is French. Here’s how you can create an automation rule for this –
-
Add a name and a description.
-
Select event as
Conversation Created. -
Add two conditions and join them with the
ANDoperator. Condition 1:Conversation StatusisOpen, and Condition 2:Browser LanguageisFrancais (fr)from the dropdown. -
Add an action -
Assign a teamand select the teamFrance salesfrom the dropdown. (You need to create your team first).
How to pause, edit, clone, and delete automation rules?
Your list of Automation rules appears under “Automations”. You can view this page by going to Settings → Automation. You will find a set of quick actions here:
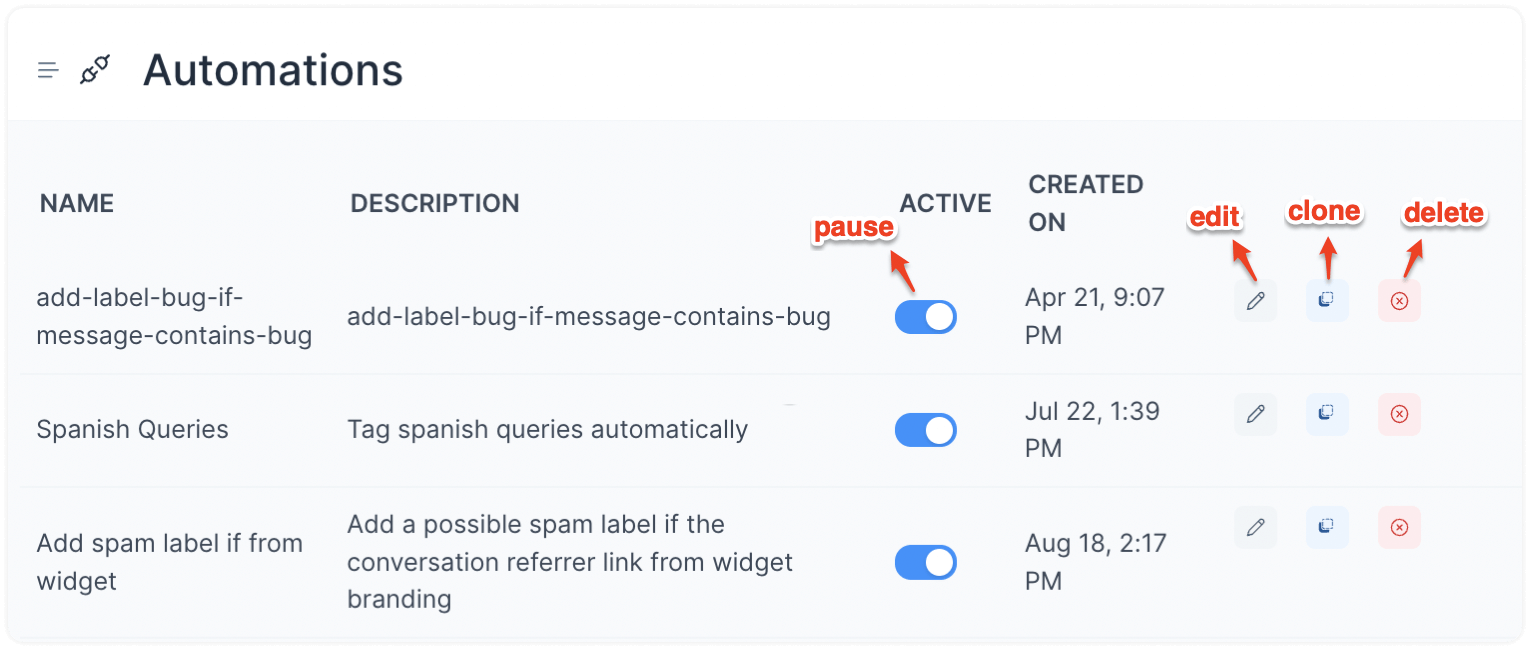
To pause an automation rule:
Toggle the switch off under the “Active” column.
To edit a rule:
Click on the pencil icon.
To clone a rule:
Click on the copy icon.
To delete a rule:
Click on the red cross icon.