AgentBot can seamlessly integrate with your Chatwoot inbox as a customer query handling bot. With Chatwoot, you can easily connect your custom bot logic to conversation handling via AgentBot's API.
By connecting AgentBot to your inbox, all new conversations will automatically be assigned a 'bot' status. Chatwoot will send conversation events to your bot URL as webhook events, allowing AgentBot to respond through the Chatwoot API in real-time.
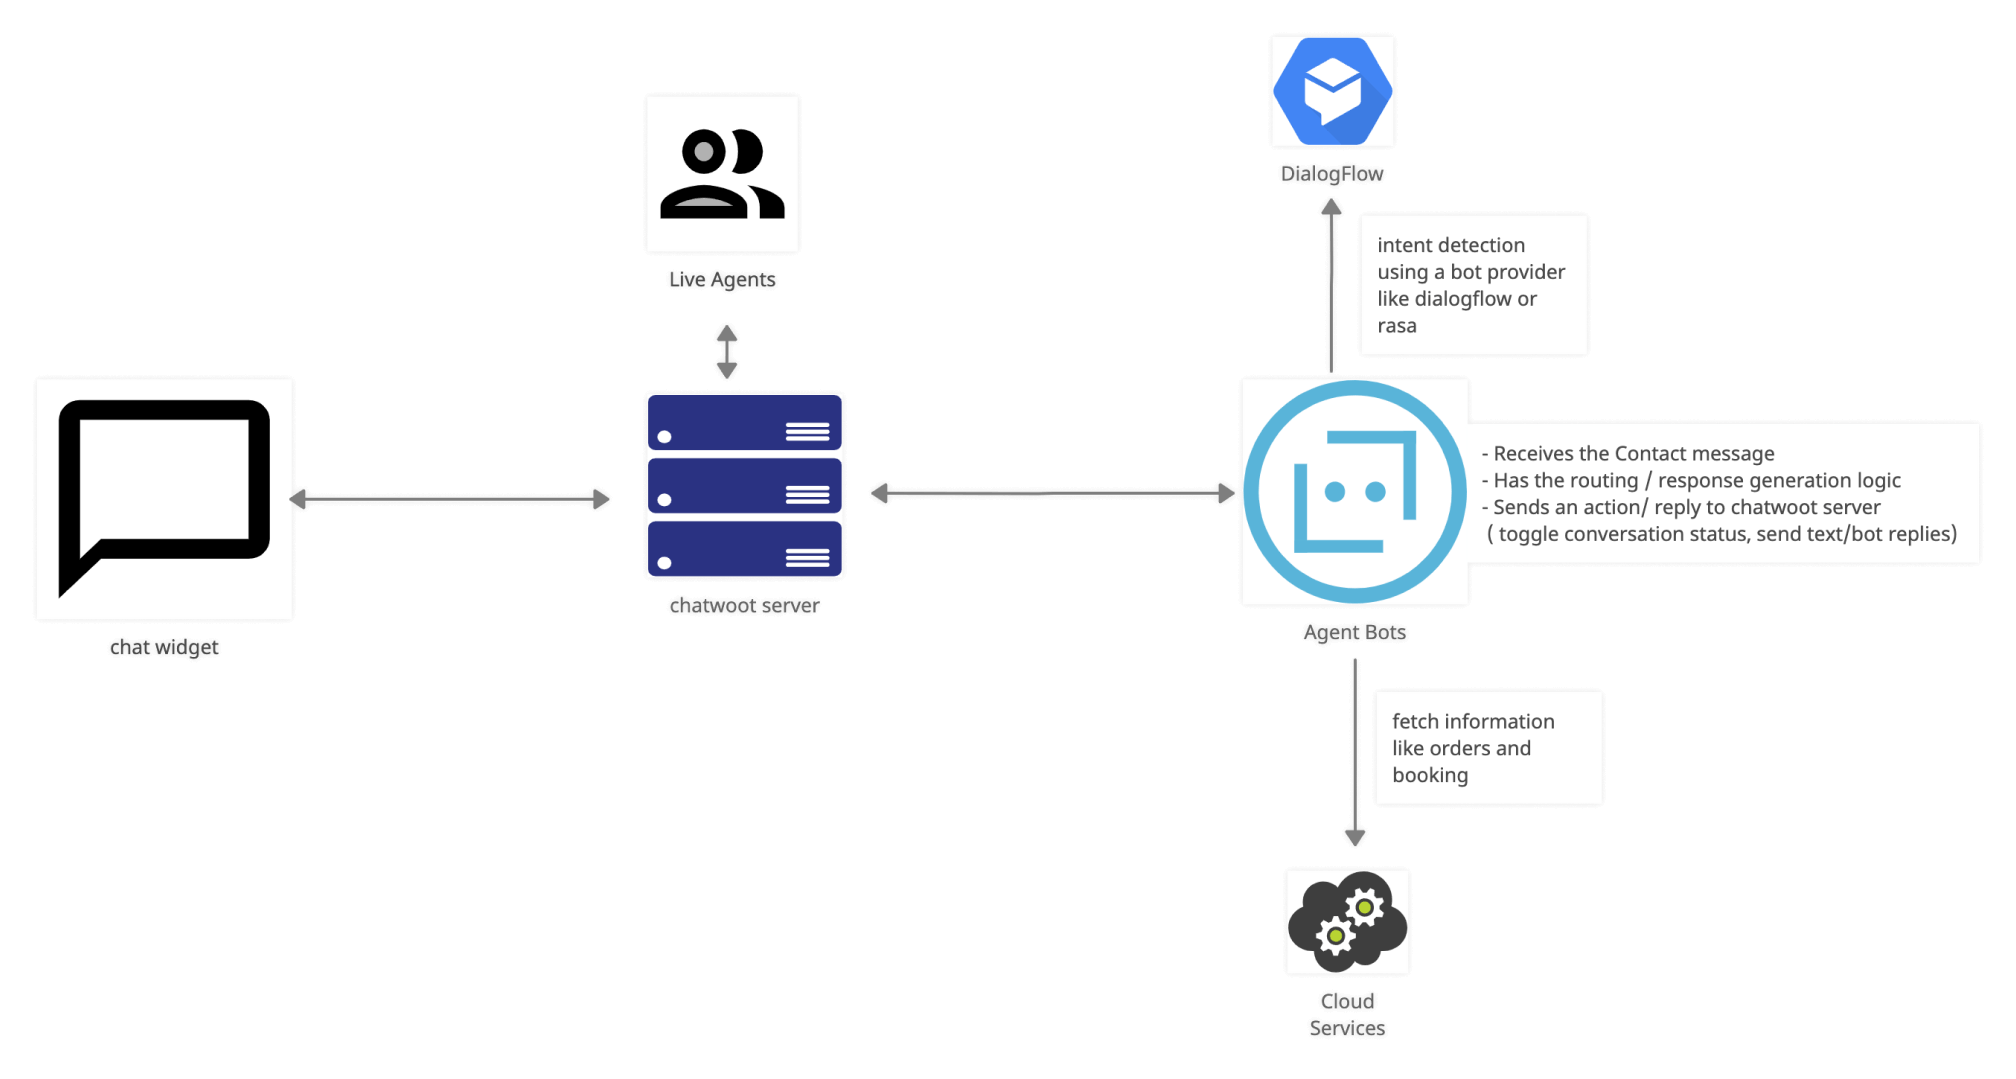
How does the AgentBot work?
Explained below in a typical workflow of an AgentBot.
-
The AgentBot receives events such as
widget_triggered,message_created, andmessage_updatedbased on customer interactions. -
The AgentBot processes the received information to generate an appropriate response.
-
The AgentBot can also utilize external system APIs to gather additional customer information, such as order status or booking triggers.
-
The AgentBot can utilize services such as Rasa, Dialogflow, or Lex for intent detection.
-
The AgentBot can post the generated response back into the widget by utilizing Chatwoot APIs such as
message_create. -
The AgentBot can toggle a conversation status to open to hand off the conversation to a human agent.
-
It continues to monitor open conversations to provide contextual information to the support agent.
How does the Human-Agent handoff work?
When an agent bot is connected to an inbox, conversations are created with a "pending" status, allowing it to triage the conversation before passing it on to a human agent. If the bot determines that a human agent's assistance is needed, it can use the conversation update API to change the status to "open."
Sometimes the agents would want to push back a conversation which was handed off, back again into the bot queue. Agents can return a handed-off conversation to the bot queue by changing the status back to "pending”.
How can I use the AgentBot?
Listed below are a few examples.
-
Businesses with high volume customer support queries can utilize an AgentBot to authenticate and filter queries, reducing the workload on human agents and improving the efficiency of customer support.
-
E-commerce websites can integrate the AgentBot with their existing databases, providing customers with real-time updates on order and shipping status, as well as answering other related queries.
-
News and content websites can use the AgentBot to send recommendations to users via card messages.
-
Hotel and movie booking websites can use the AgentBot to handle bookings, reservations and answering related queries, providing customers with a seamless and convenient booking experience.
Examples
Also, look into interesting ways to leverage bot-message types on Chatwoot.
Creating agent bots
How to create agent bots in your Chatwoot account?
You can create agent bots from the account settings. Go to Settings -> Bots. You will see an option like the one below.

Click on "Add Bot" to create a new bot. You will see an option to provide a name, avatar and a webhook URL.

How to connect an inbox to a bot?
Open the inbox where you want to link the bot. In Bot Configuration, pick the bot that should manage the conversations. After you click Save, you’ll start getting webhook events each time a new conversation or message is created.

For more details about the events that are supported in the webhooks, please visit the Webhook documentation here.
Webhook Verification
Once you create an agent bot, we automatically generate a secret that you can use to verify the payload your application receives. You can read more about webhook verification here.