This document will help you fully set up your website live chat. It explains how to create and use the additional settings for a desired website inbox.
Compatibility and requirements
The web dashboard and the live chat widget work with most modern web browsers. Here are the supported browser versions:
-
Mozilla Firefox: v52 onwards
-
Google Chrome: v57 onwards
-
Chromium: v57 onwards
-
Apple Safari: v14.1 onwards
-
Microsoft Edge: v16 onwards
Here are the supported mobile OS versions for the Chatwoot mobile app:
-
Android: v5.0 onwards
-
iOS: v11.0 onwards
How to create a website channel on Chatwoot?
Step 1. Go to the Inboxes page. Go to Settings → Inboxes → "Add Inbox" button.
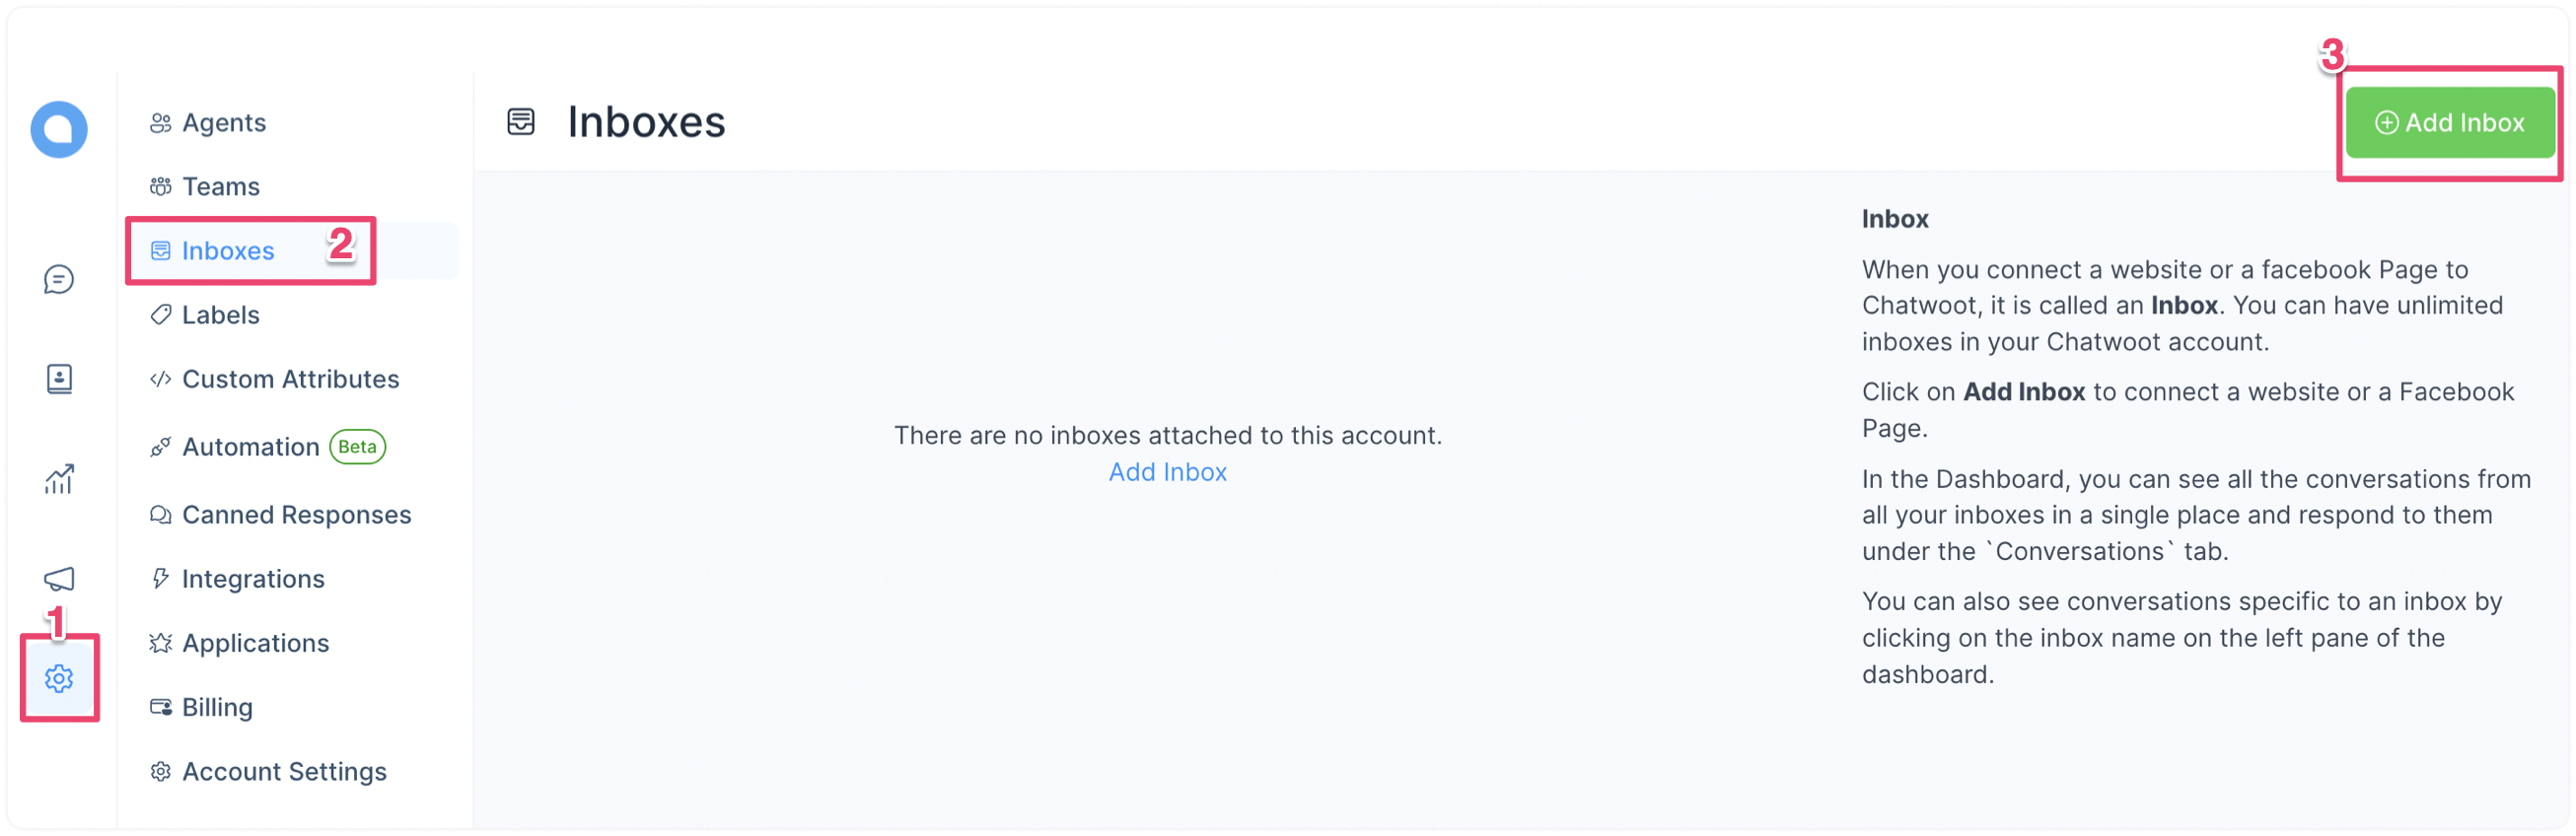
Step 2. Click on the "Website" icon.
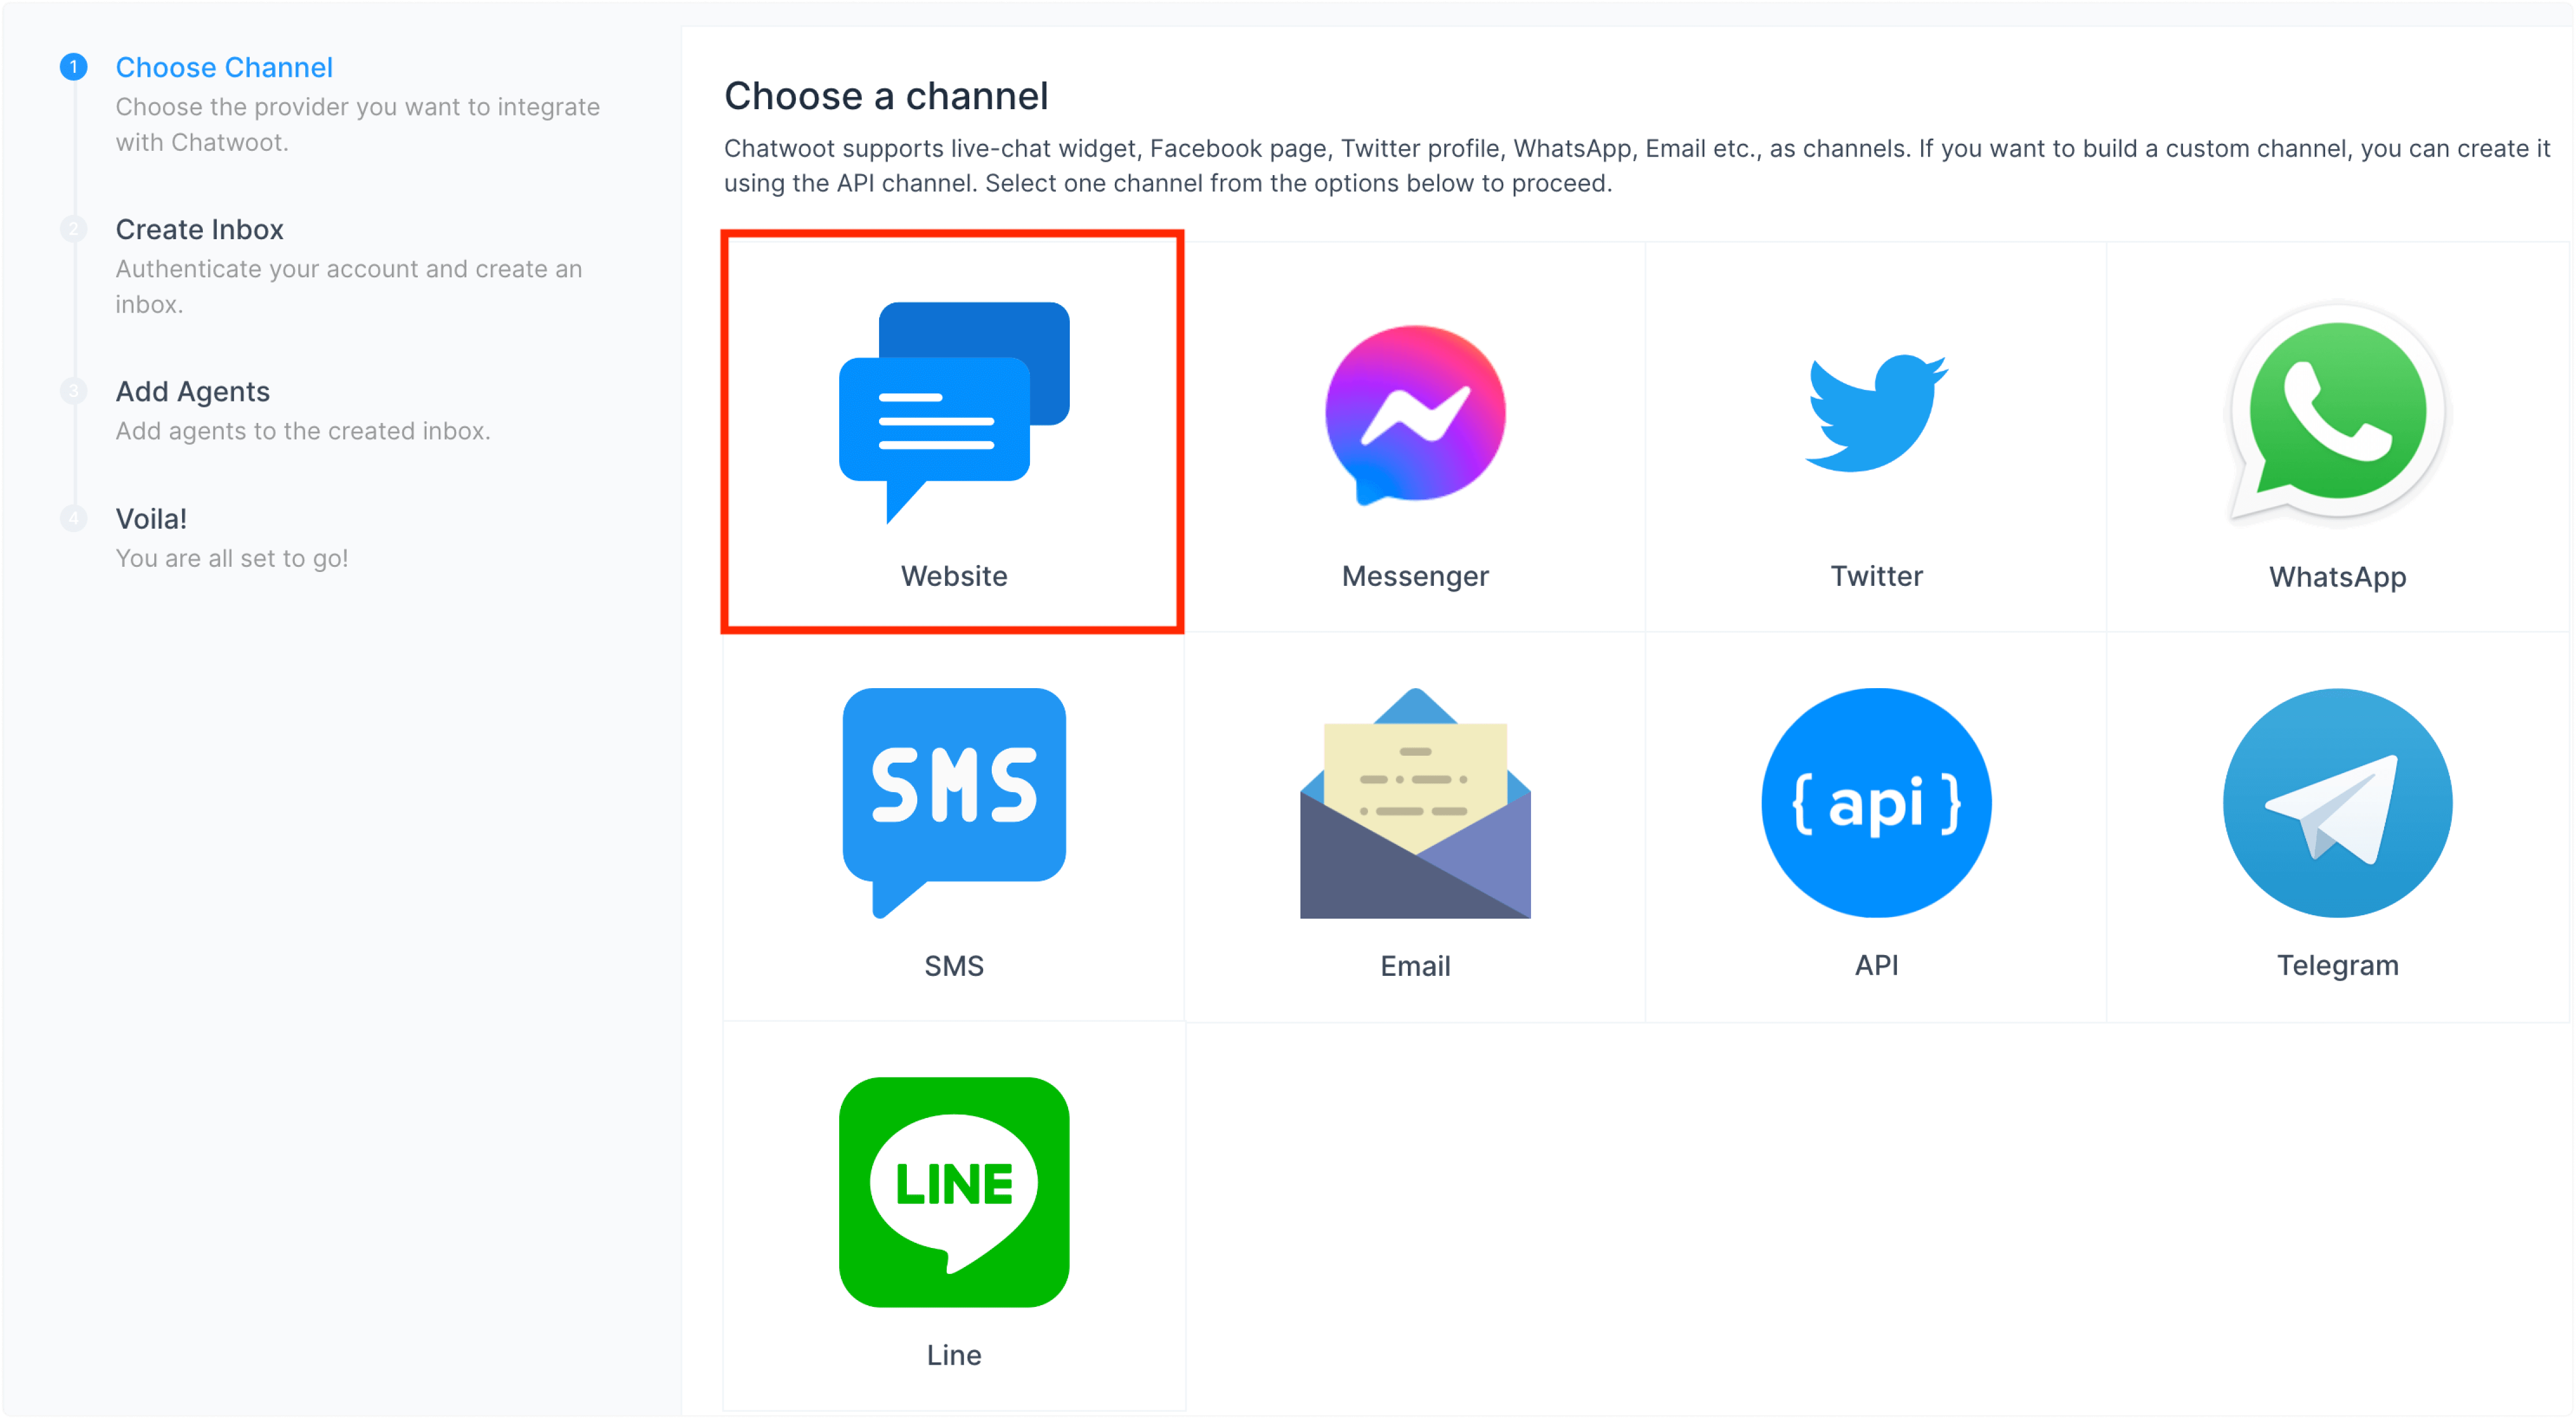
Step 3. Enter your website name, URL, and other details as described below.
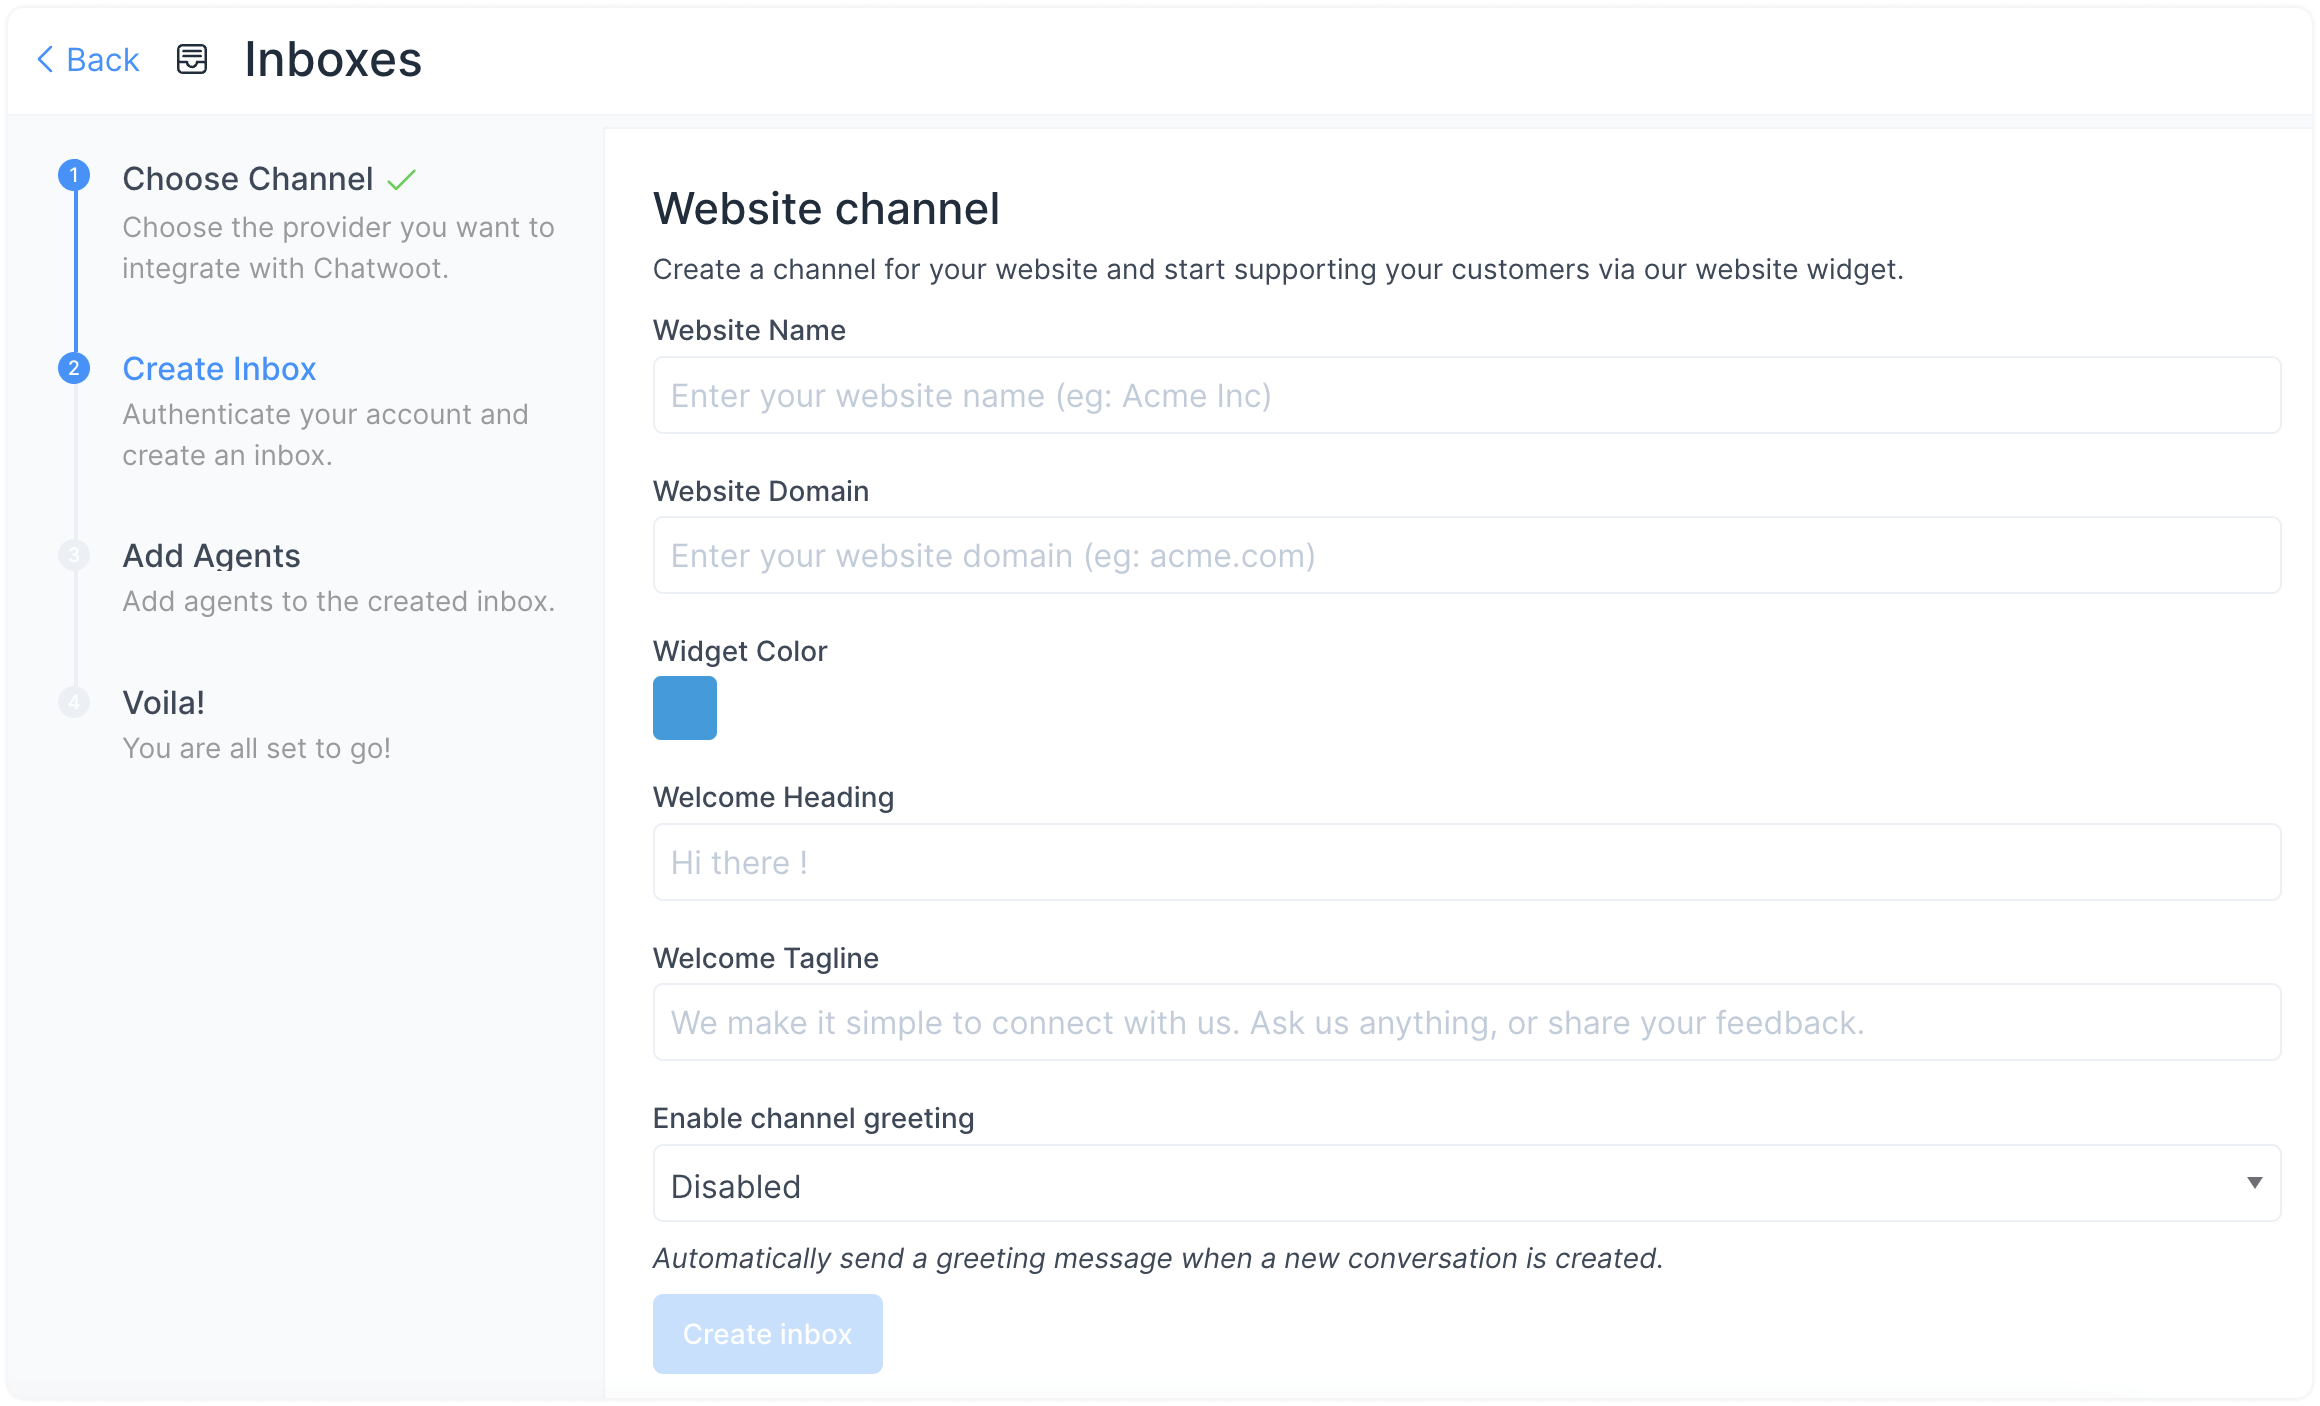
The available fields are explained below.
-
Website name
Enter your website's name. For e.g., Example Inc.
-
Website domain
Enter your website's URL. For e.g.,
www.example.com -
Widget color
Click the pallet and select a color for your website live chat widget.
-
Welcome heading
Write a greeting message for your customers. For e.g., Hello there 👋
-
Welcome tagline
For e.g.,We are here to help you with your questions. Ask us anything, or share your feedback.
-
Enable/disable channel greeting
Enable to Send Greeting message when customer starts conversation
-
Channel greeting message
Give a greeting to start the conversation. For e.g., Hi. How can we help you?
Once all details are entered, click the “Create Inbox” Button.
Step 4. "Add agents" to your website inbox.
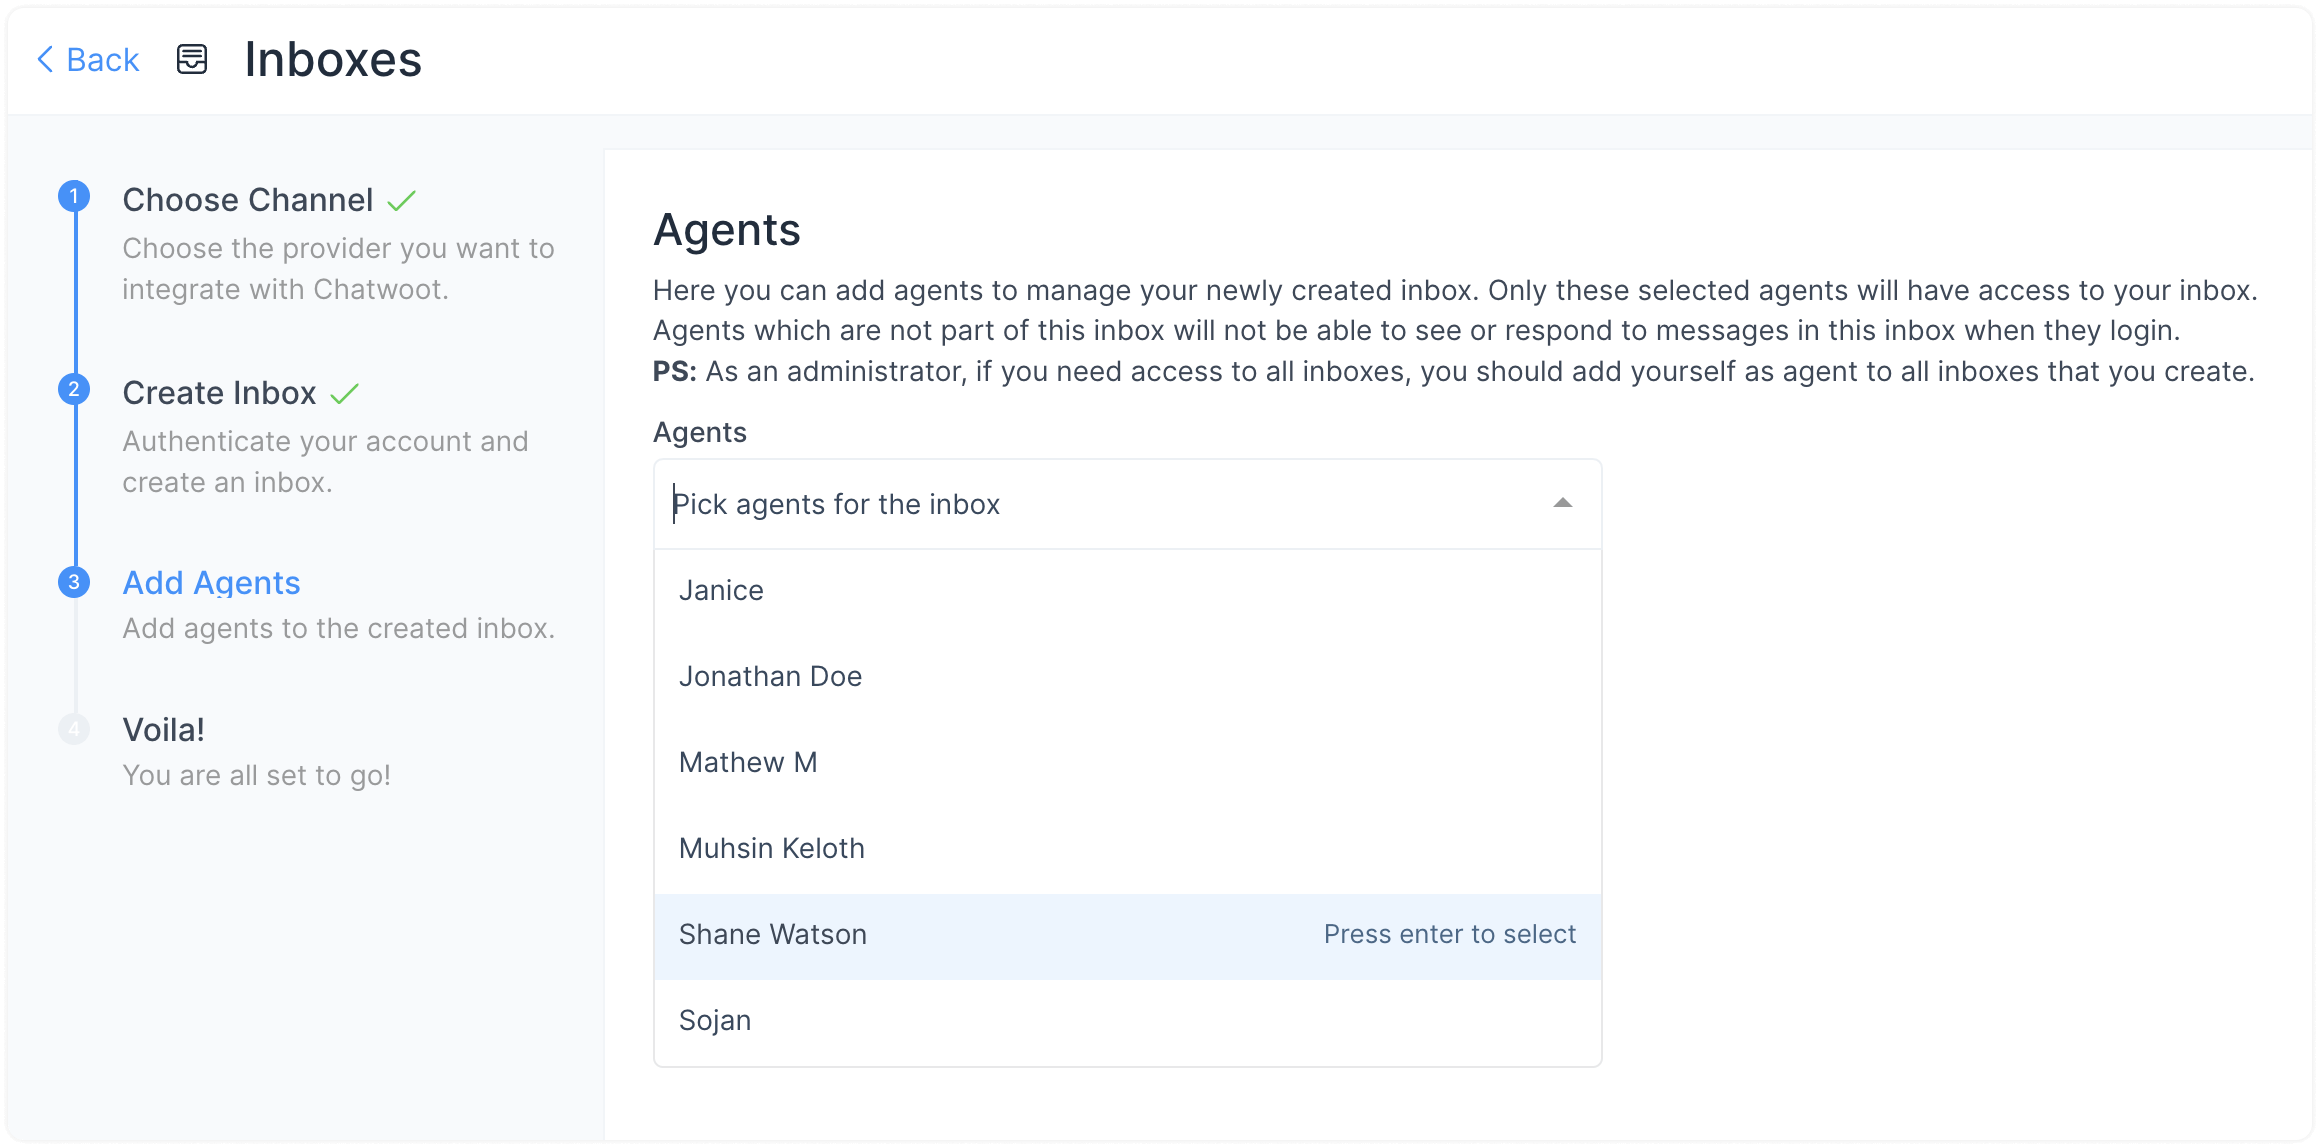
The conversations will be routed to agents only if they are associated with the inbox. Even if you are an Administrator, you need to add yourself as an agent to the Inbox to see the Inbox on your screen.
Select the Agents from the drop-down and click on Add agents. If agents have not been added, follow the steps to add agents.
Step 5. Hooray! You have successfully created a website inbox. Now, add the widget to your website.
Copy and paste the code snippet shown on the page to your website and start supporting your customers. You can click on the Copy button to copy and then paste in the root file of your website.
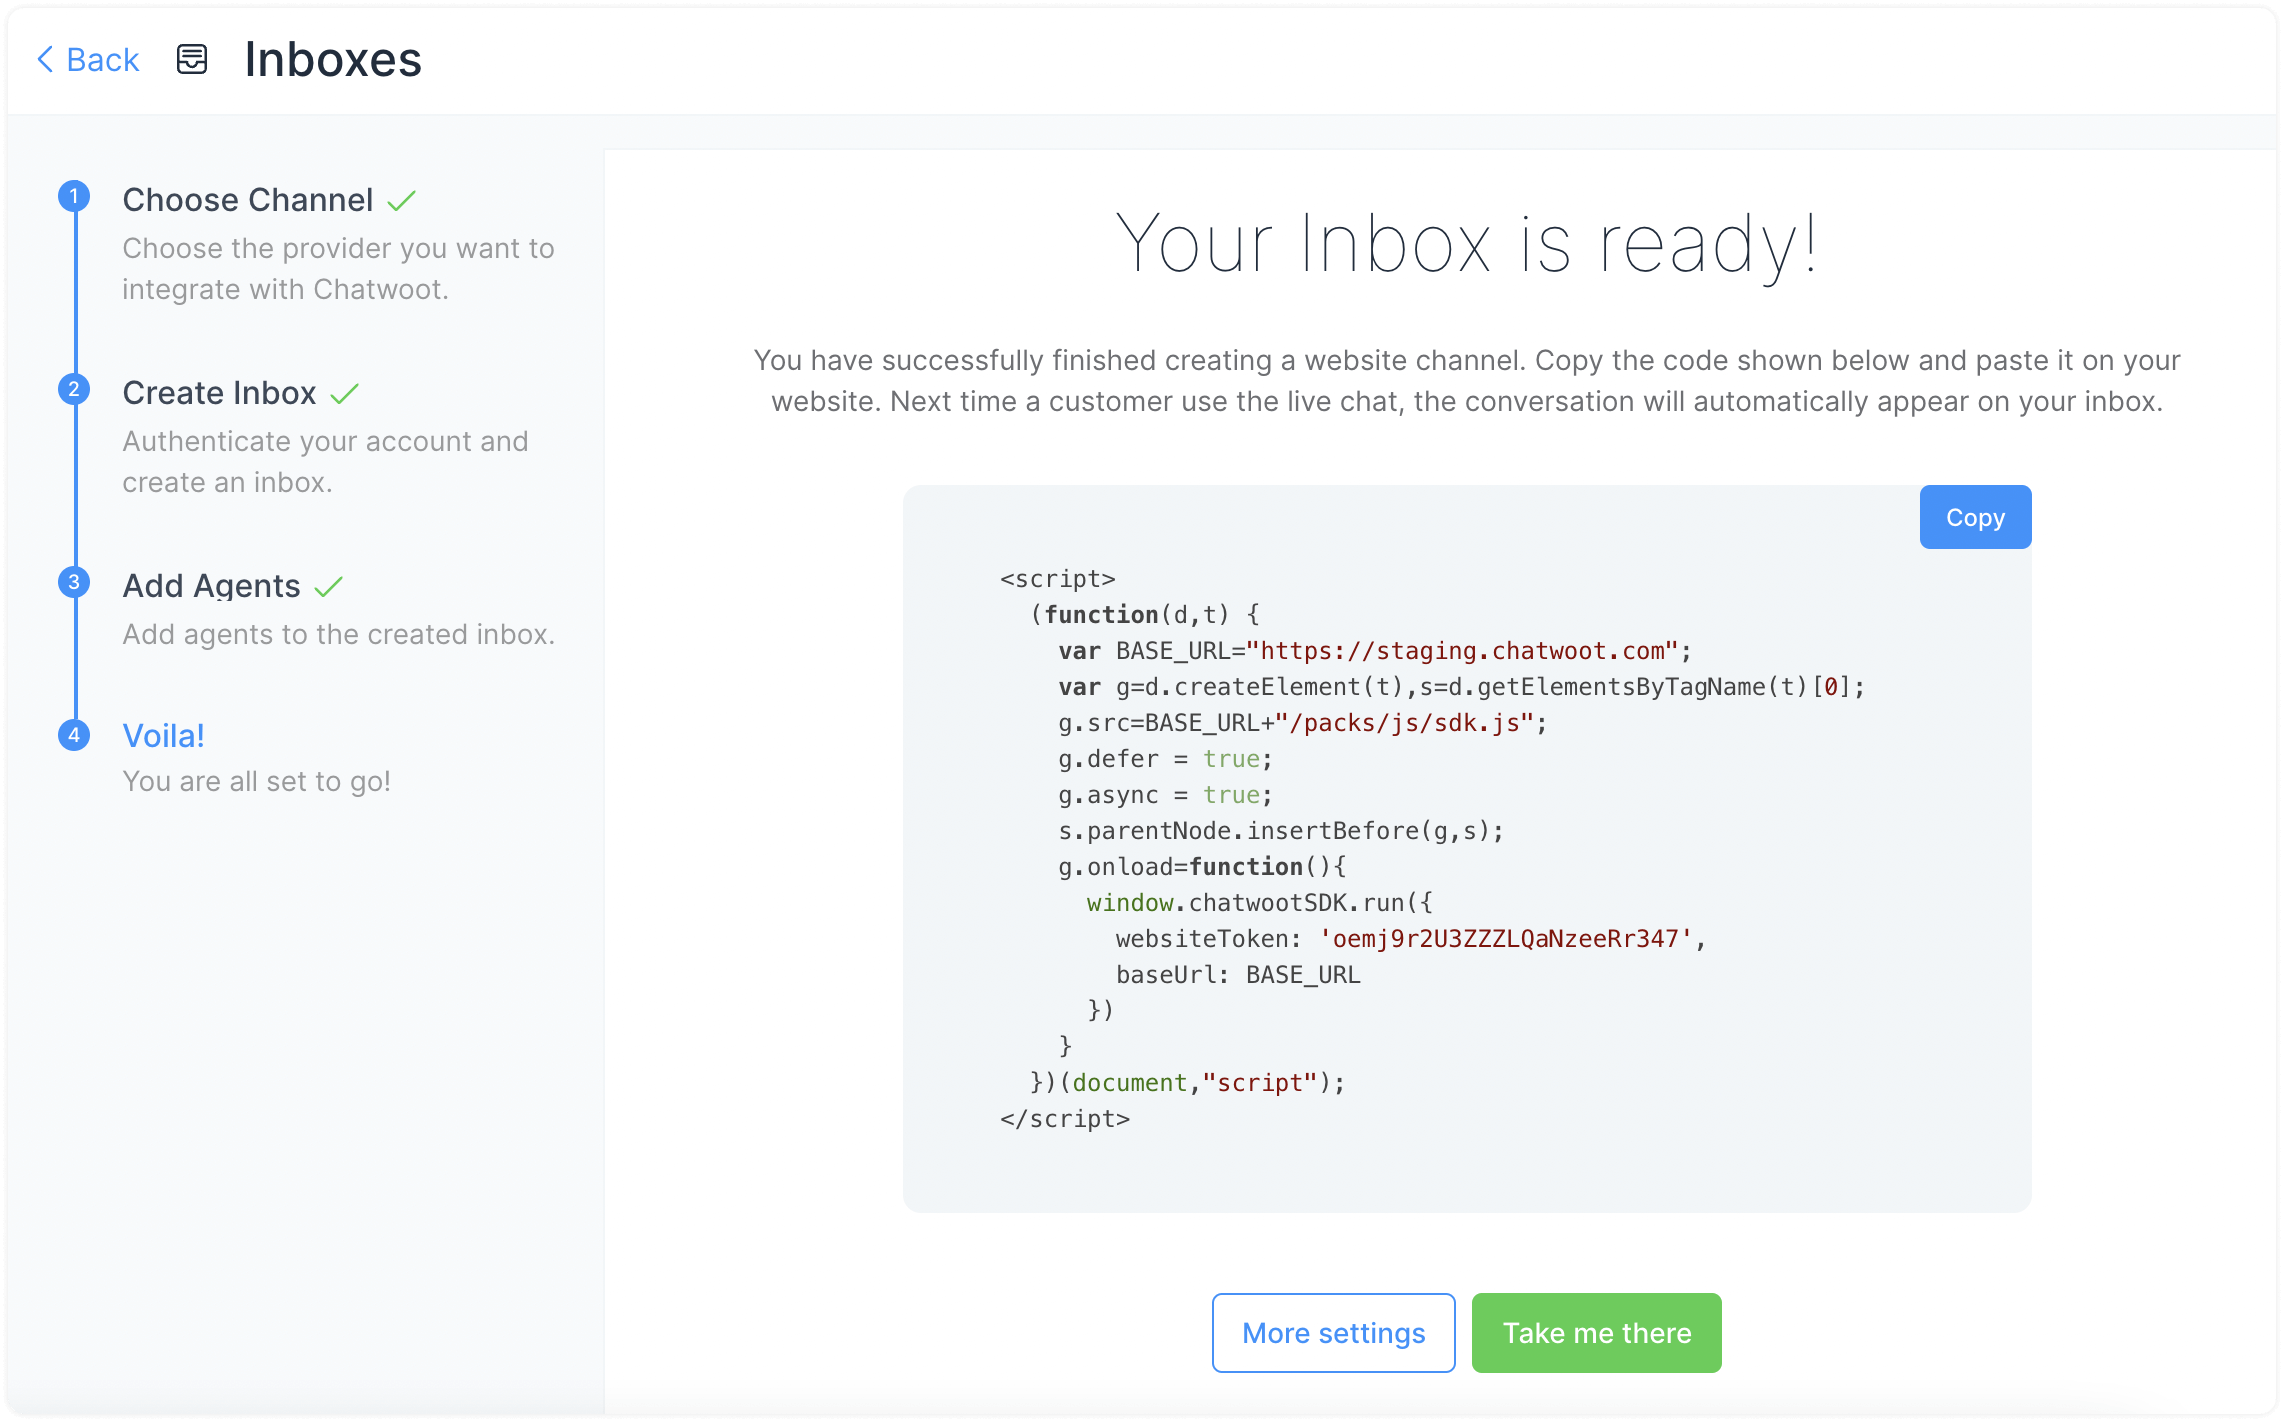
If you click the "More settings" Button, you will be taken to the Additional Settings for Inbox. If you click on the "Take me there" button, you will be taken to the newly created Inbox.
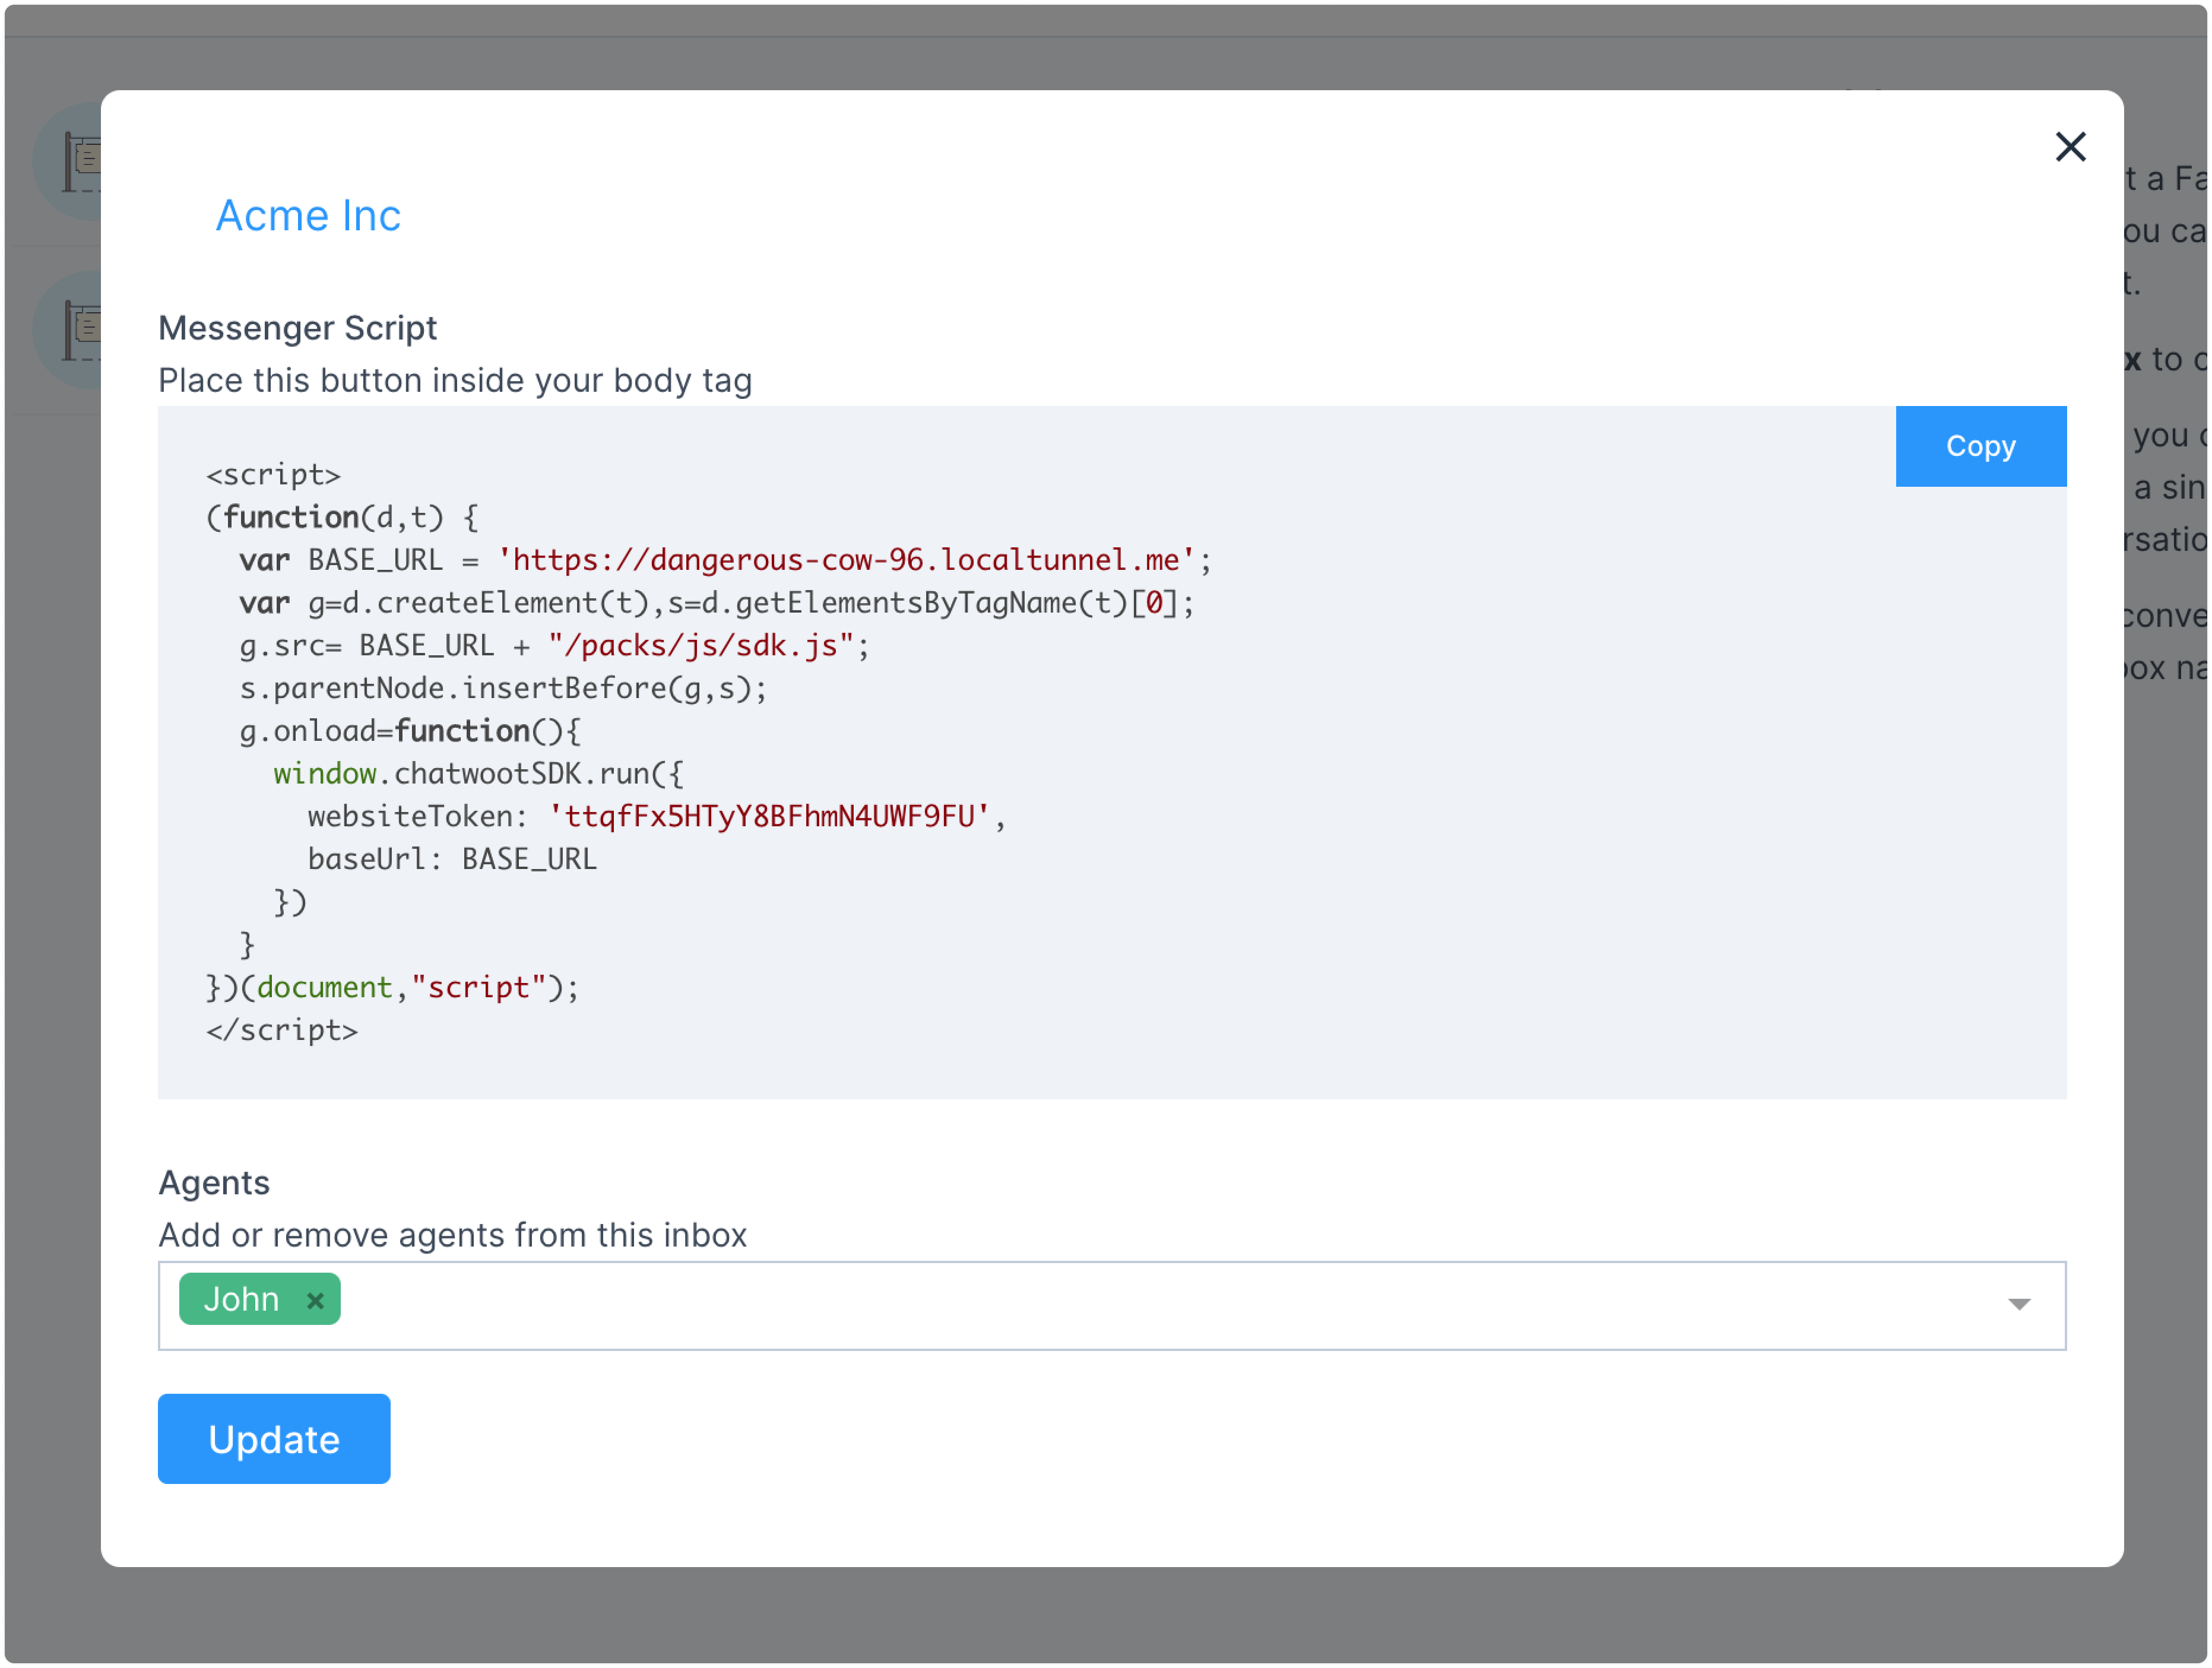
Step 6. If you want to update the agents with access to the inbox, go to Settings → Inboxes. You will be able to see your website inbox listed there. Click on Settings. You will be able to see the code as well as the list of agents who have access to the inbox.
Complete the website inbox setup
You already have a functional website inbox. Let's take a look at the additional Inbox settings.
On your Inboxes screen, click the gear icon to reach the Settings page. You will see the following screen:
Settings tab
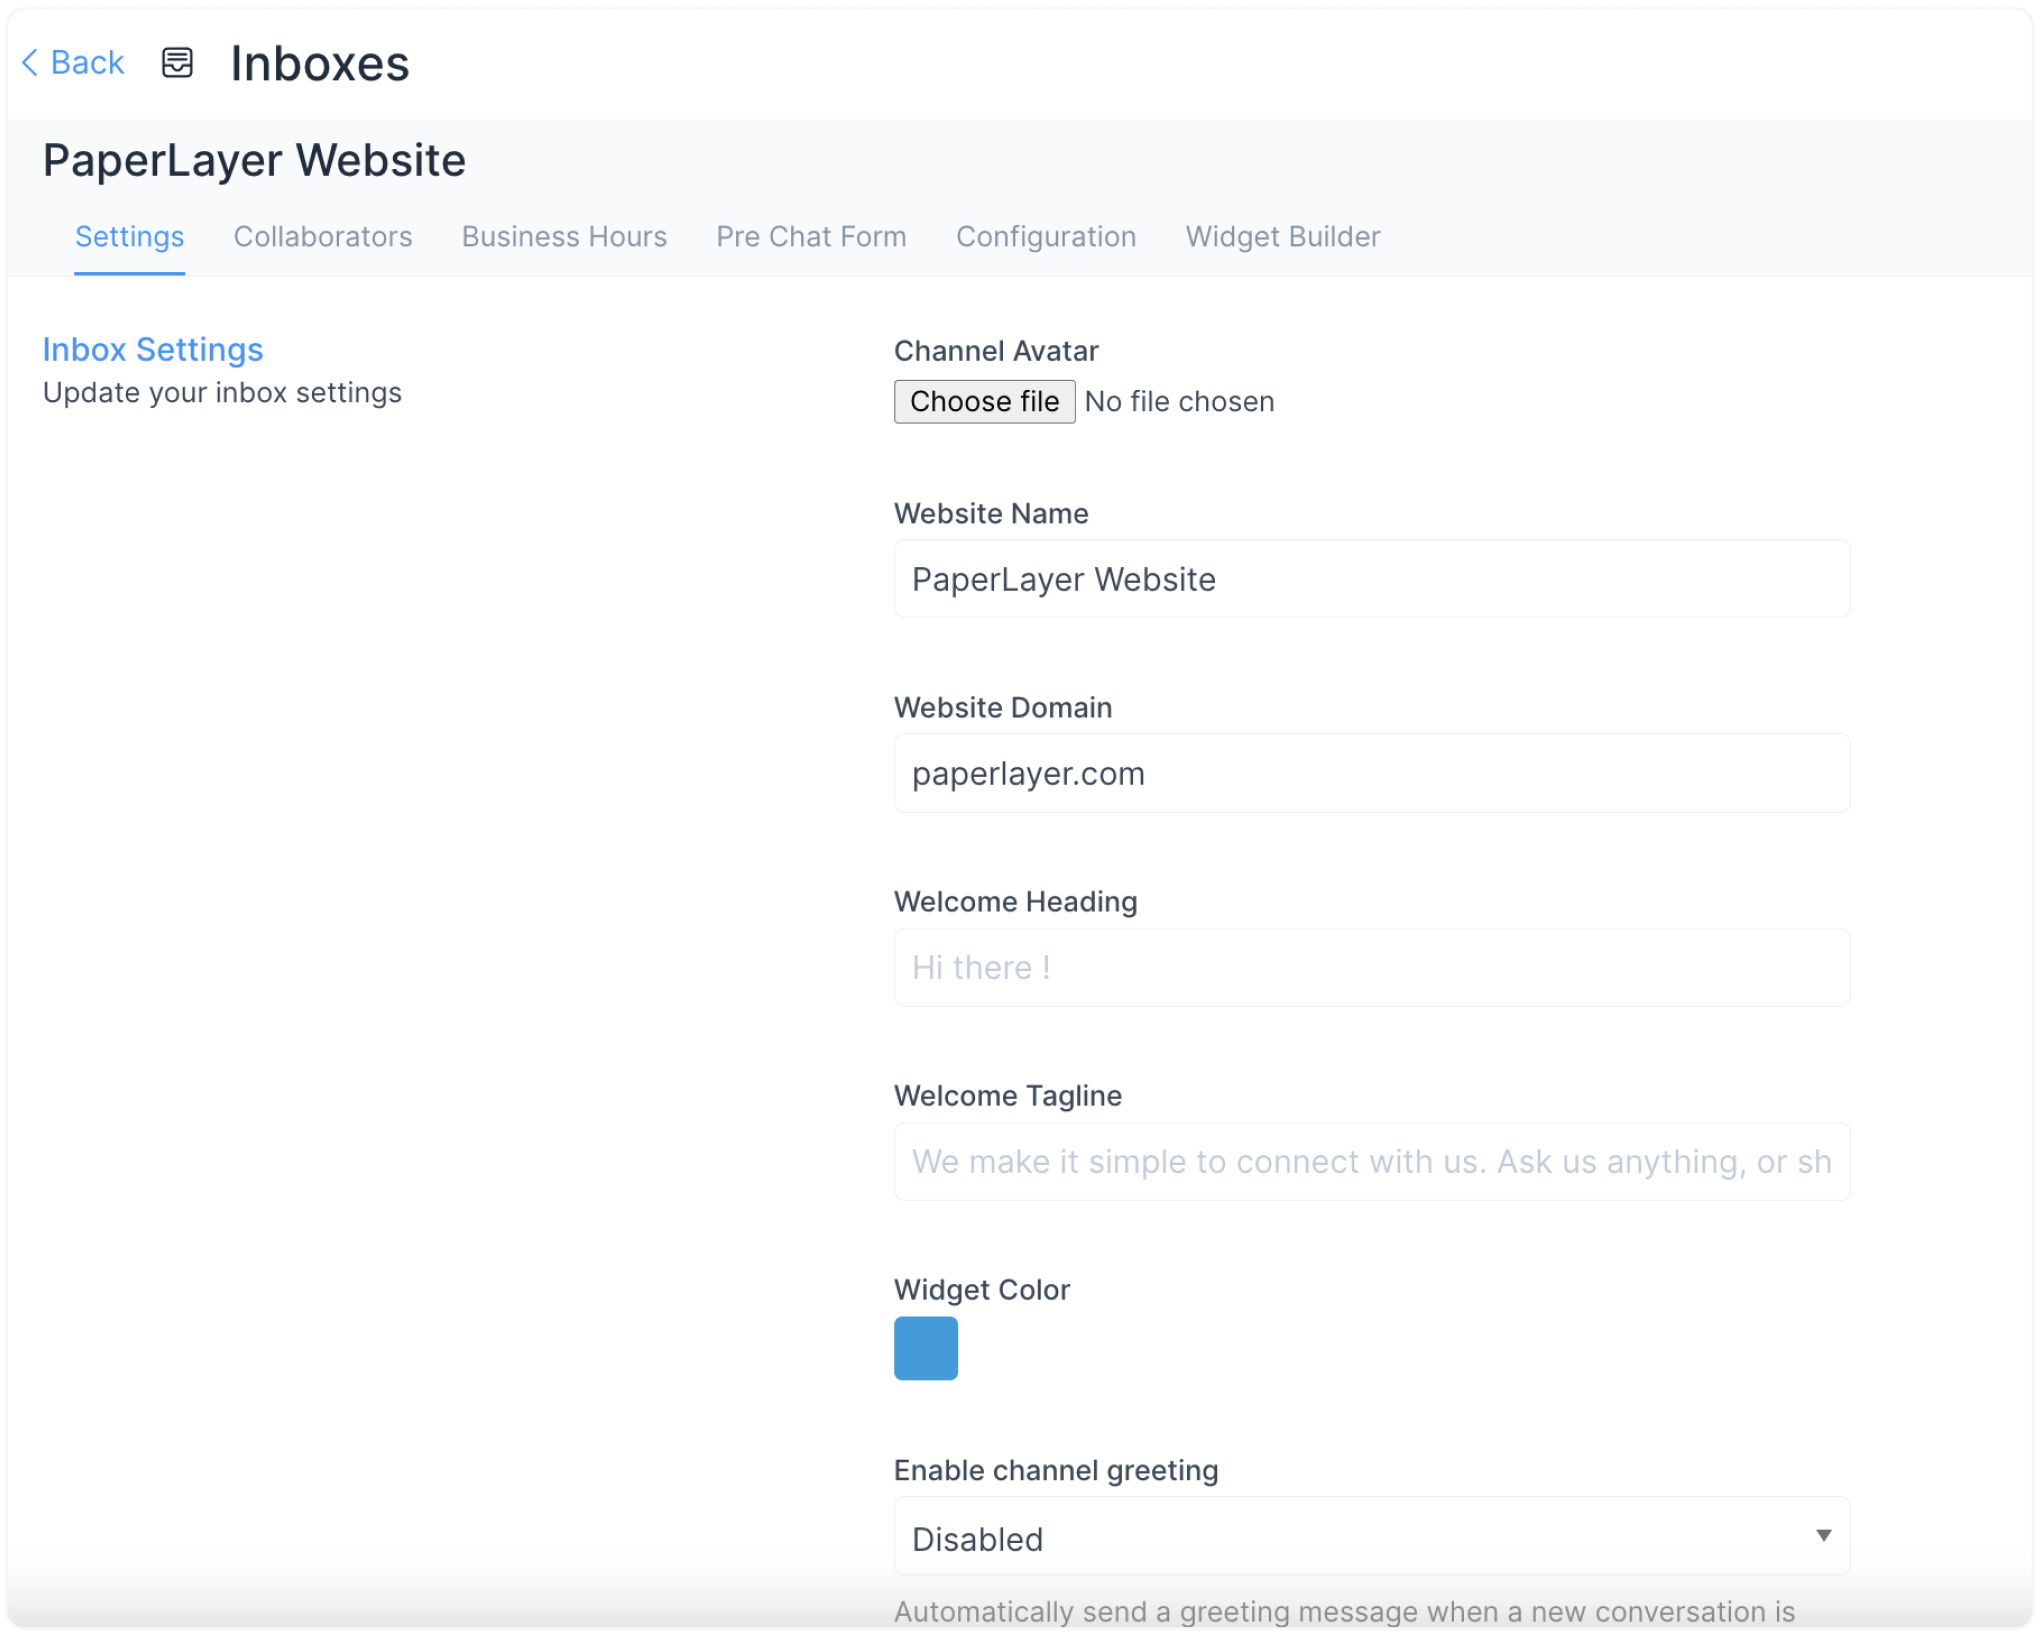
Scroll down to see more settings, where you can set up the various notifications you would like to receive when your website inbox starts functioning.
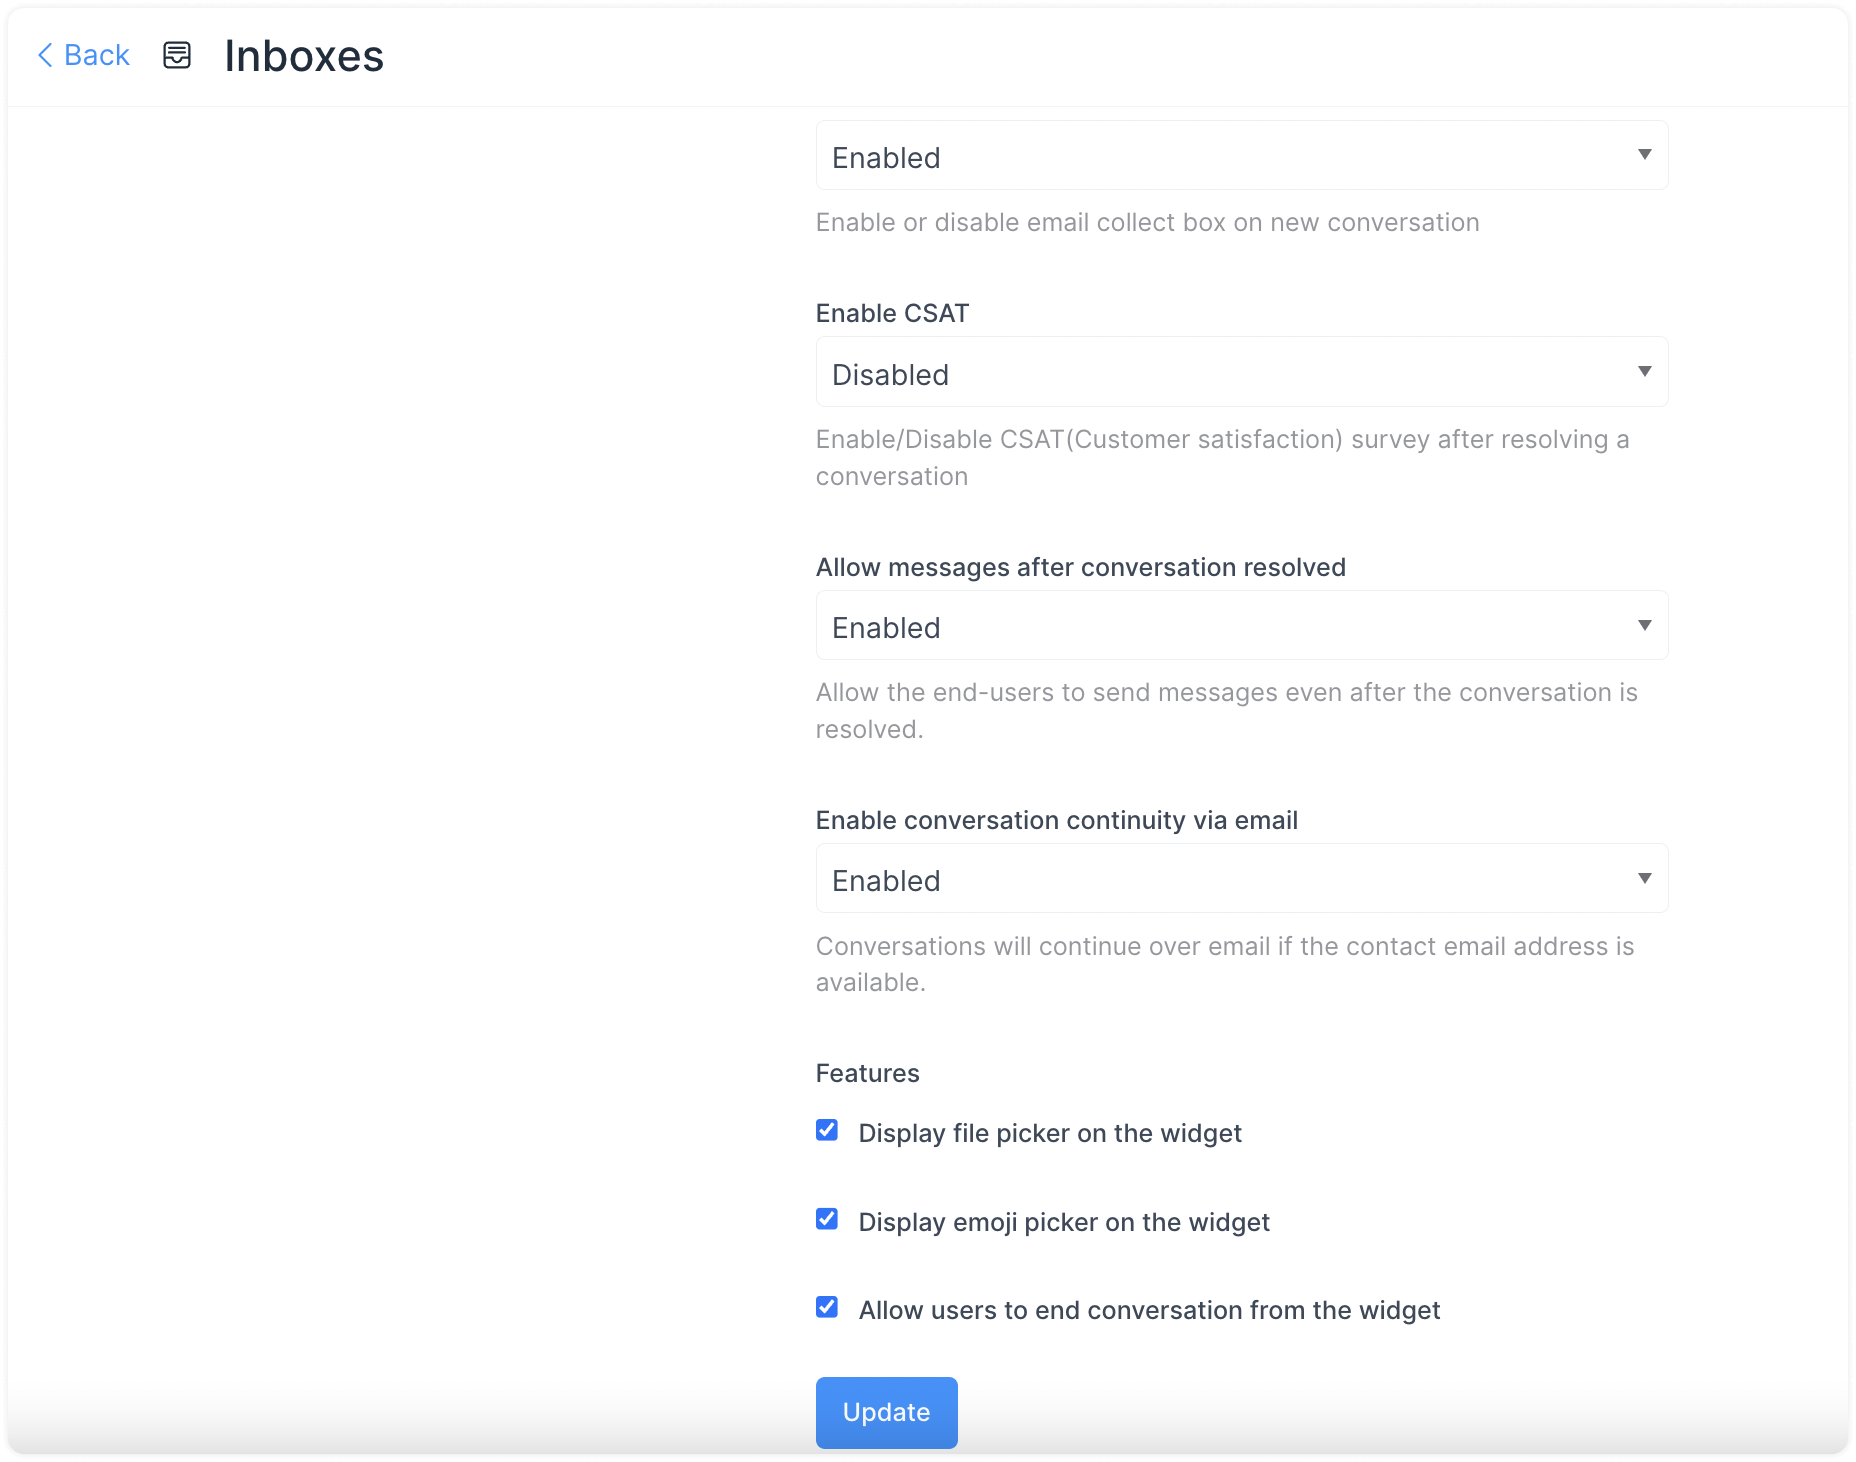
Here are a couple of examples for your understanding:
Enable email collect box is enabled by default. This means an automatic message to collect the e-mail id will be displayed once the customer starts a conversation. The customer/end user will receive a prompt to enter an e-mail id.
Enable CSAT. Once you enable this, your Customer Satisfaction survey will be launched every time a ticket is resolved. The CSAT results can be viewed later in the Reports section.
Click the "Update" button to save the changes you have made.
Collaborators tab
Click on the "Collaborators" tab.
Here, you can add Agents to the Inbox or delete Agents already added in the Inbox. You can also enable or disable the automatic assignment of new conversations to the agents added to this inbox.
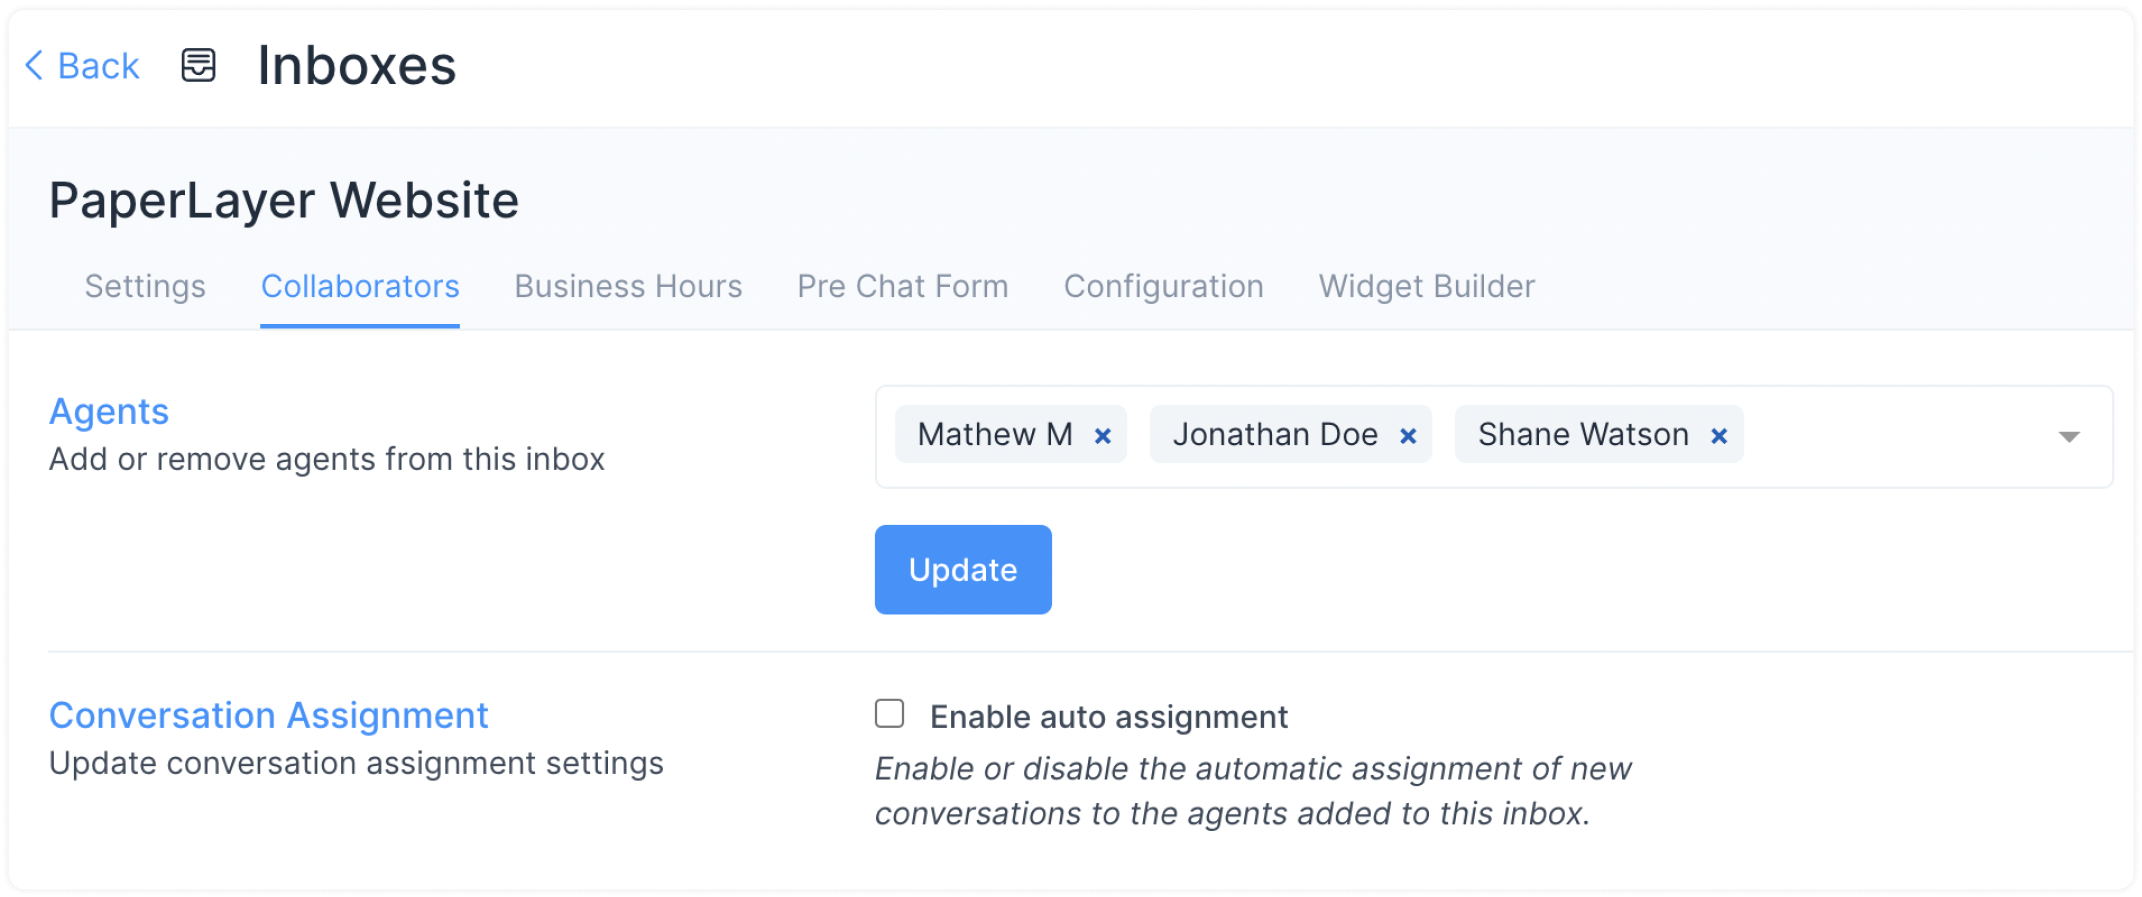
Click on Update to save the changes.
Business Hours tab
Click on the "Business Hours" tab. In this section, you can set the working hours of your team.
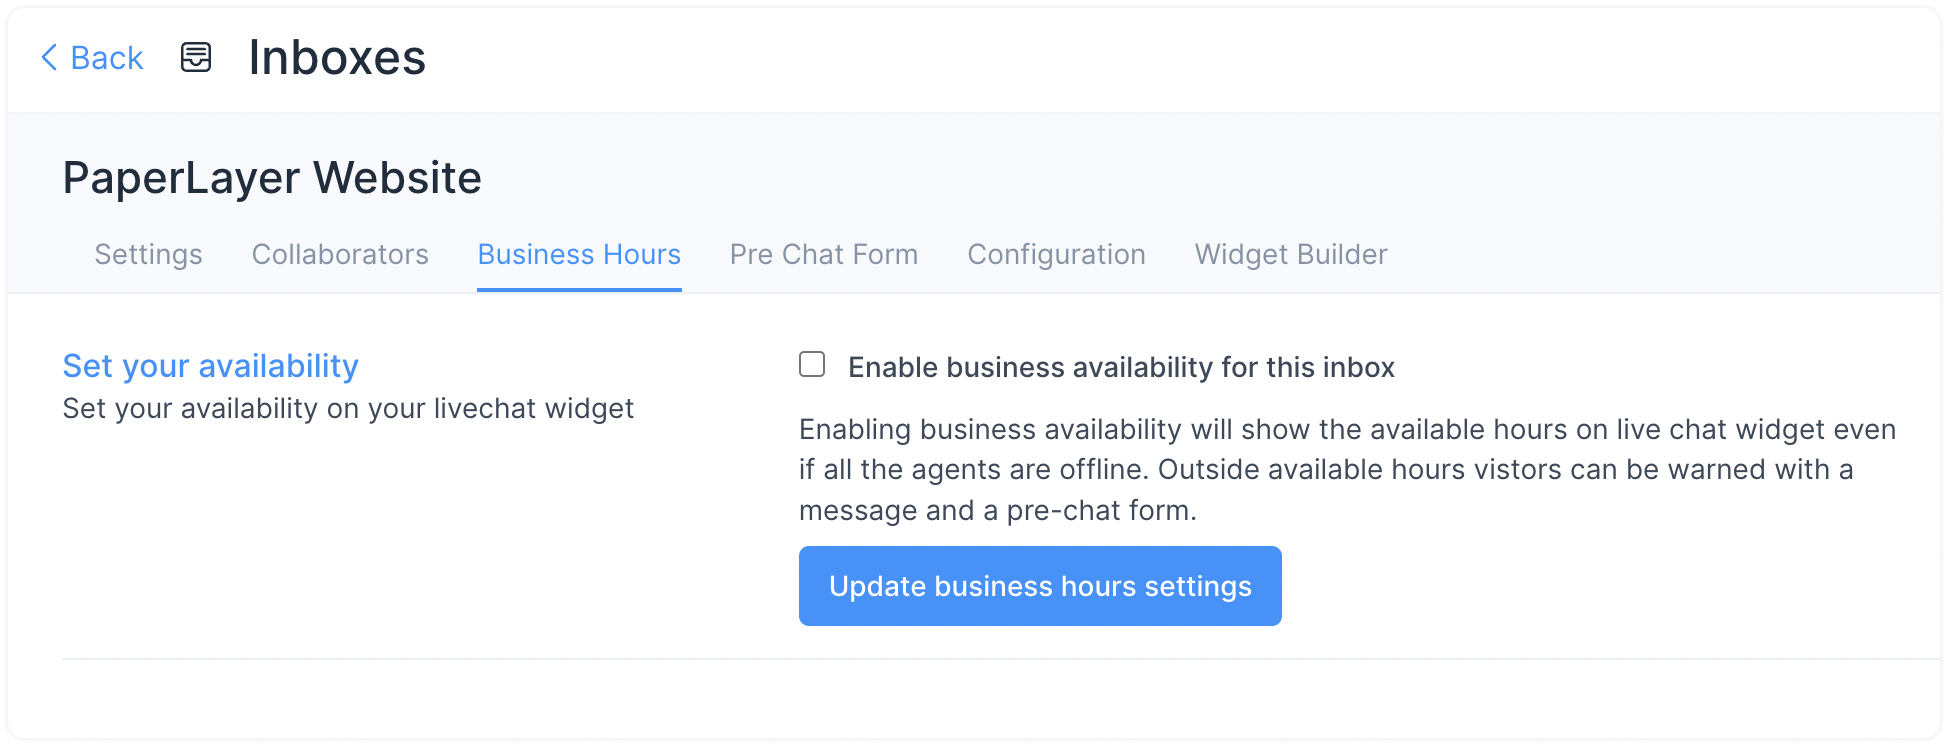
Check the check box for Enable business availability for this inbox if you have well-defined business hours. Once the box is checked, the a new section will open up, like shown below. You can write your message to be displayed to the customer during OFF business hours.
Note: When Captain is enabled on an inbox, the unavailability message is automatically suppressed. Captain will handle conversations directly, even outside business hours. Unavailability message will only be sent if Captain hands off the conversation to a human agent or if Captain is not configured for the inbox.
You can also select the available business hours for each day of the week, along with the proper time zone.
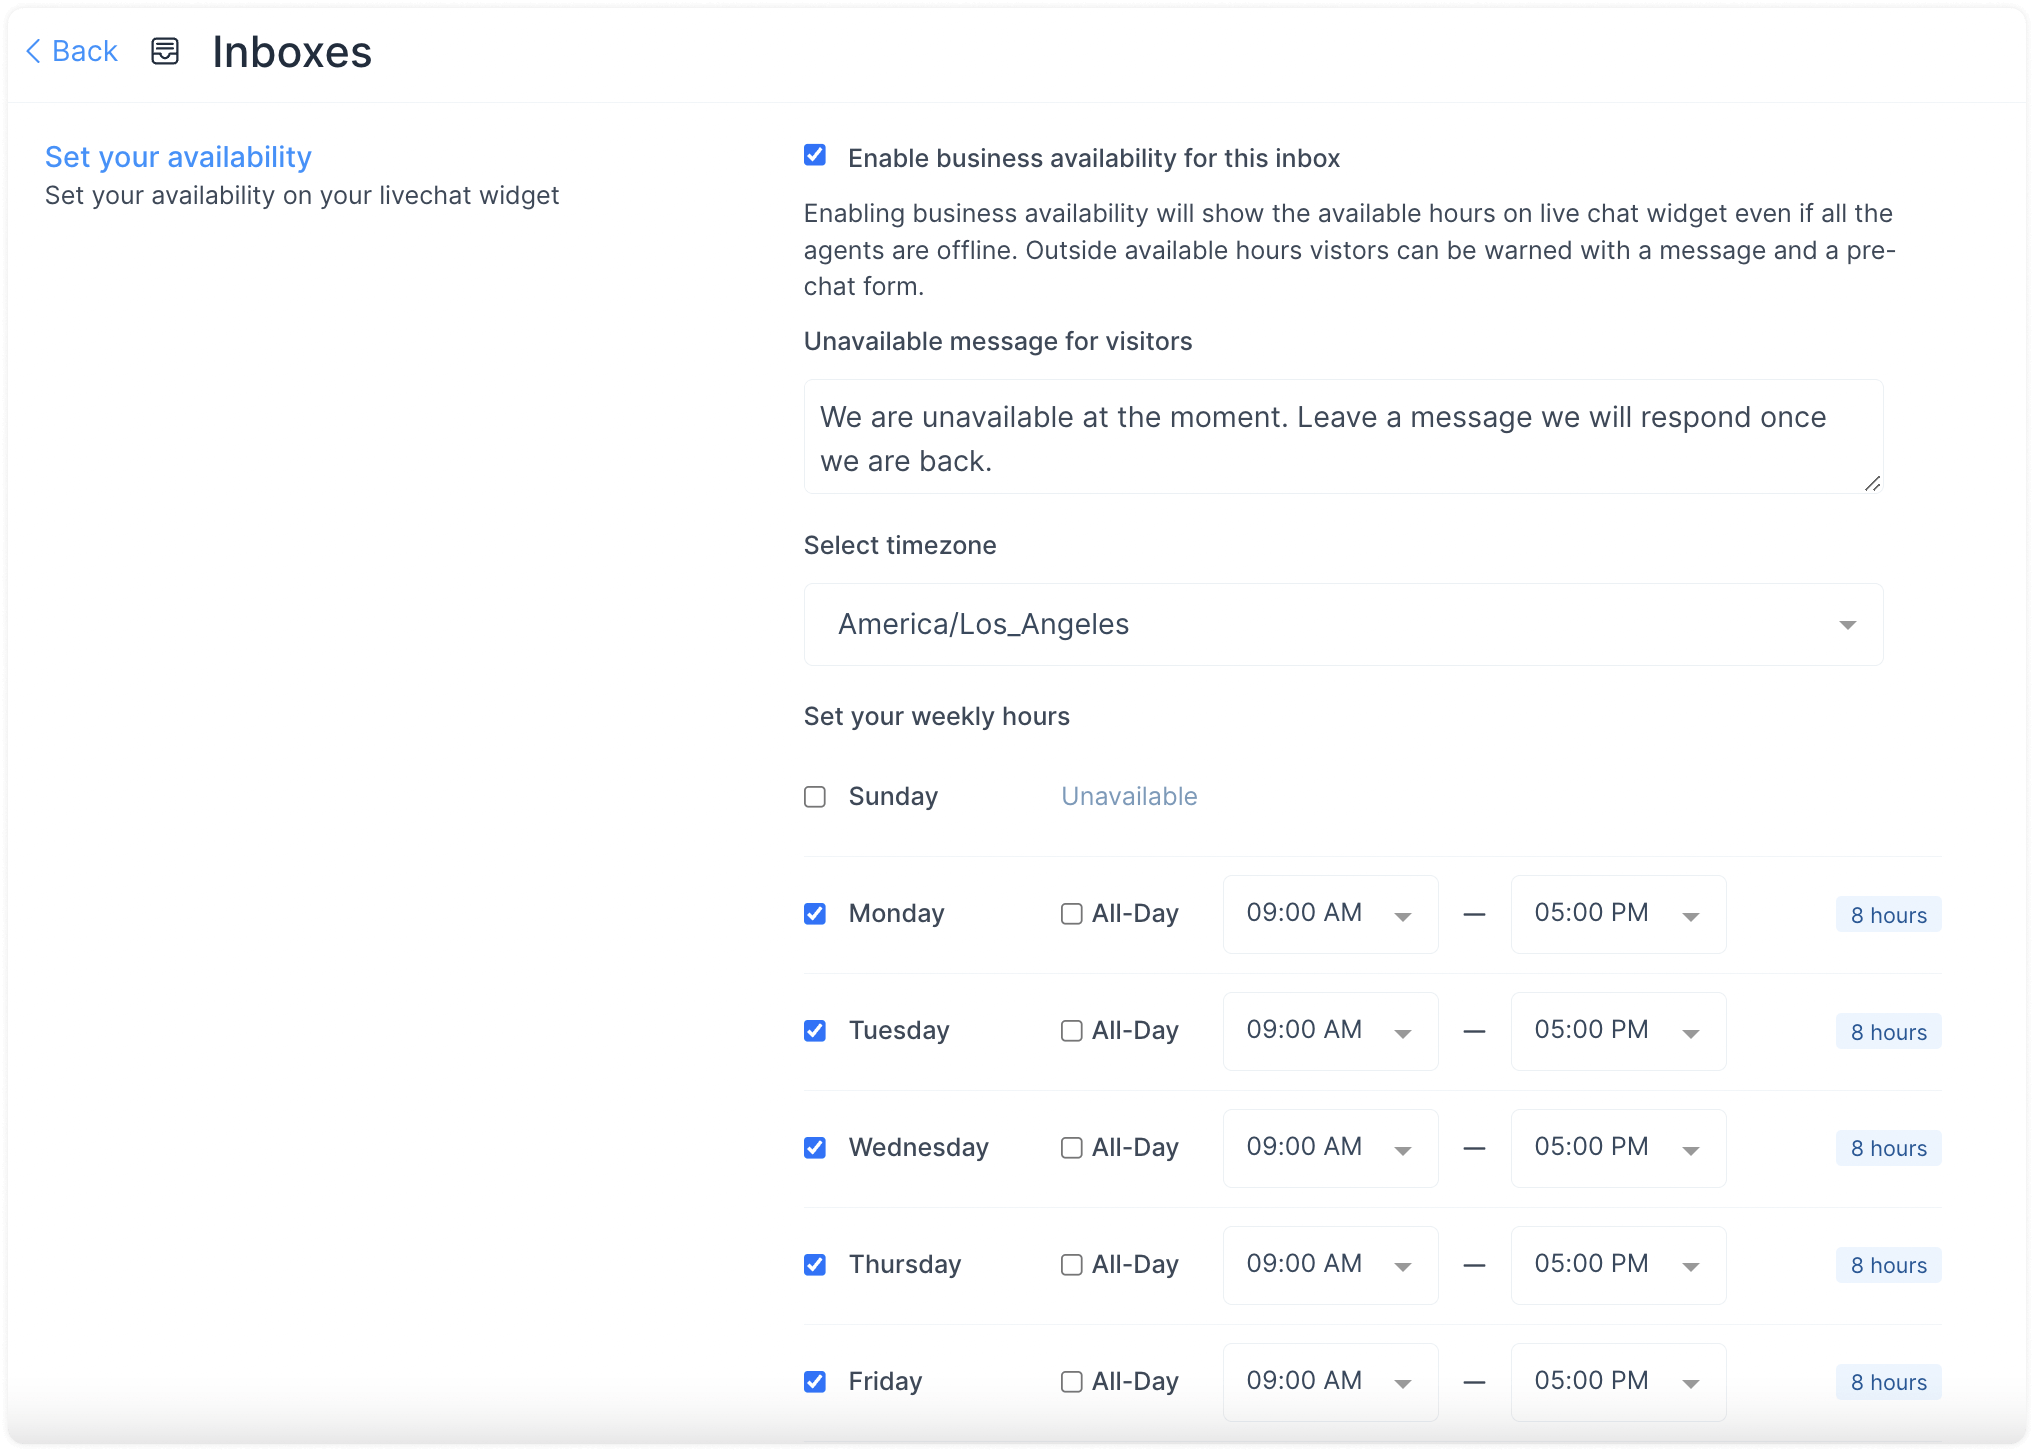
Click on the Update Business Hour Setting Button.
Pre Chat Form tab
Click on the "Pre Chat Form" tab.
With this, you can collect information about your customers as soon as they enter your live chat window/website widget. You can use this to collect name, e-mail address, and more before beginning the chat.
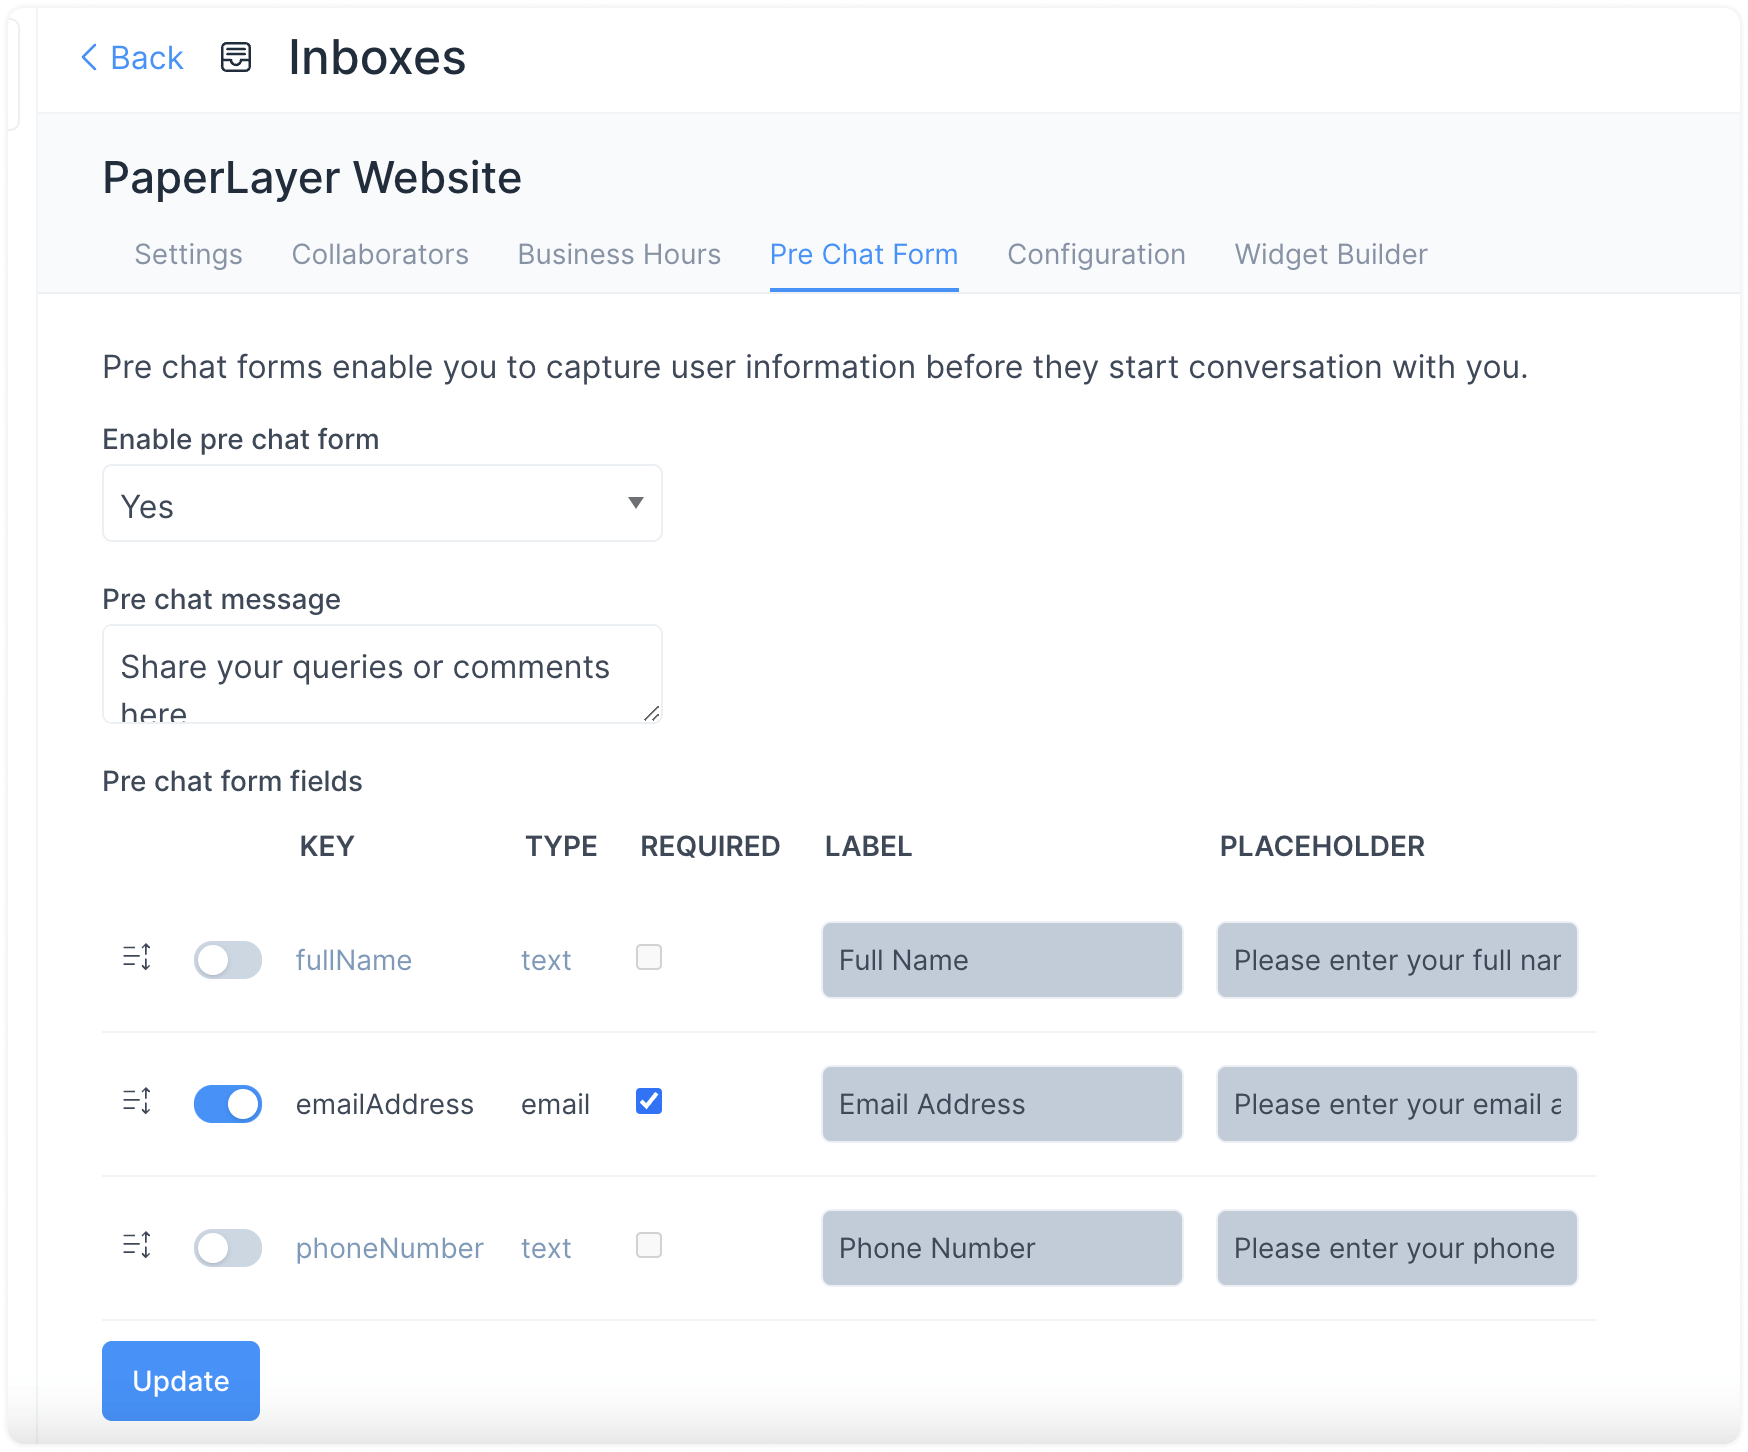
The fields as seen are explained below:
-
Enable pre chat form
Select Yes or No. Yes, if you want to use the prechat form. No if you're going to keep it disabled.
-
Pre Chat Message
Write a message to start a conversation with the customer. For e.g., Hi, We need some information to serve you better.
-
Pre chat form fields
Check the needed ones.
Imp: "Name," "Email" and "Phone" are the only standard attributes for the pre chat form. The other fields are created through custom attributes. If you need custom fields in your form, create them as custom attributes first.
Click the "Update" button. Pre Chat Form is enabled now.
Configuration tab
Click on the “Configuration” tab. You can find the code snippet to be copied to the website here.
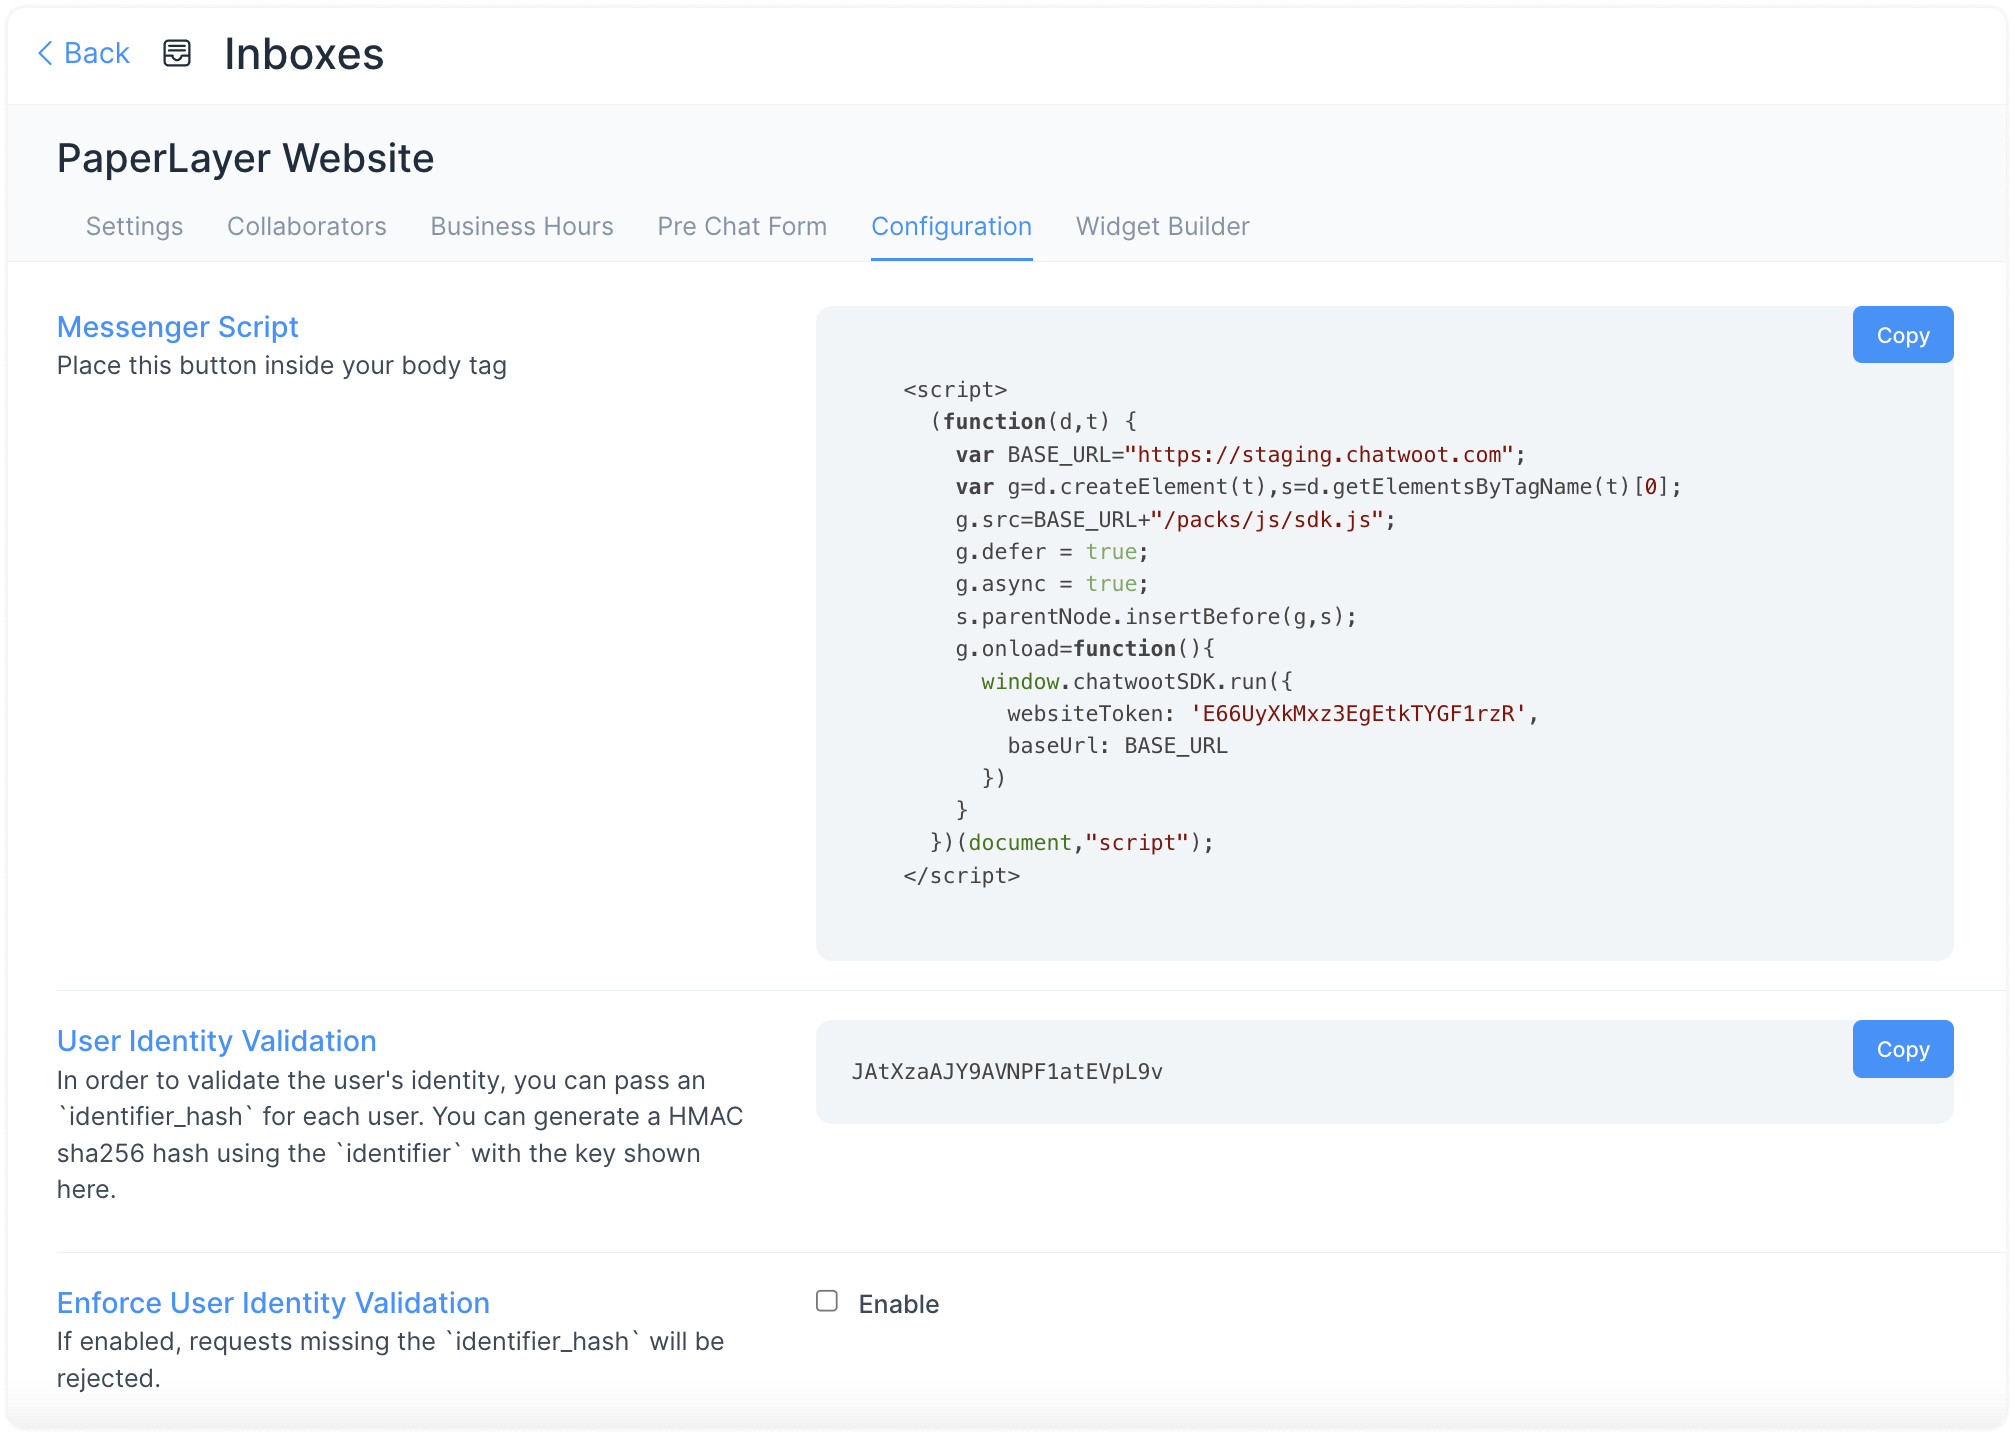
You can click on the Copy button to copy the code and paste it into the root file of your website.
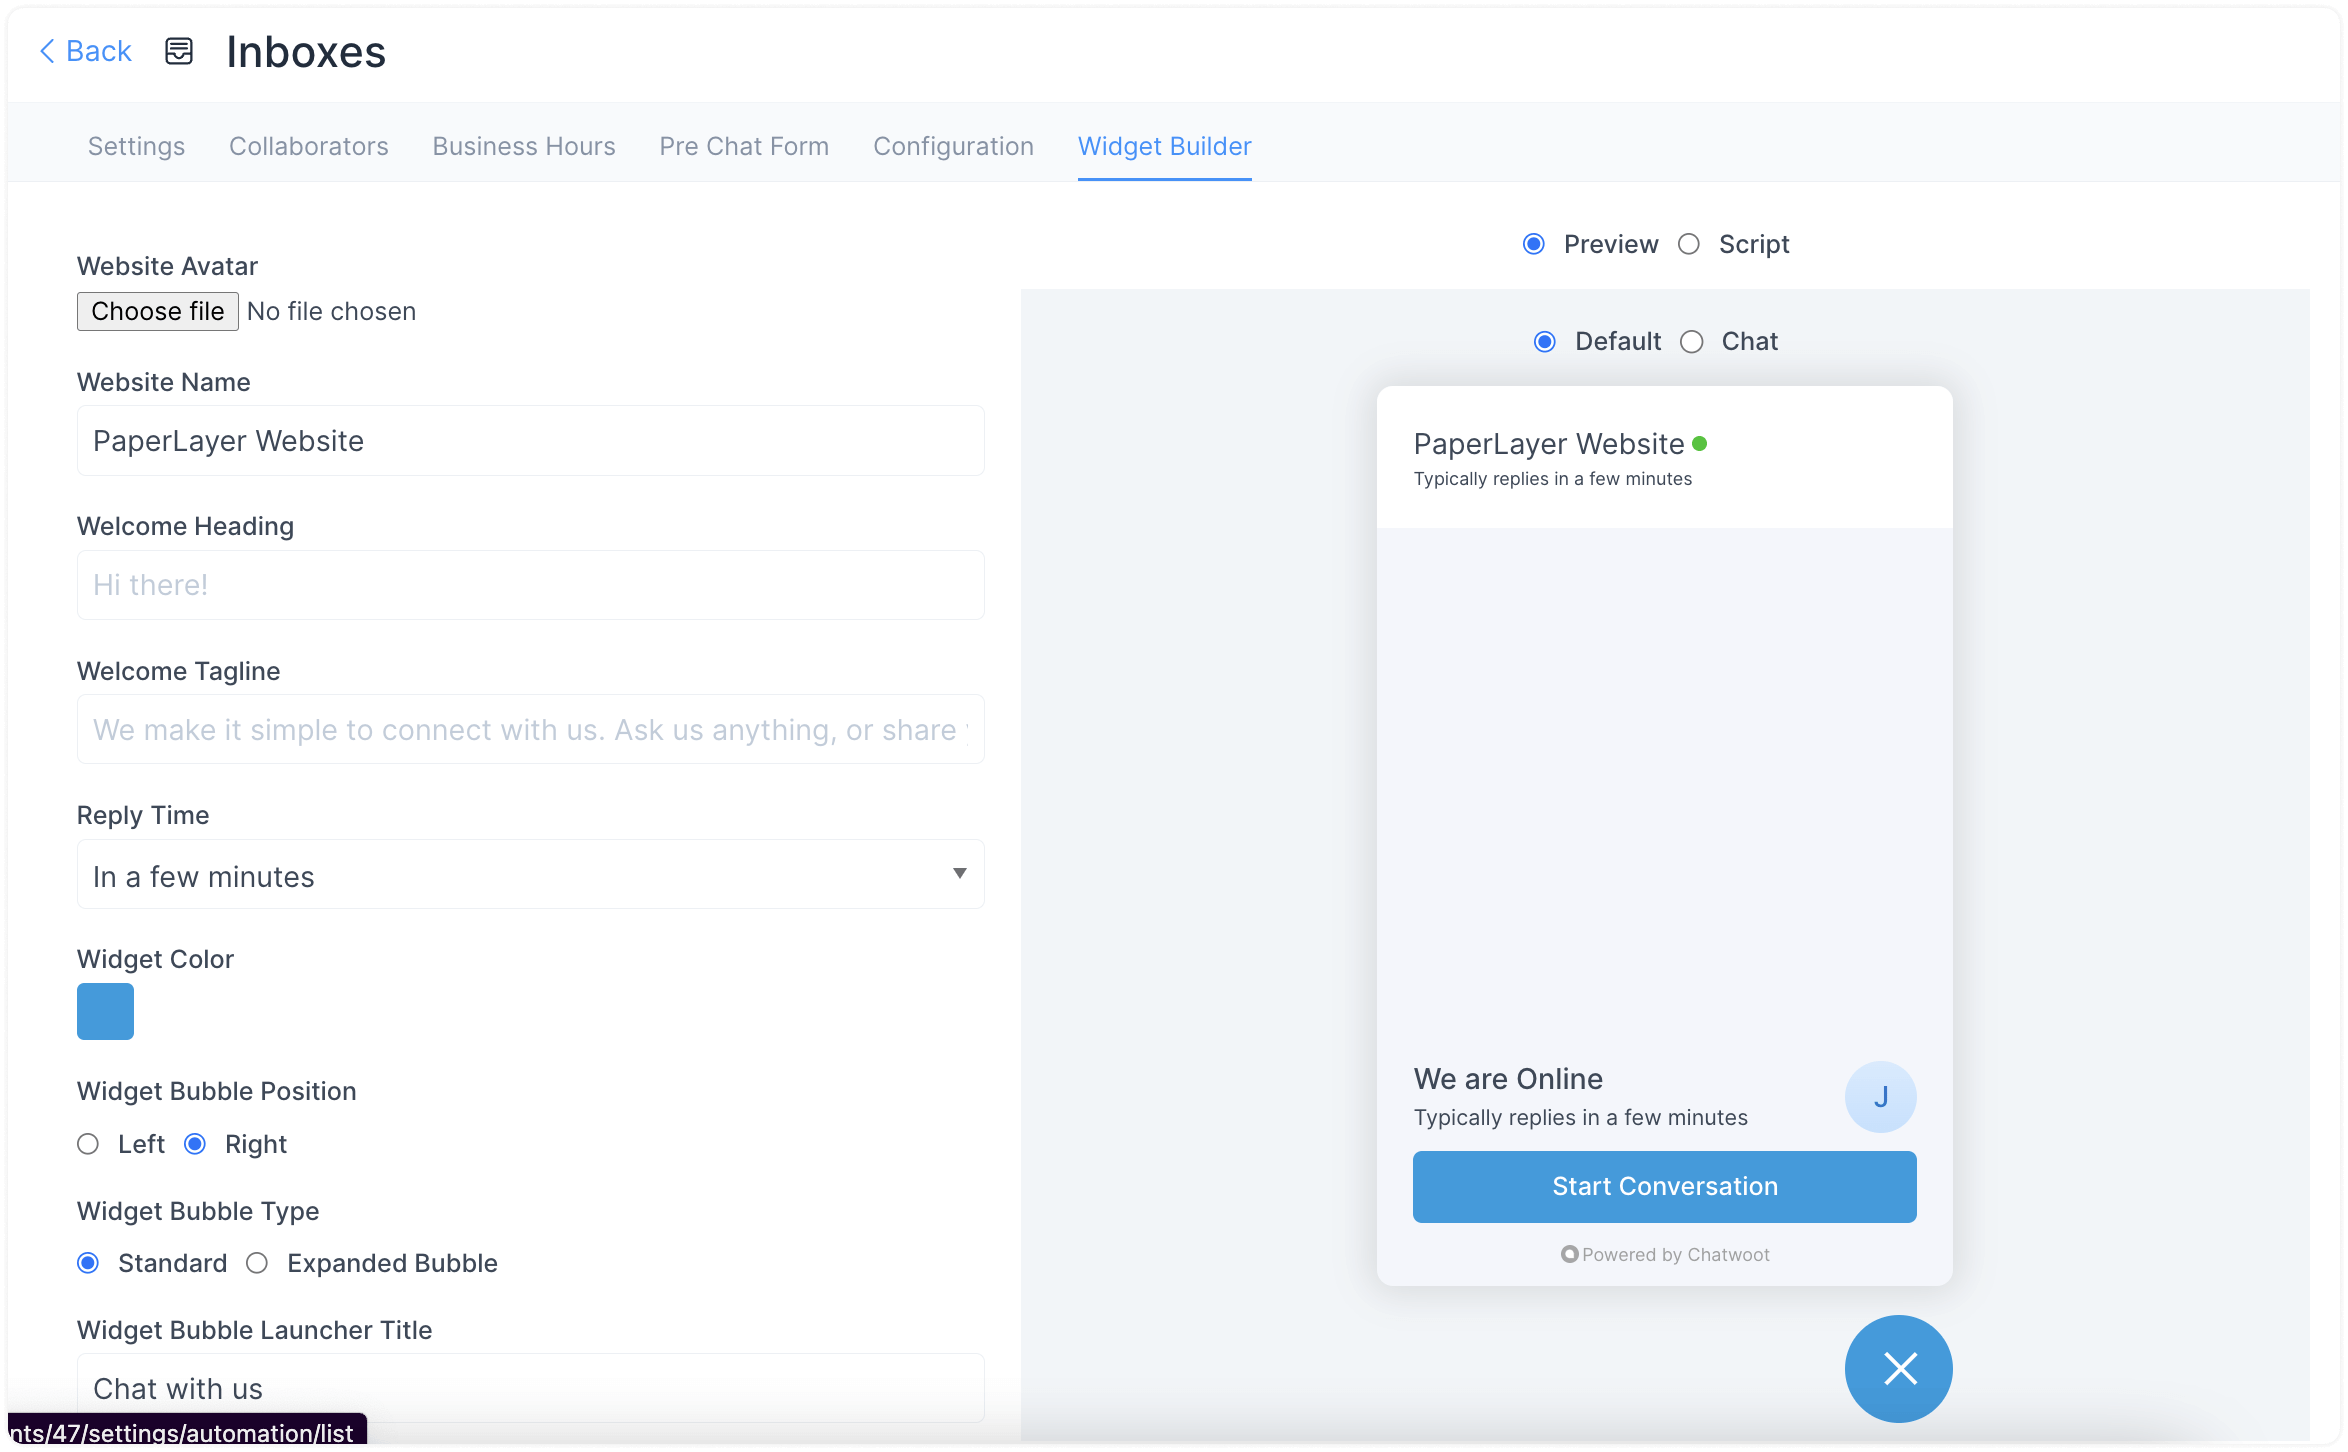
Widget Builder tab
You can customize your web widget with simple settings given on this page. You will be able to see your changes live.