To create and configure an API channel inbox in Chatwoot installations, follow the step described below.
Setup the API channel
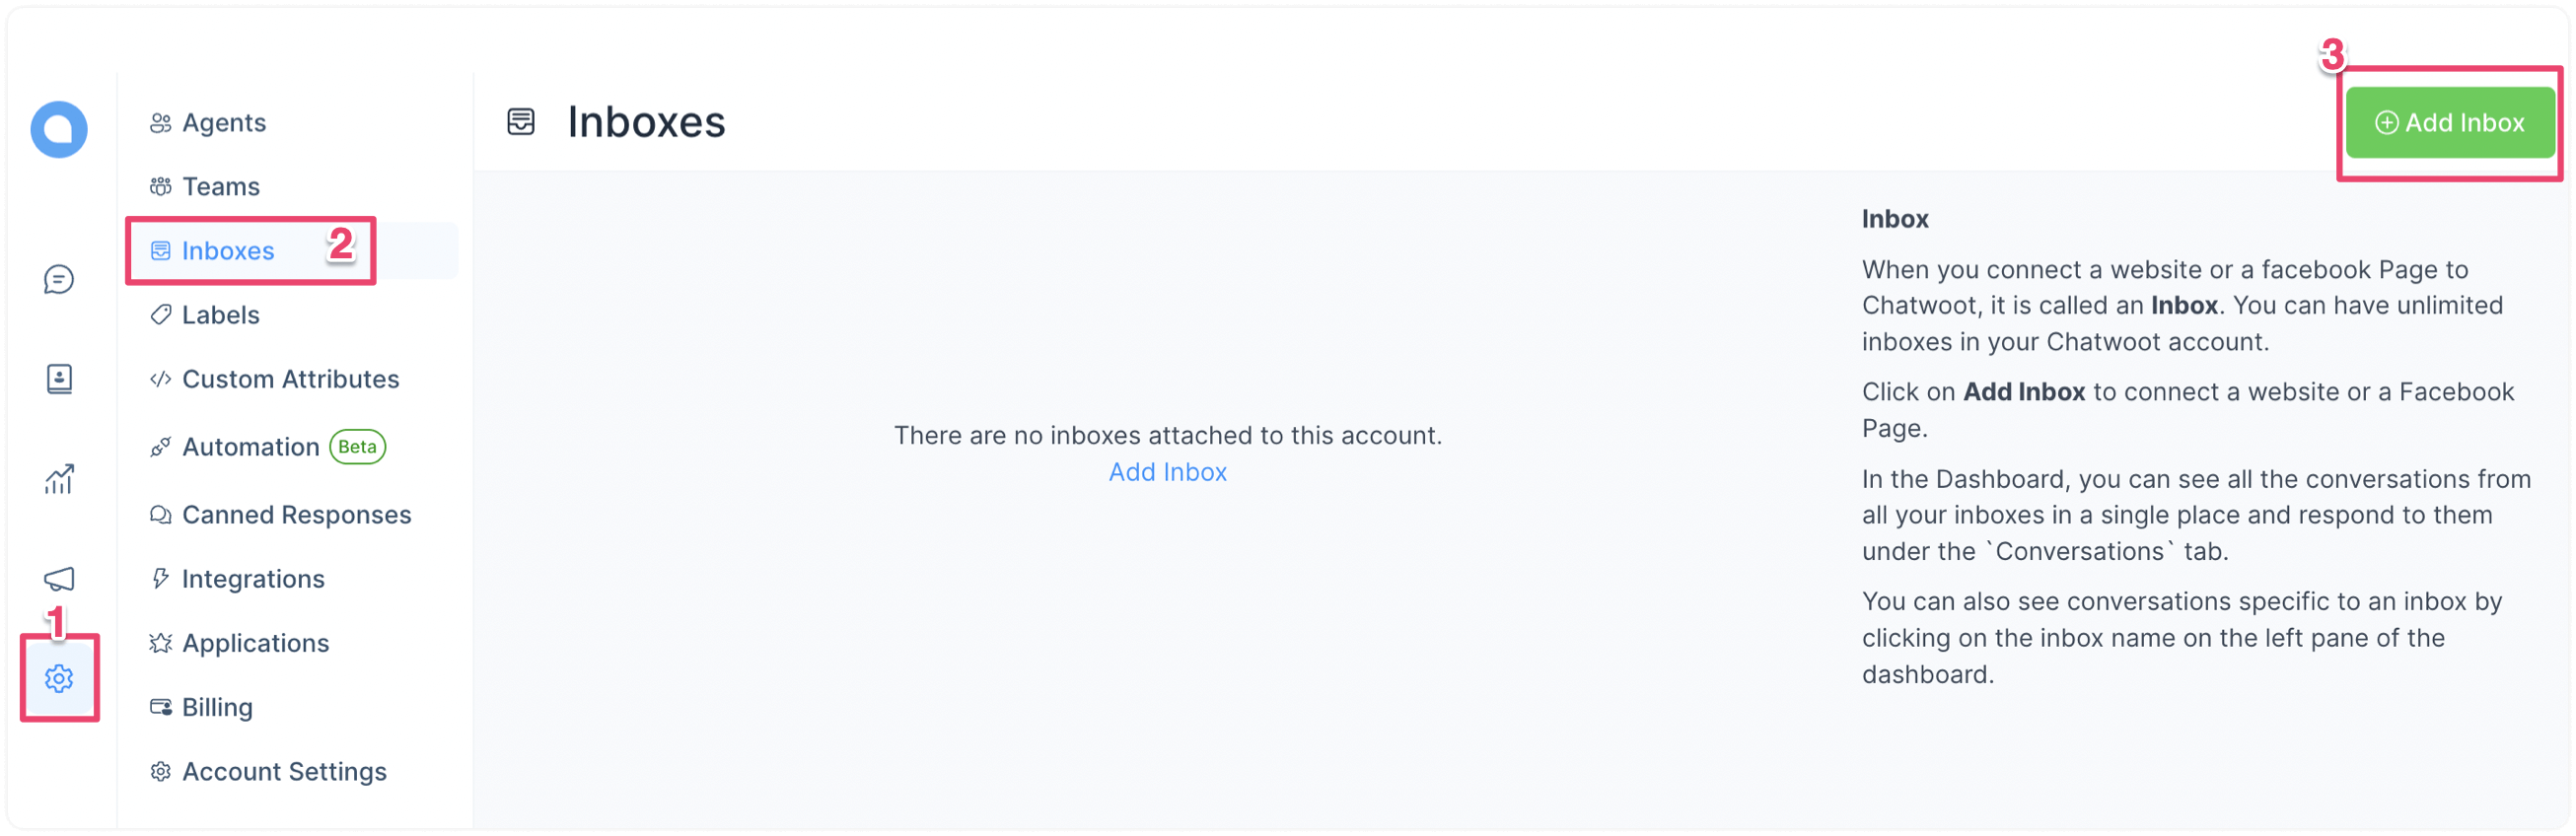
Step 1. Go to Settings → Inboxes → “Add Inbox”.
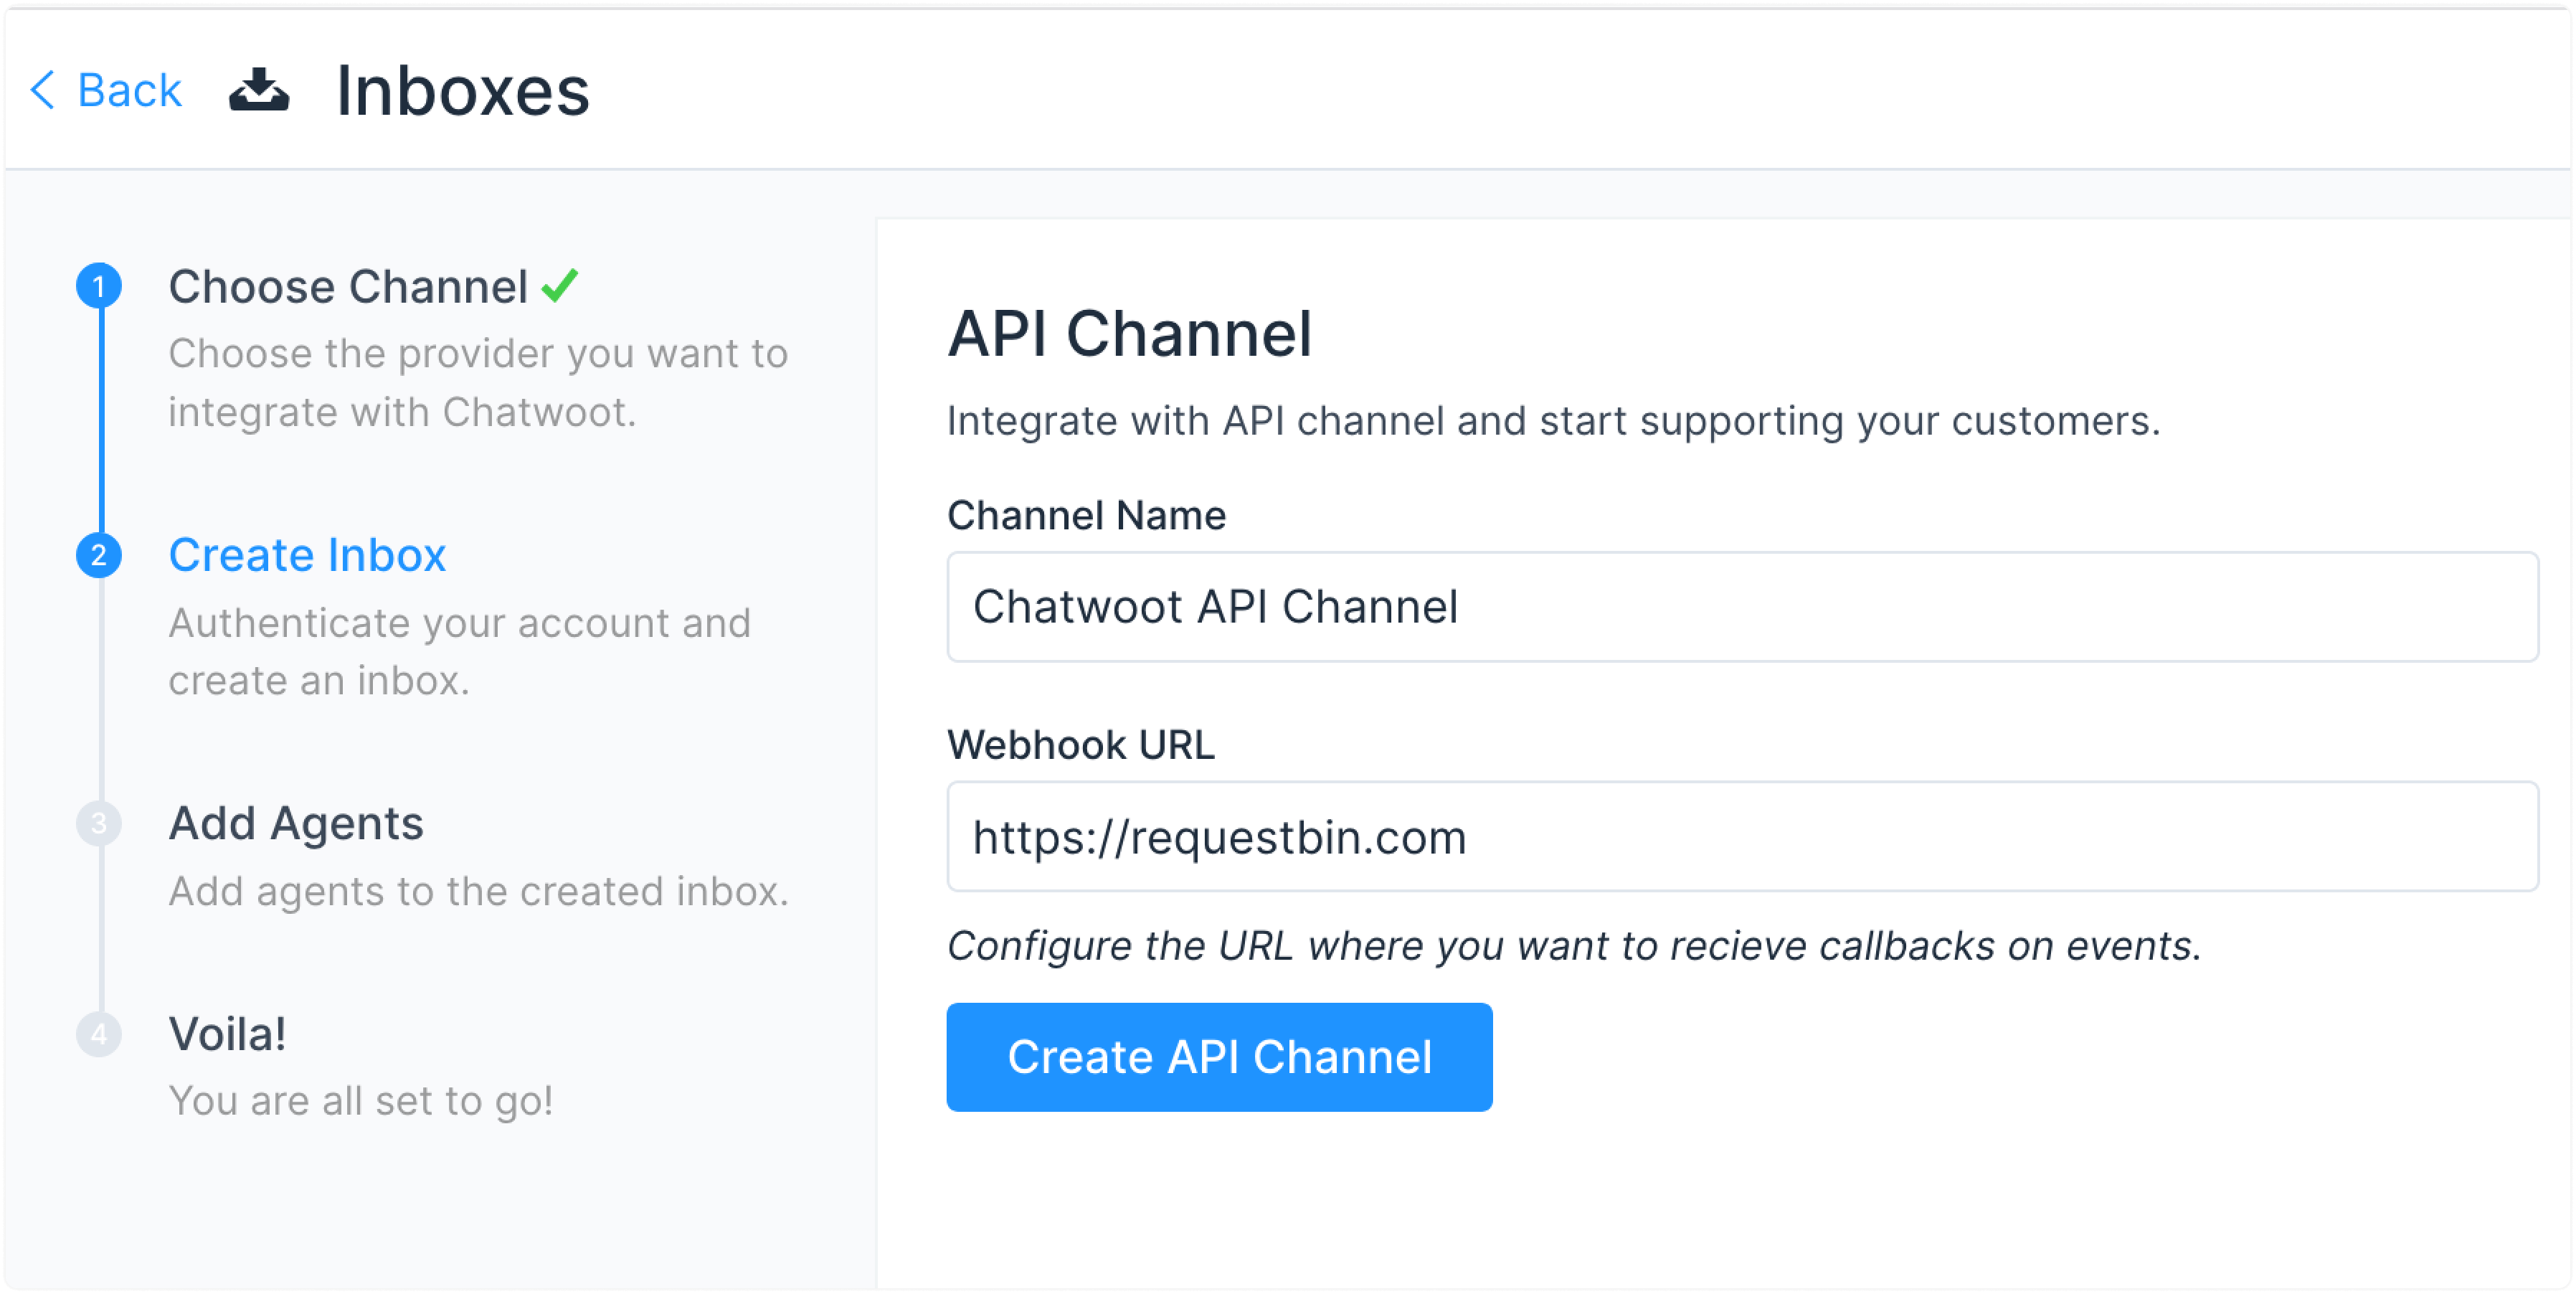
Step 2. Click on the "API" icon.

Step 3. Provide a name for the channel and a callback URL. Here is an example:
Step 4. "Add agents" to your API inbox.
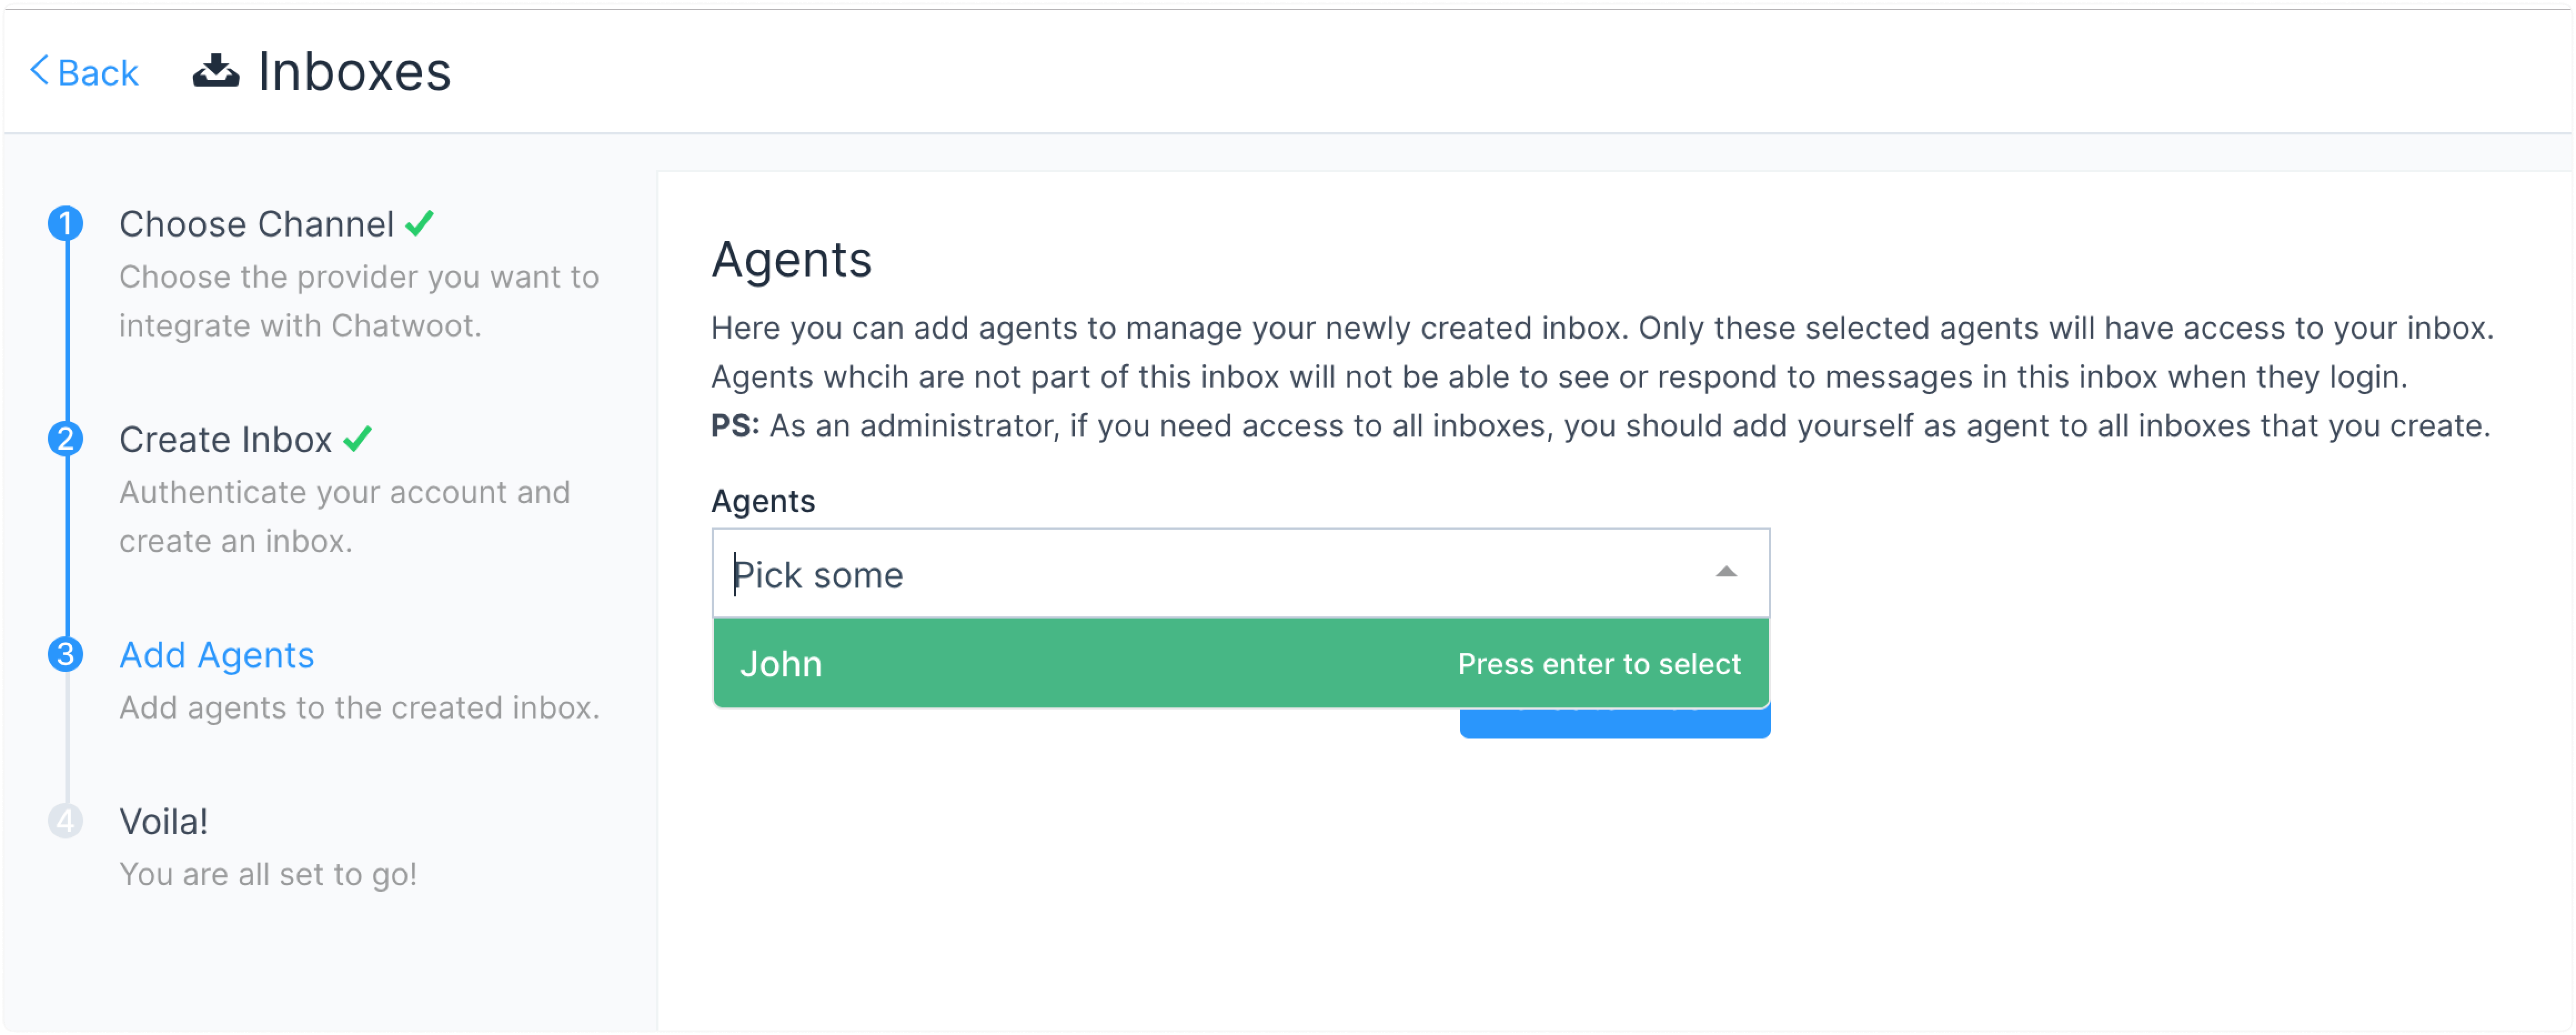
The inbox setup is complete.
Send messages to the API channel
To send messages to the API channel, ensure you understand the following models and nomenclature used in Chatwoot.
-
Channel: Channel defines the type of source of conversations. E.g., Facebook, Twitter, API, etc.
-
Inbox: You can create multiple sources of conversations of the same channel type. E.g., You can have more than one Facebook page connected to a Chatwoot account. Each page is called the inbox in Chatwoot.
-
Conversation: A Conversation is a collection of messages.
-
Contact: Each conversation has a real-life person associated with it, called a contact.
-
Contact Inboxes: This is the session for each contact in an inbox. A contact can have multiple sessions and multiple conversations in the same inbox.
How to send a message in an API Channel?
To send a message in an API channel, create a contact, initiate a conversation, and finally send the message.
APIs require api_access_token in the request header. You can get this token by visiting your Profile settings → Access Token.
1. Create a contact
Ref: API documentation
Pass the inbox ID of the API channel along with other params specified. This would create a session for you automatically. A sample response would look like the one below.
{
  "email": "string",
  "name": "string",
  "phone_number": "string",
  "thumbnail": "string",
  "additional_attributes": {},
  "contact_inboxes": [
    {
      "source_id": "string",
      "inbox": {
        "id": 0,
        "name": "string",
        "website_url": "string",
        "channel_type": "string",
        "avatar_url": "string",
        "widget_color": "string",
        "website_token": "string",
        "enable_auto_assignment": true,
        "web_widget_script": "string",
        "welcome_title": "string",
        "welcome_tagline": "string",
        "greeting_enabled": true,
        "greeting_message": "string"
      }
    }
  ],
  "id": 0,
  "availability_status": "string"
}
As you can see in the payload, you will be able to see the contact_inboxes and each contact_inbox will have a source_id. Source ID can be seen as the session identifier. You will use this source_id to create a new conversation as defined below.
2. Create a conversation
Ref: API documentation
Use the source_id received in the previous API call. You will receive a conversation ID which can be used to create a message.
{
  "id": 0
}
3. Create a new message
Ref: API documentation
There are 2 types of messages.
-
Incoming: Messages sent by the end user is classified as an incoming message.
-
Outgoing: Messages sent by the agent is classified as an outgoing message.
If you call the API with the correct content, you will receive a payload similar to this one:
{
    "id": 0,
    "content": "This is a incoming message from API Channel",
    "inbox_id": 0,
    "conversation_id": 0,
    "message_type": 0,
    "content_type": null,
    "content_attributes": {},
    "created_at": 0,
    "private": false,
    "sender": {
        "id": 0,
        "name": "Pranav",
        "type": "contact"
    }
}
If everything is successful, you will see the conversation on the dashboard as follows.
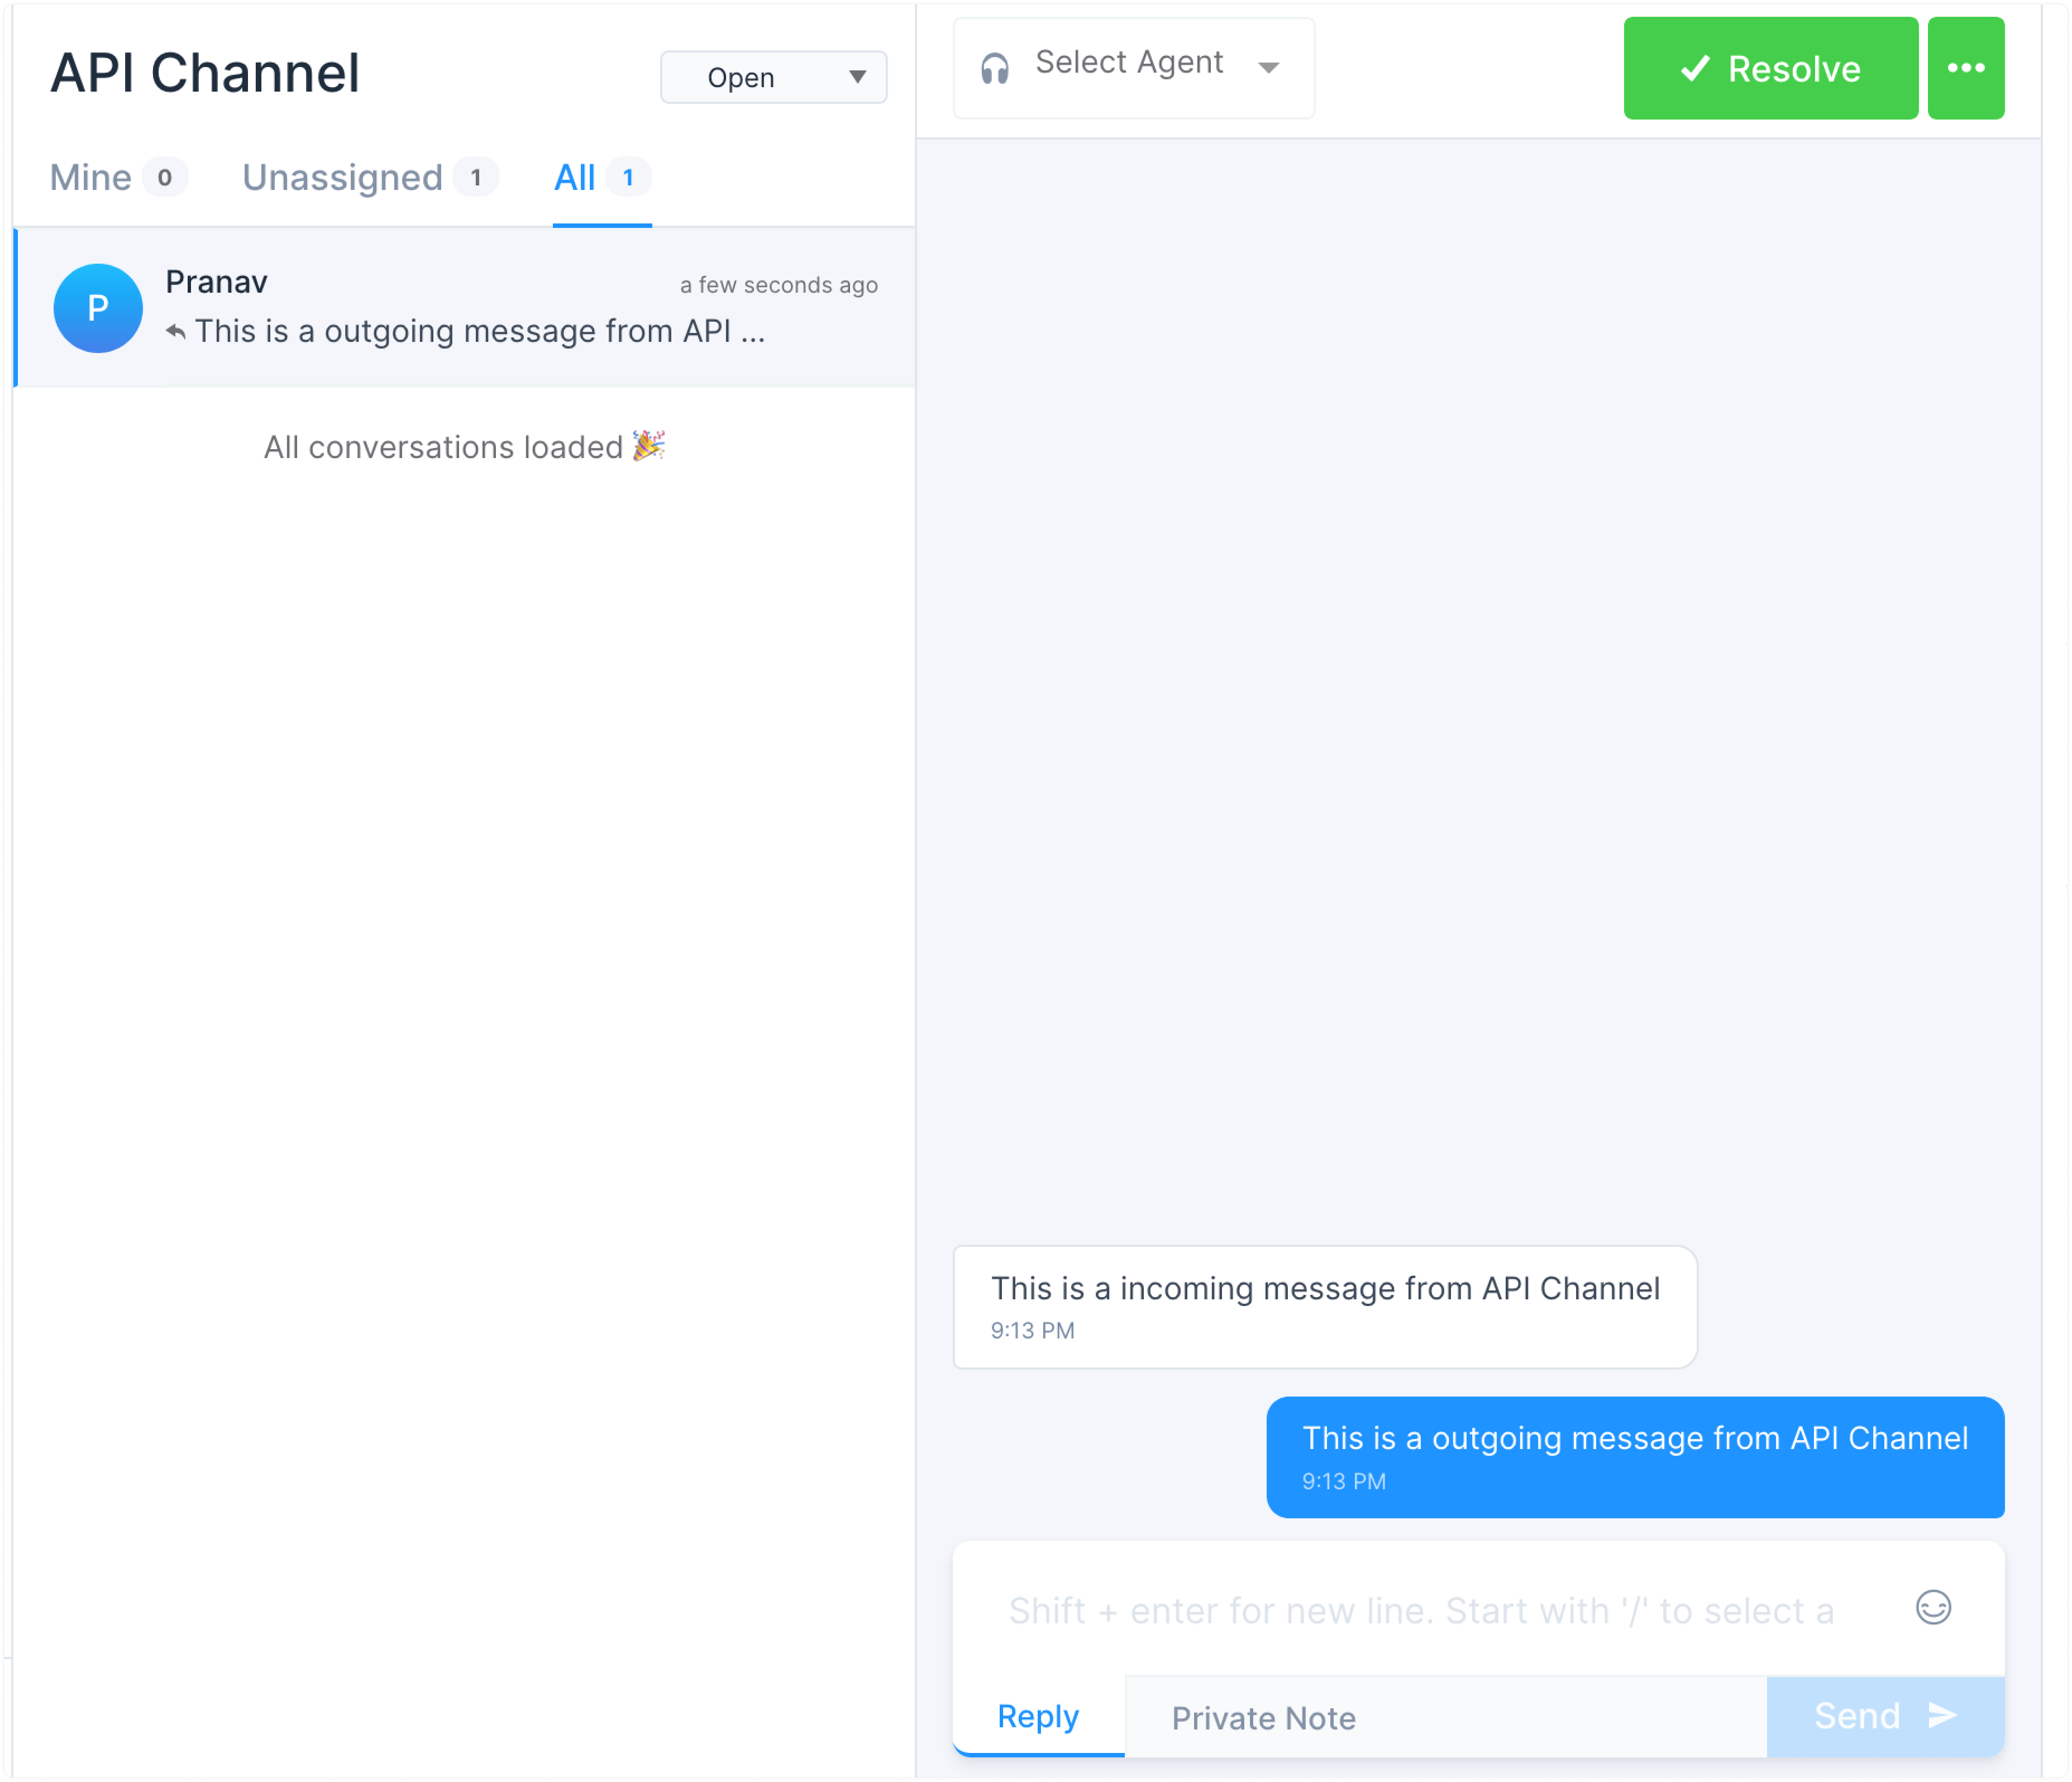
You will be notified when a new message is created on the URL specified while creating the API channel. You can read about the message payload here.
Receive messages using callback URL
When a new message is created in the API channel, you will get a POST request to the Callback URL specified while creating the API channel. The payload would look like this.
Find the full list of events supported by the webhook here.
Event type: message_created
{
  "id": 0,
  "content": "This is a incoming message from API Channel",
  "created_at": "2020-08-30T15:43:04.000Z",
  "message_type": "incoming",
  "content_type": null,
  "content_attributes": {},
  "source_id": null,
  "sender": {
    "id": 0,
    "name": "contact-name",
    "avatar": "",
    "type": "contact"
  },
  "inbox": {
    "id": 0,
    "name": "API Channel"
  },
  "conversation": {
    "additional_attributes": null,
    "channel": "Channel::Api",
    "id": 0,
    "inbox_id": 0,
    "status": "open",
    "agent_last_seen_at": 0,
    "contact_last_seen_at": 0,
    "timestamp": 0
  },
  "account": {
    "id": 1,
    "name": "API testing"
  },
  "event": "message_created"
}
Create Interfaces using client APIs
Client APIs available for the API channel will help you build customer-facing interfaces for Chatwoot.
These APIs are useful for cases like the ones listed below.
-
Use a custom chat interface instead of the Chatwoot chat widget.
-
Build conversational interfaces into your mobile apps.
-
Add Chatwoot to other platforms for which Chatwoot doesn't have an official SDK.
Creating customer objects
You can create and retrieve customer data objects using the inbox_identifier and customer_identifier.
Inbox Identifier
You can obtain the inbox_identifier from your API channel -> Settings -> Configuration.
Customer Identifier
The customer_identifier or the source_id can be obtained when creating the customer using the create API. You will need to store this identifier on your client-side to make further requests on behalf of the customer. This can be done in cookies, local storage etc.
Available APIs
The Available Client APIs are documented here. Some of the things you can do with the APIs are:
-
Create, View and Update Contact
-
Create and List Conversations
-
Create, List and Update Messages
HMAC Authentication
The Client APIs also support HMAC Authentication. The HMAC token for the Channel can be obtained via running the following on your rails console.
# replace api_inbox_id with your inbox id
Inbox.find(api_inbox_id).channel.hmac_token
Connecting to the Chatwoot WebSockets
To get real-time updates from the agent dashboard, connect to Chatwoot WebSockets using the following URL.
<your installation url>/cable
Authenticating your WebSocket connection
After subscribing using the customer's pubsub_token, you will receive events directed toward your customer object. The pubsub_token is provided during the customer creation API call.
Example
const connection = new WebSocket('ws://localhost:3000/cable');
connection.send(JSON.stringify({ command:"subscribe", identifier: "{\\"channel\\":\\"RoomChannel\\",\\"pubsub_token\\":\\""+ customer_pubsub_token+"\\"}" }));
Find the full list of events supported by WebSockets here.
Implementation
Here is an example chat interface build over the Client APIs.